DIY Spray Painted Lamps
My very first DIY project 🙂
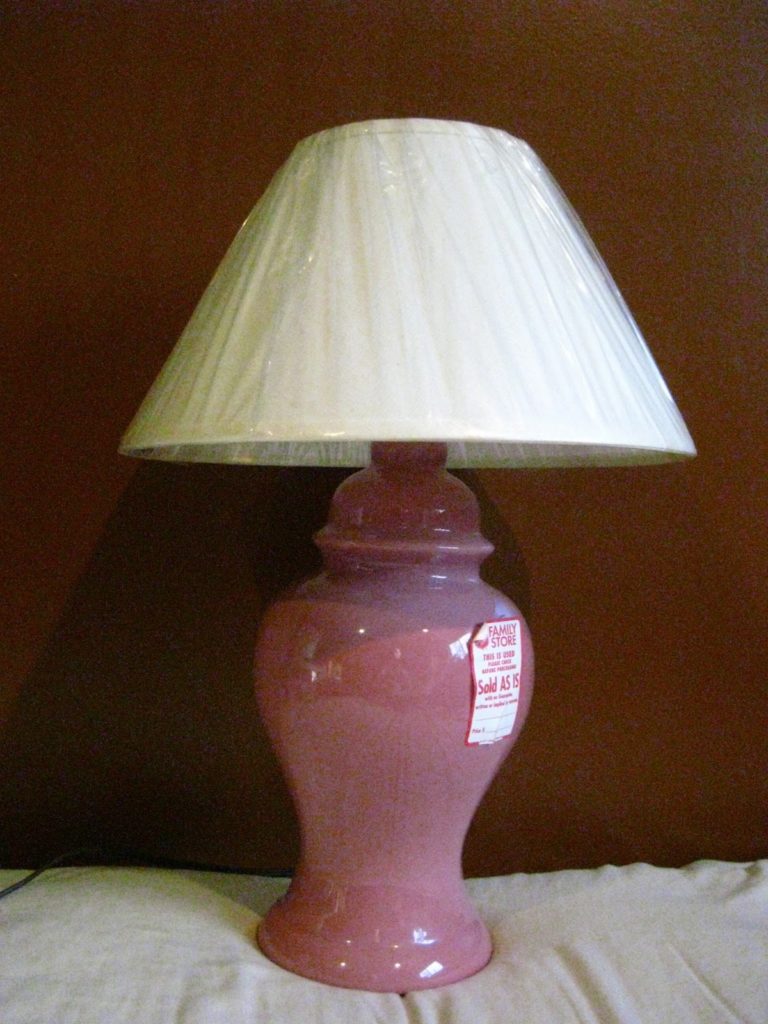
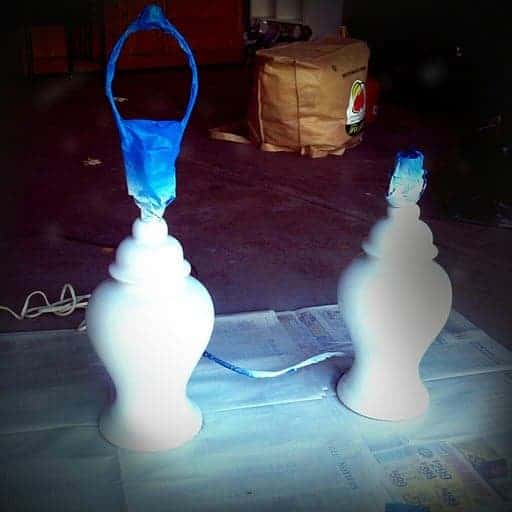
I bought these lamps before we moved into our new home from Salvation Army for a grand total of $7.
I knew that they would look perfect on each side of the bed on a nightstand. All they needed was a fresh coat of paint and new lamp shades!
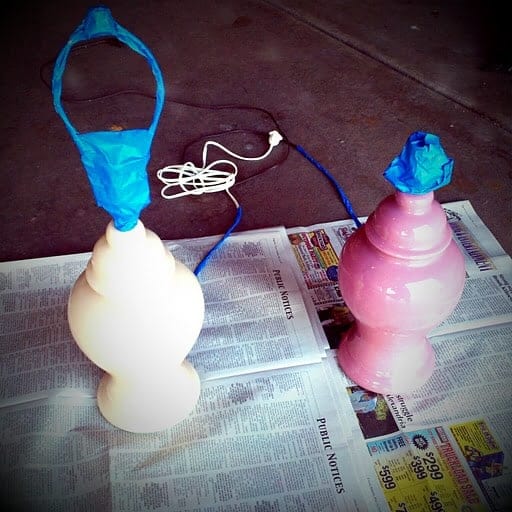
I started by taping off anything I didn’t want to get paint on with painters tape.
Then I sprayed on a coat of white primer to each lamp. The primer and spray paint cost a total of about $8.
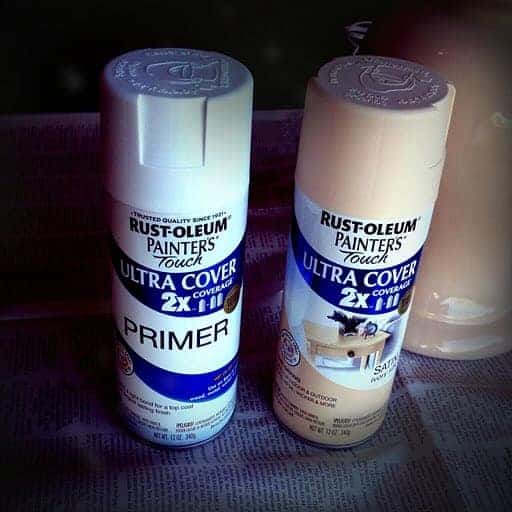
After allowing the primer to dry for about 20 minutes, I sprayed on a coat of Matte Ivory Satin paint.
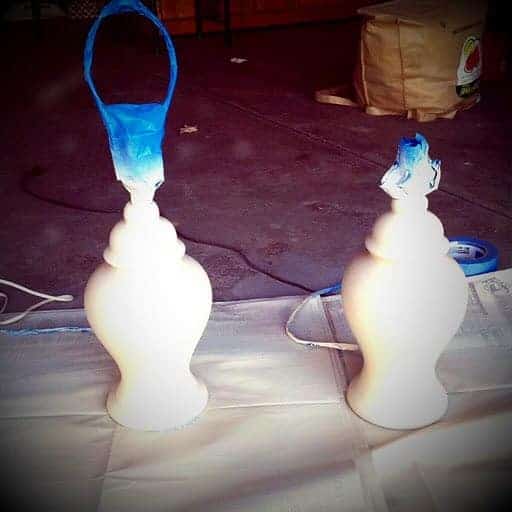
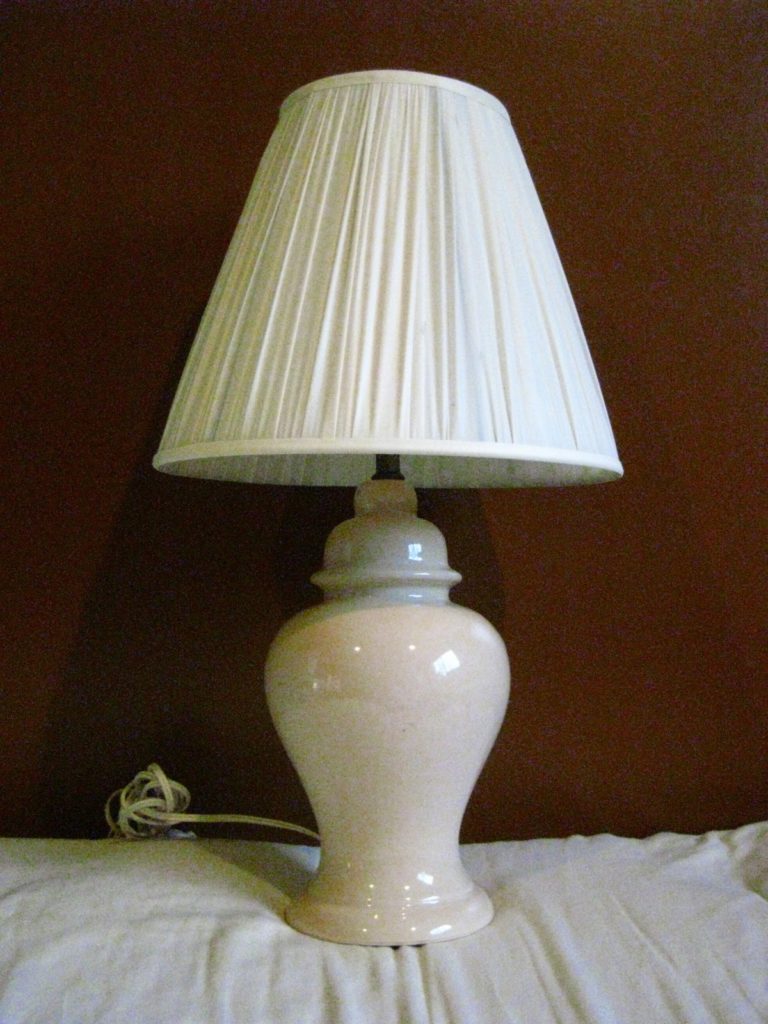
The final step was to remove the tape, attach a new shade (found at Target for about $4 a piece) and place them on their new homes-our nightstands.
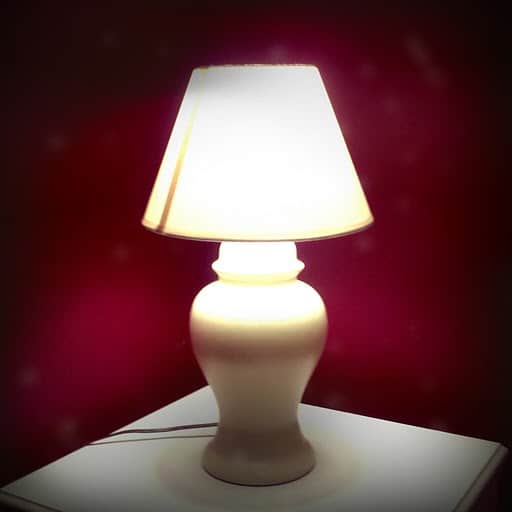
For a grand total of about $8 a piece (not counting the cost of spray paint which I’ll use on many more projects), we had brand-new (looking), matching bedside lamps!

![Weekend Wanderlust [003]](https://www.brepea.com/wp-content/uploads/2015/09/c8f3c-img_7379-1-768x1151.jpg)
I love spray paint! lamps look great.
gail
Hi there- cute lamps and what a slick makeover- spot on!
Found your cutie pie lamps via a linky party submission of yours over at ThriftyDecorChic btw. In fact, I stumbled on HER site thru another linky party. (This is addicting).
You are welcome to check out my blog if you'd like…I started just yesterday.
Not sure yet where you are from, but says “Midwest” for you. I live in NW Illinois
Smiles, Suzanne @whycuzican
Thanks 🙂 They were super easy to make!
I am totally addicted to link up parties too. Such an easy way to find project inspiration and also to get my blog out there.
I am getting ready to makeover some lamps too. I was wondering if you knew how to remove the puffy paint decoration on glass lamps? I've been searching and haven't found a great solution.
Thanks!
That is a great question… did you try sanding it off with really fine sandpaper? I sanded the ones I did above just so that the paint would adhere better.