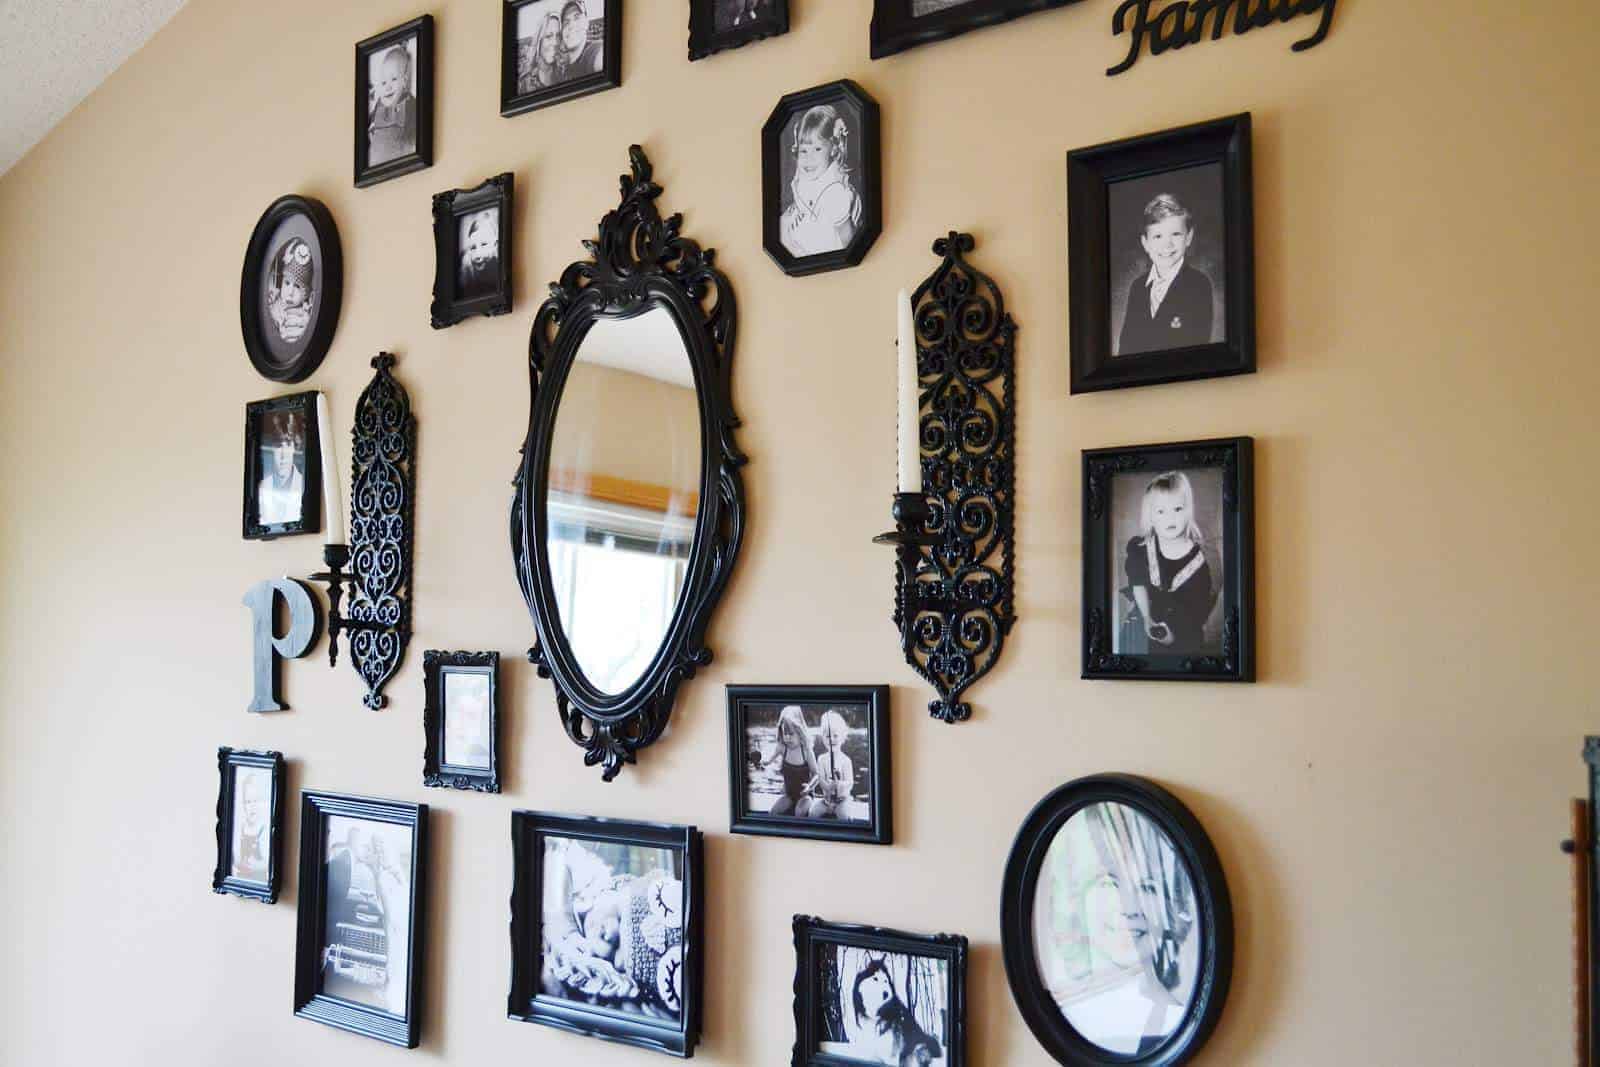
Gallery Wall in progress!
Man, it’s been awhile since I have made the time to blog! I blame my new found obsession- creating items for my Etsy shop. Anywho, you know that gallery wall project that I said I was starting soon a LONG time ago? Well, I finally got around to starting it yesterday. I knew it was going to be a big project so I kept putting it off until finally I got the bug to do it. I’m not totally done with it since I had to space out the banging of the nails to when Bean was awake, but I have just a few things left to hang (thanks to my wonderful hubby who did all of the hanging so far).
Before:
 |
| BORING |
First I took a tip from a wonderful little blog called Young House Love to create newspaper templates to map out the layout so you don’t end up with unnecessary holes everywhere. Here’s a little tip- I used newsprint, because I didn’t have many ads, and instantly regretted it after starting to hang them. If you’re not SUPER careful you’ll end up with smudges all over the walls. If I were to do it again I would use the ads.
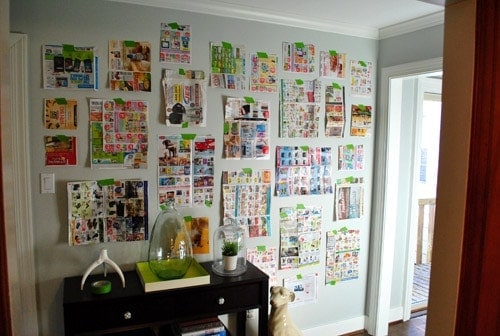 |
| Their Version |
 |
| My Version |
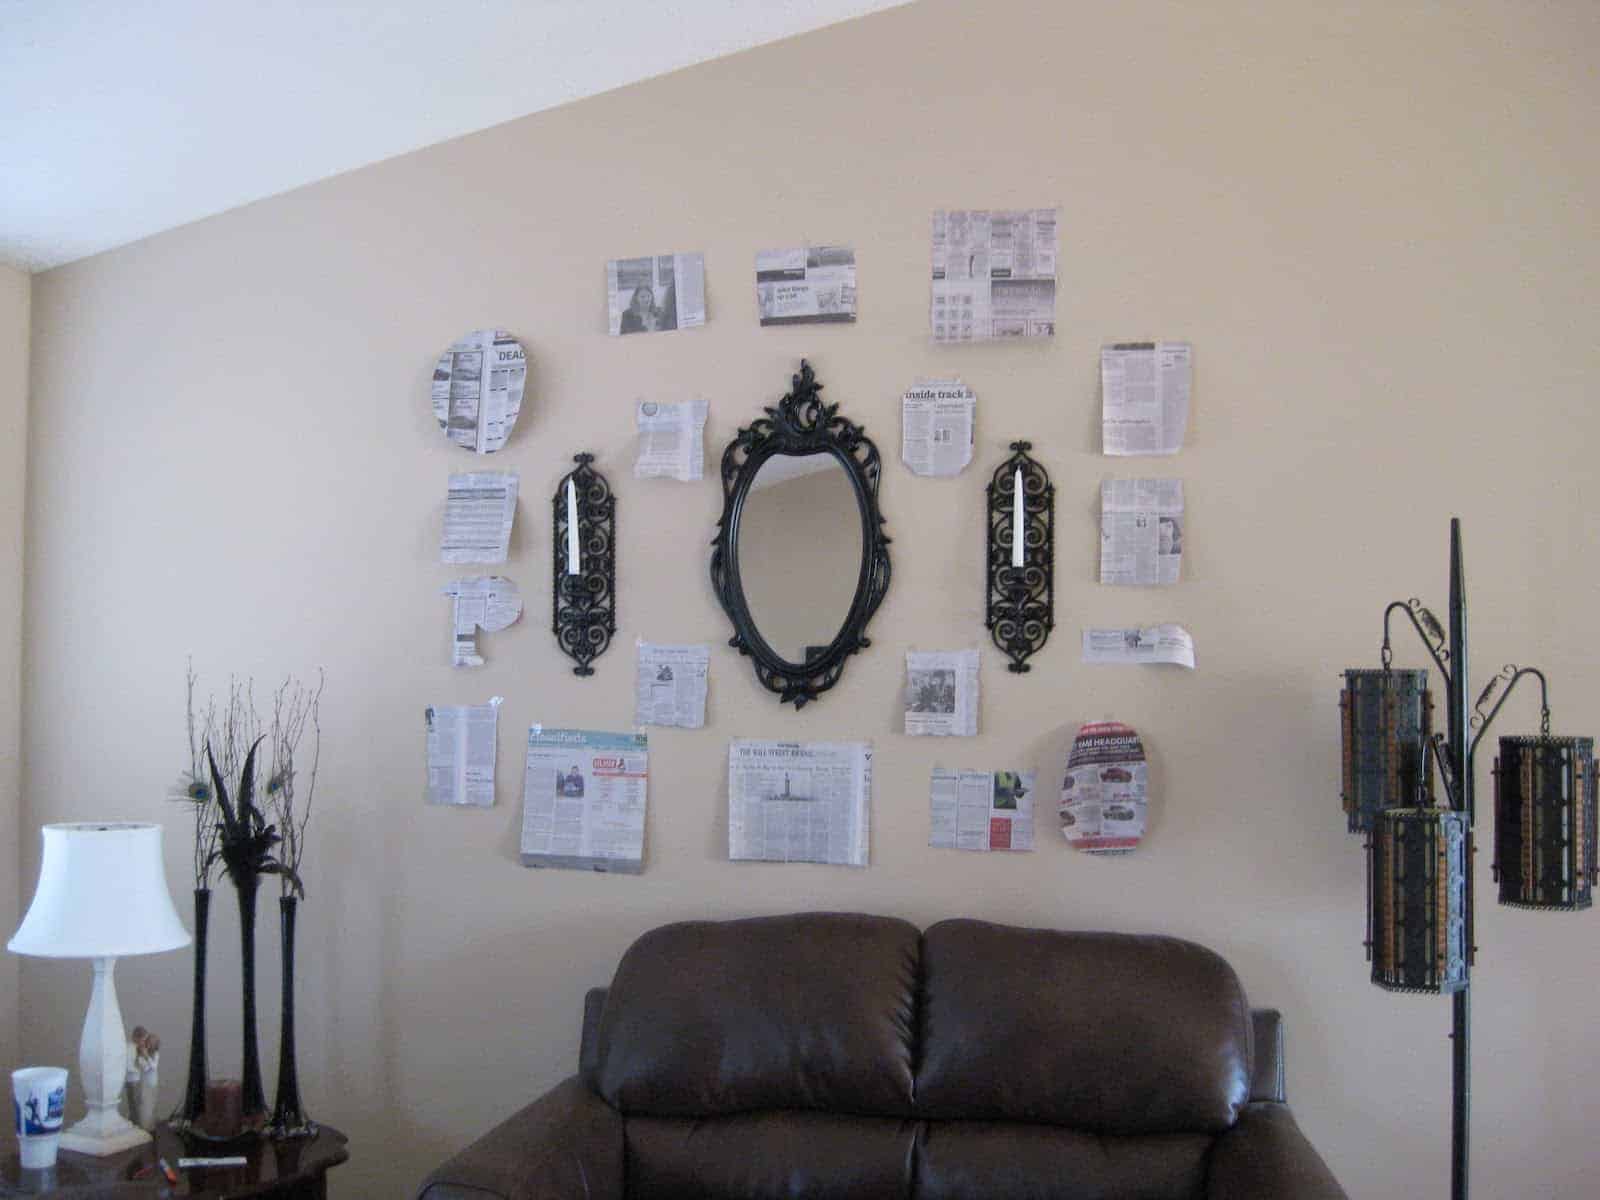
We started hanging the photos in the center and then worked our way out:
 |
| Almost there! |
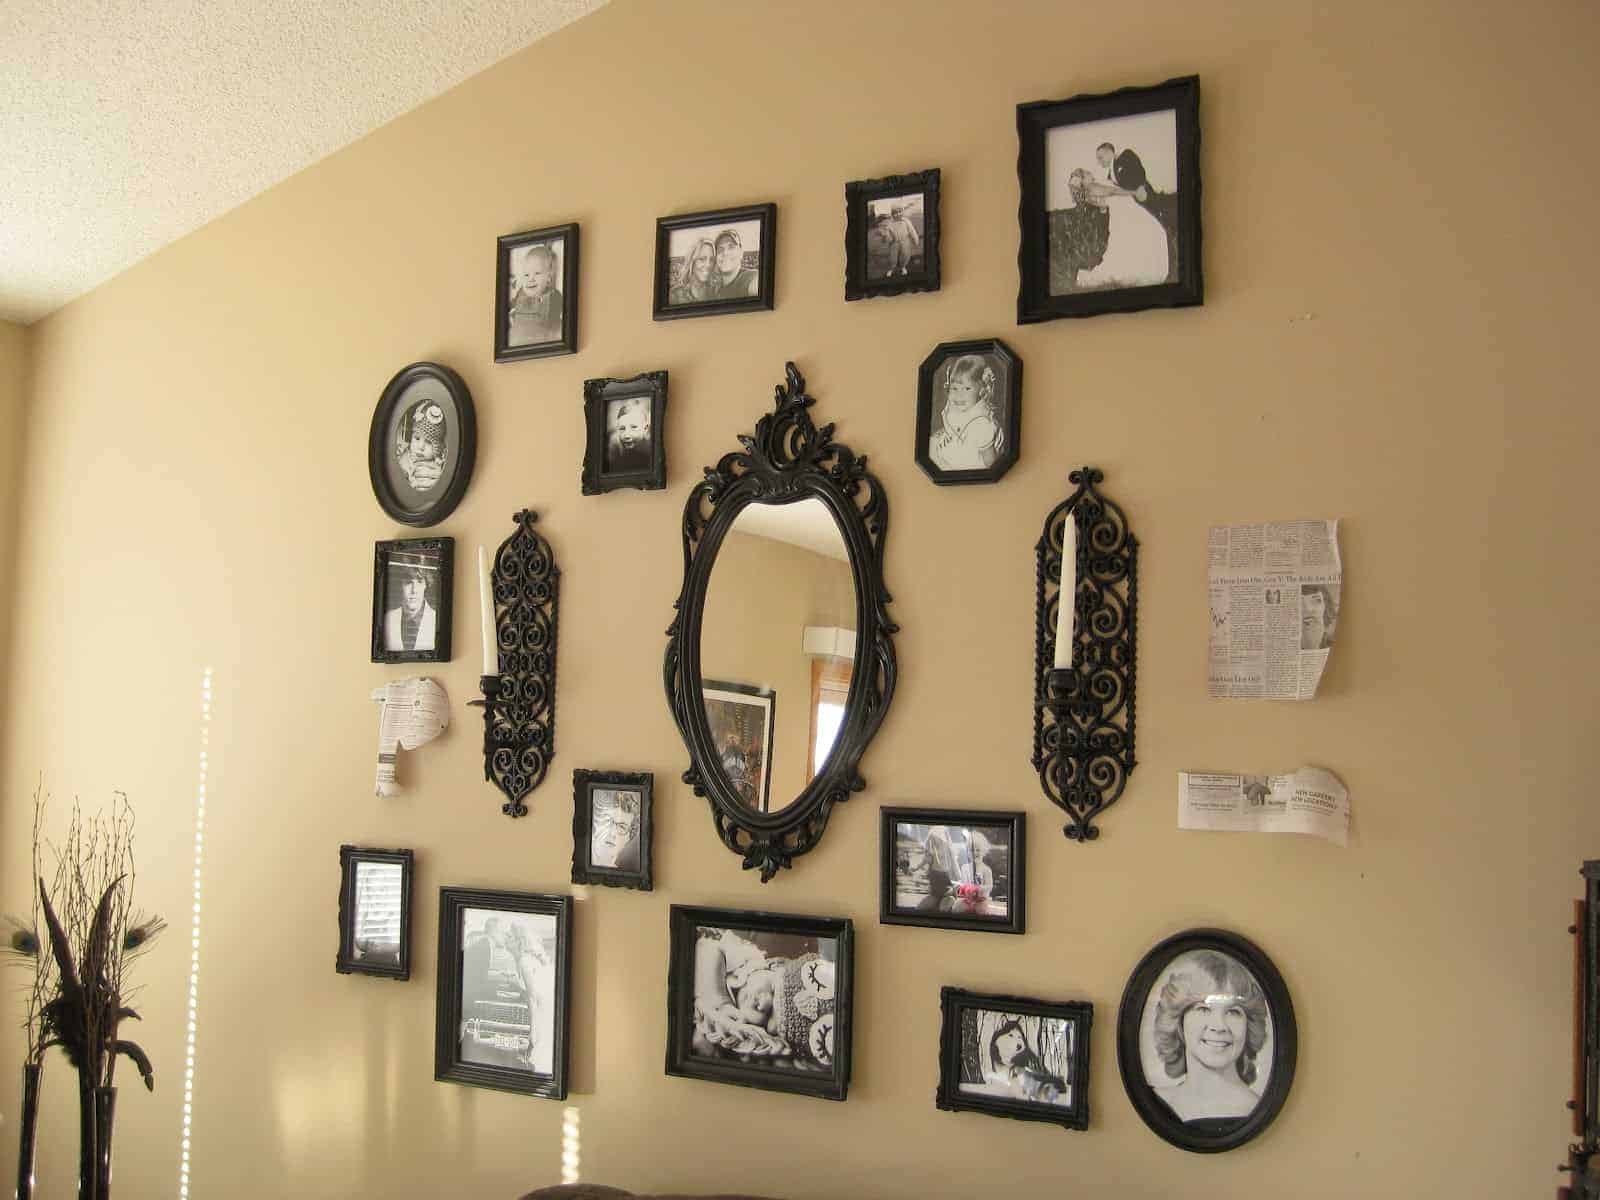
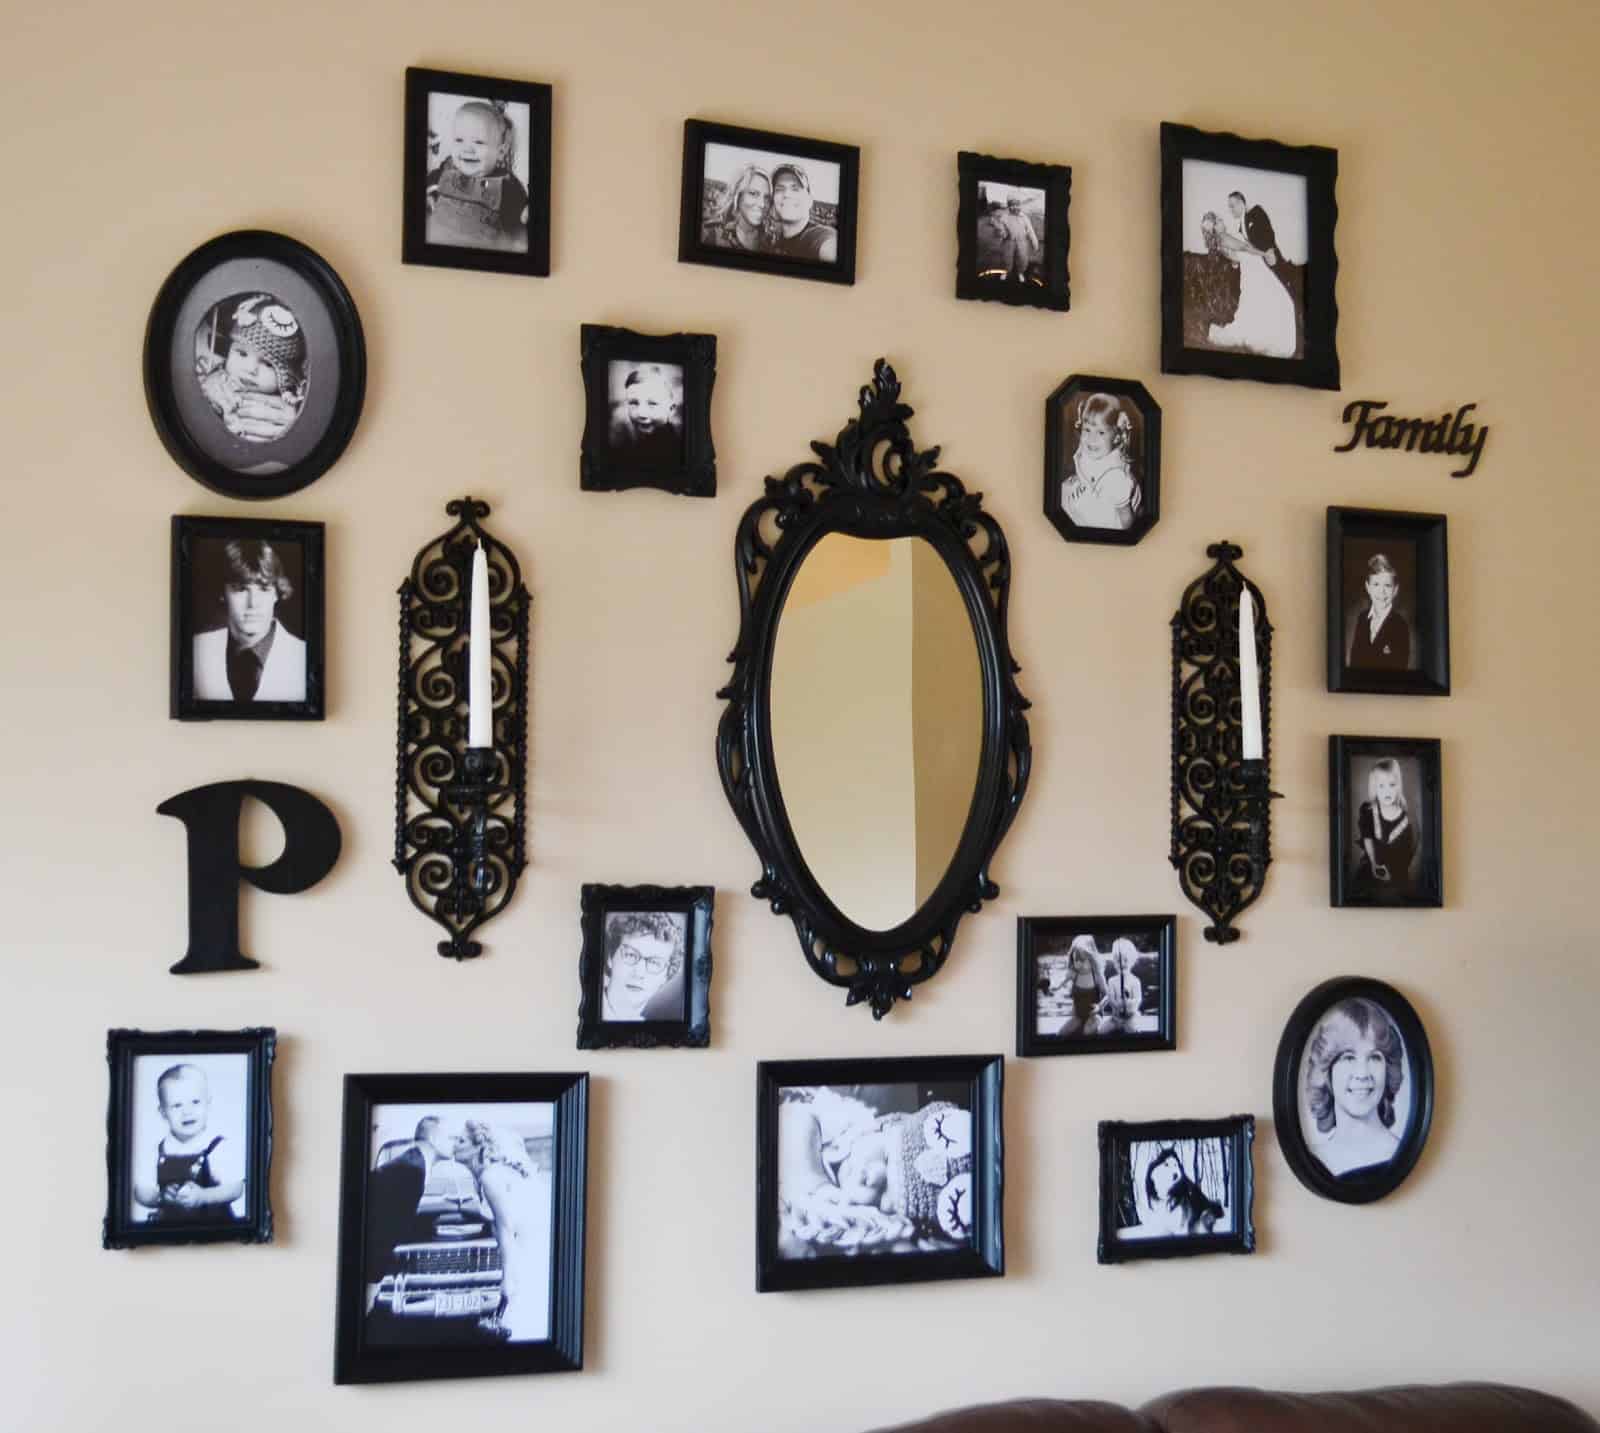
It’s weird how much the wall color changes according to what time of day it is… ANYWAYS I am SO proud of it. I worked very hard slowly collecting the frames from thrift stores over time and then spray painting them all. Not to mention gathering the photos and editing them in Photoshop to black and white (I wanted a somewhat cohesive look). And the best part of it is that there is still room to grow! Some people may think that it would look cluttered with a full wall of frames, but I love that look.
UPDATE: Finished!
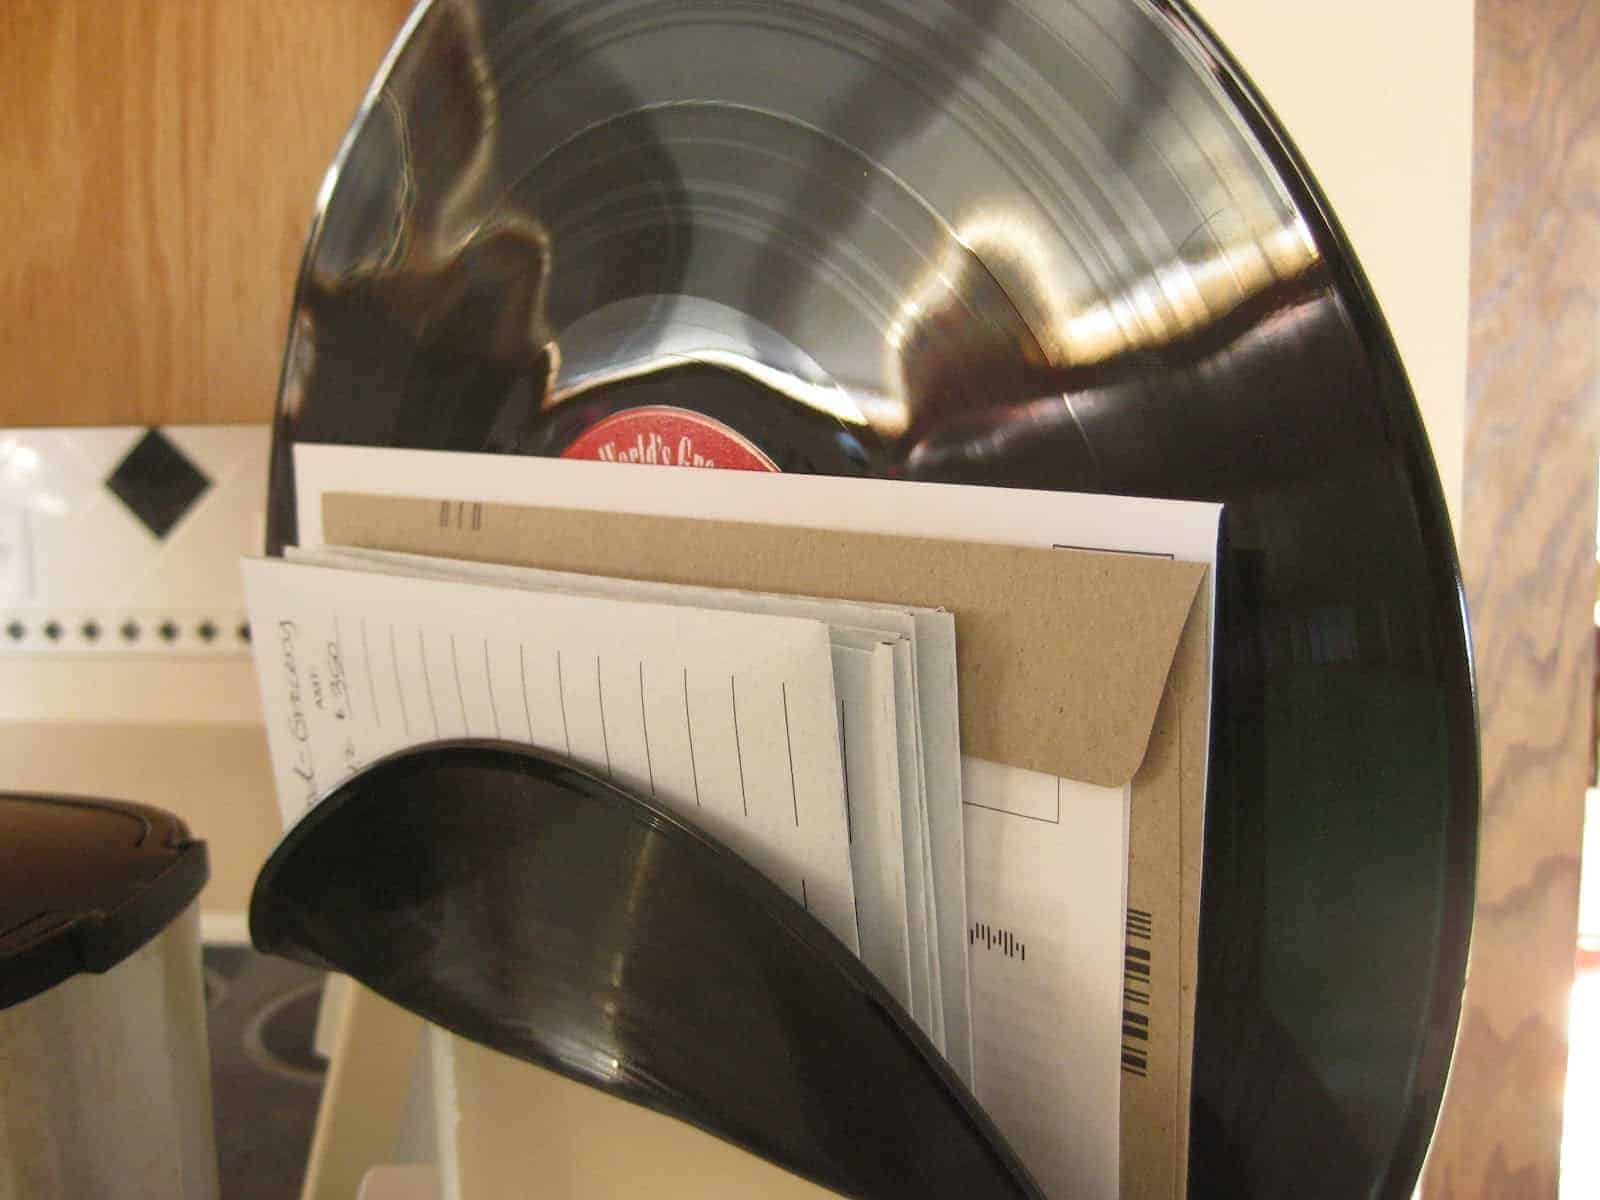
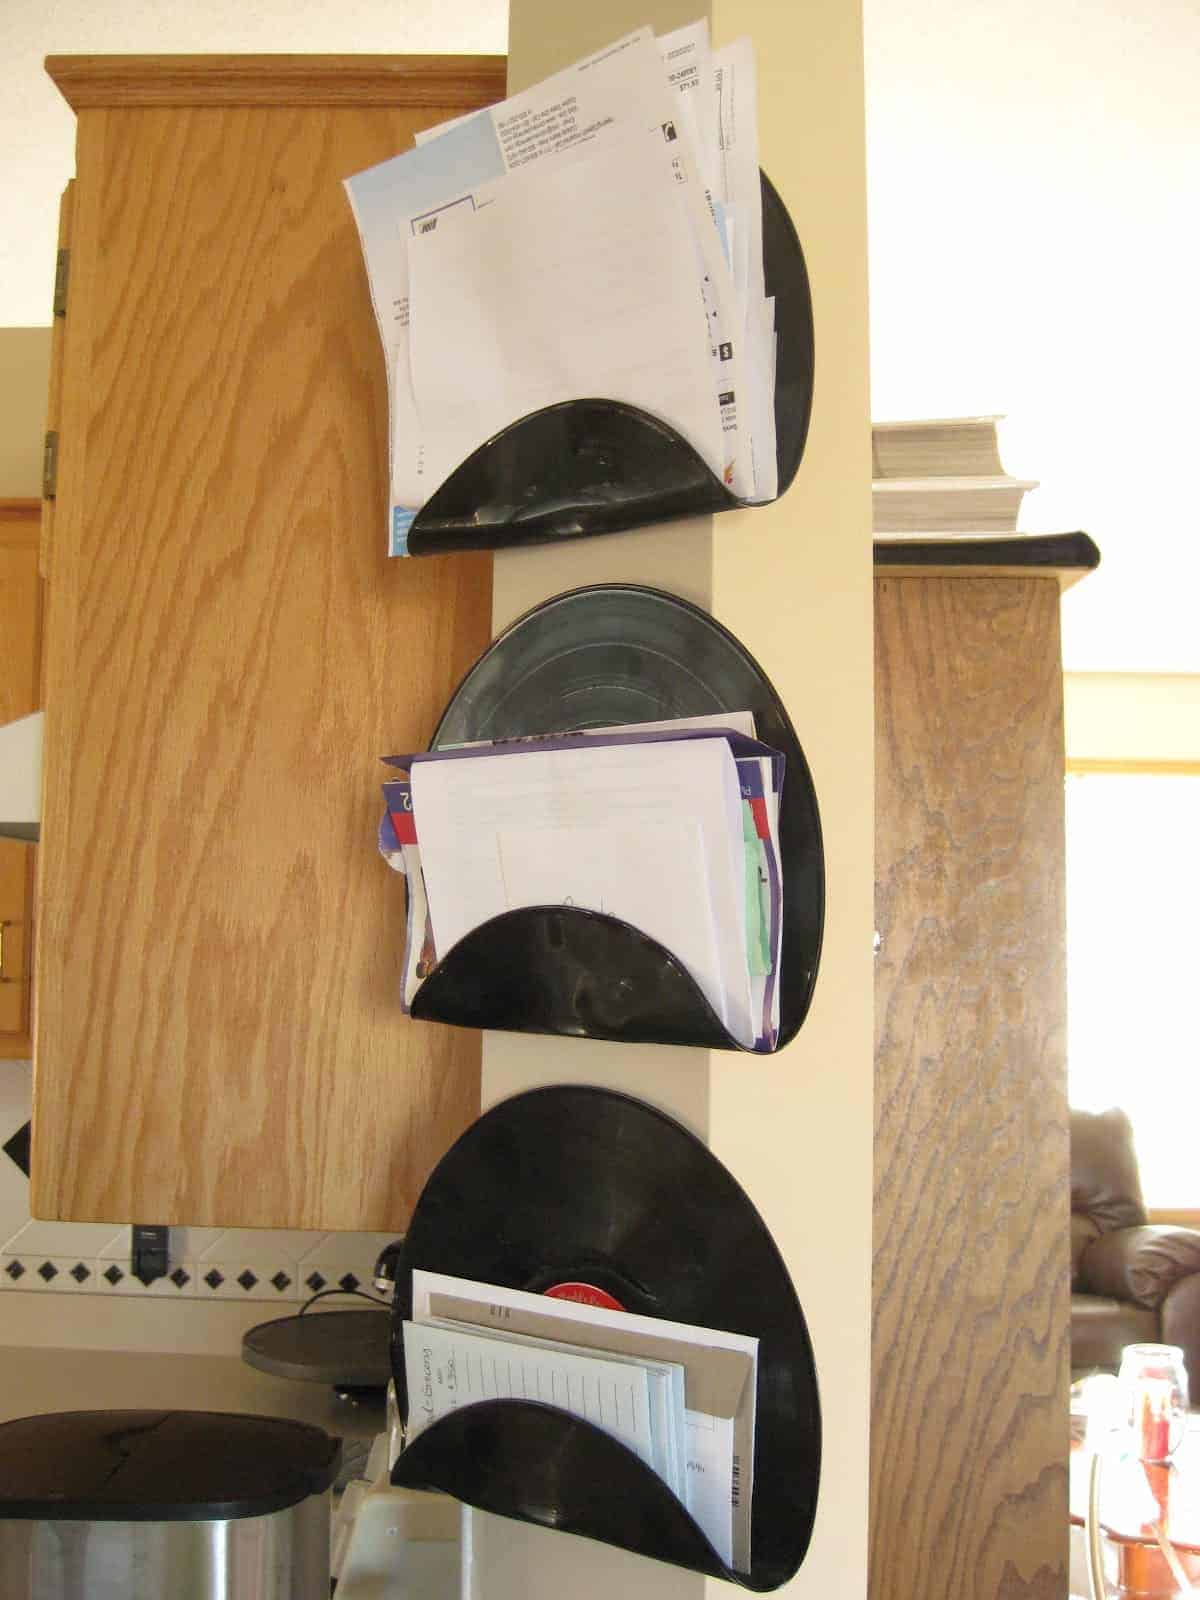
Besides getting this wonderful project done I also found time to create a nifty filing system for our mail. We never really had a dumping ground for our mail so it would just end up all over the place. We’re lucky we never lost an important bill or letter! I didn’t want to spend a whole lot (if anything) on buying one so I brainstormed what we had lying around that would work. After our “rock n roll” themed wedding we had a PLETHORA (like that use of wordage?) of vinyl records that we could never use. How perfect! While planning our wedding I had seen tutorials about how to melt them into various shapes to use for other things. So, I basically popped them into the oven at 200 degrees on top of a glass bowl, waited until they started to slump, and then pulled them out and formed them into a shape that would hold letters and mail. VOILA


I just love the vintage look you've created with your wall of frames. Gorgeous!
Just so you know, blogger isn't allowing me to post a message with my wordpress account, which is why I tried with anonymous. Seems to be an ongoing problem with Blogger 🙁
That's annoying, I've been wishing lately that I had started this blog with wordpress. Too late to go back now, though.
Wow!!! This looks so good!!! I love the layout… great job! Also those record mail holders are a genius idea! How cool is that that you had a rock n roll wedding theme!! 🙂
I have a project party every weekend if you would like to join and link up your great ideas! http://bubblynaturecreations.com/2012/03/project-party-weekend-pretty-striped-pencils-tutorial.html
I hope you will come! xoxo-Rachel
Thanks! The next time I do a project I'll have to join your party 🙂
I like the look so well I want to copy it.
Your gallery wall looks fabulous! 🙂
love melting records into fun shapes.
thanks for sharing at catch as catch can.
gail
ps I will attempt the word verification, but it only gets one chance. 😉