I love pulling out our Halloween decorations every October, but I’ll be honest: I always seem to want just a few more things.
Not an entire new house full of Halloween decorations. Just a few cute little things to fill in the empty spots and make everything feel a little more festive. You know how it goes.
I originally made a version of these DIY glitter pumpkins years ago using a couple of mini pumpkins I already had. This time, I wanted to make a more permanent version that I could pack away and bring back out every Halloween.

Enter: cheap plastic pumpkins, metallic paint and a completely reasonable amount of glitter.
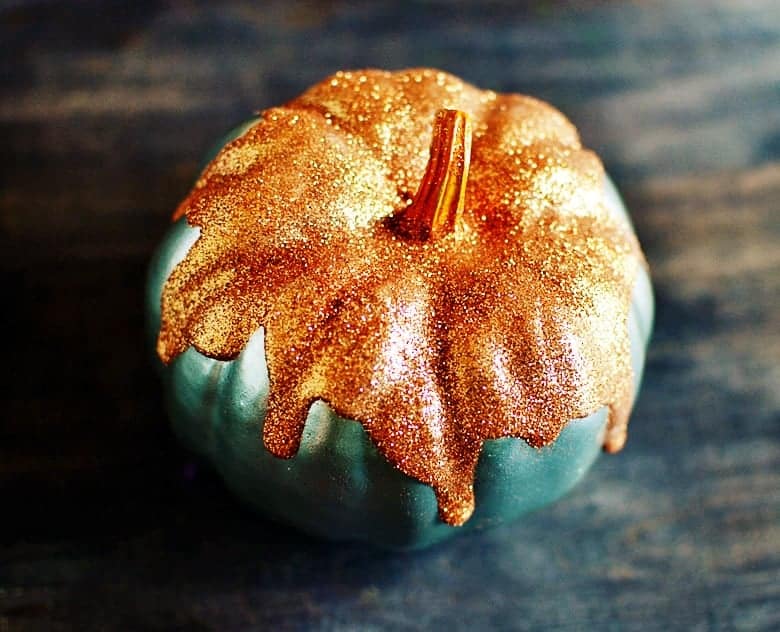
These little pumpkins look like they were dipped in sparkly frosting, which is obviously my favorite part. They’re colorful, slightly over-the-top and a little bit kitschy. In other words, exactly what Halloween decorations should be!
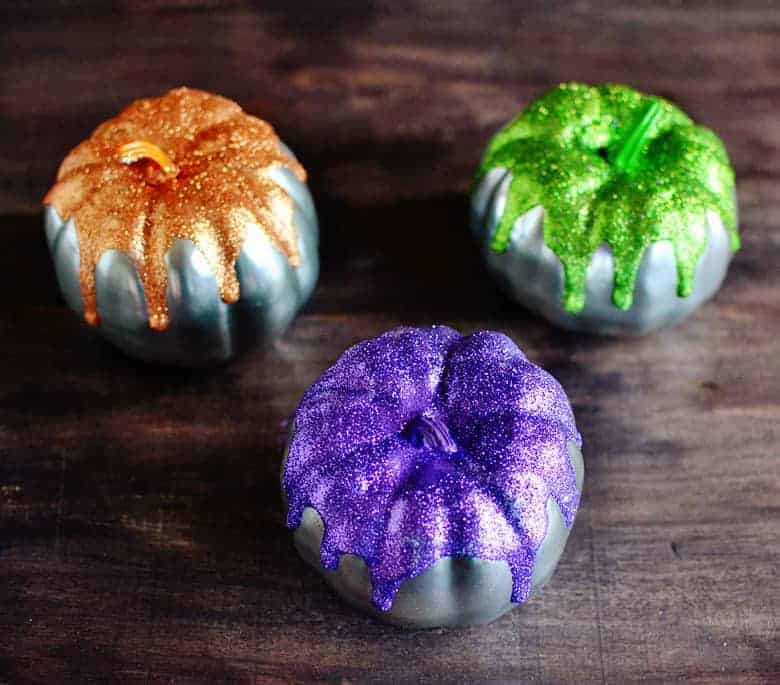
They’re also really easy to customize. You could use traditional orange and black, make them in rich jewel tones, or stick with gold, copper and bronze for a more vintage-inspired Halloween look.
The actual project is easy and only takes about 30 minutes of hands-on time, although you’ll need to let the paint and Mod Podge dry between steps. Since these are made with faux mini pumpkins, you can store them after Halloween and bring them back out year after year.
Here’s how to turn plain plastic mini pumpkins into metallic DIY glitter pumpkins!

How to Make DIY Glitter Pumpkins
Required Supplies
- Faux plastic mini pumpkins *they can’t be real pumpkins if you’re going to spray paint them like I did, or else they could explode!
- Metallic spray paint made for plastic surfaces
- Multi-surface acrylic craft paint
- Mod Podge
- Fine or chunky craft glitter
- Small foam brushes
Optional but Helpful
- Disposable gloves
- Scrap paper, a paper plate or a glitter-catching tray
- Small detail paintbrush
- Clear acrylic sealer
- Drop cloth or cardboard for spray painting
Step 1: Paint the Faux Pumpkins
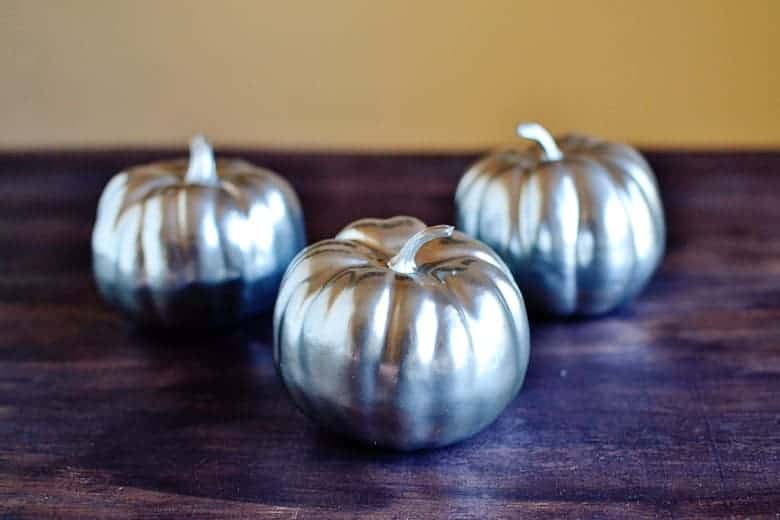
Place your plastic mini pumpkins on a protected surface in a well-ventilated area. Apply several light coats of metallic spray paint, allowing each coat to dry before adding the next.
Light coats will give you a smoother finish and help prevent the paint from dripping or pooling around the ridges of the pumpkins.
I used faux plastic pumpkins because I wanted to be able to store these and reuse them every Halloween. Before painting, check that your spray paint is compatible with the material your pumpkins are made from. Some faux pumpkins are made from foam rather than plastic, and certain spray paints can damage exposed foam. Test the paint on the bottom first if you aren’t sure.
Let the painted pumpkins dry completely before moving on.
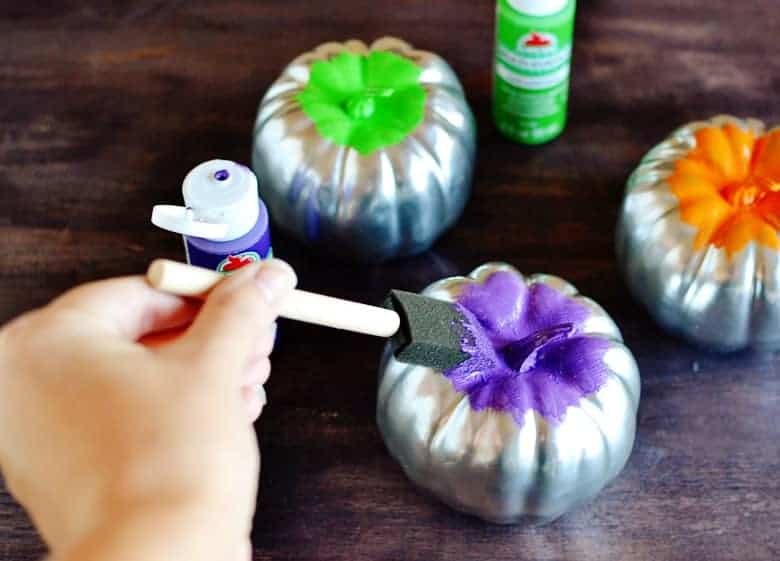
Step 2: Paint the Stems and Tops
Use a small foam brush and multi-surface acrylic paint to paint the stem and the area around the top of each pumpkin.
Brush the paint outward from the stem, following the natural ridges of the pumpkin. This painted section will show underneath the glitter, so use a color that coordinates with it.
I used matching paint and glitter to create a more solid frosted look, but you could also mix the colors. Gold paint with copper glitter or black paint with purple glitter would both be really cute.
Allow the acrylic paint to dry completely.
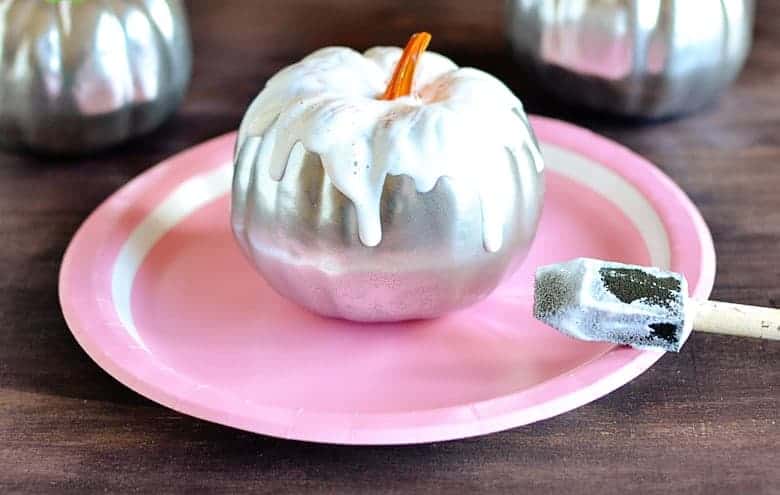
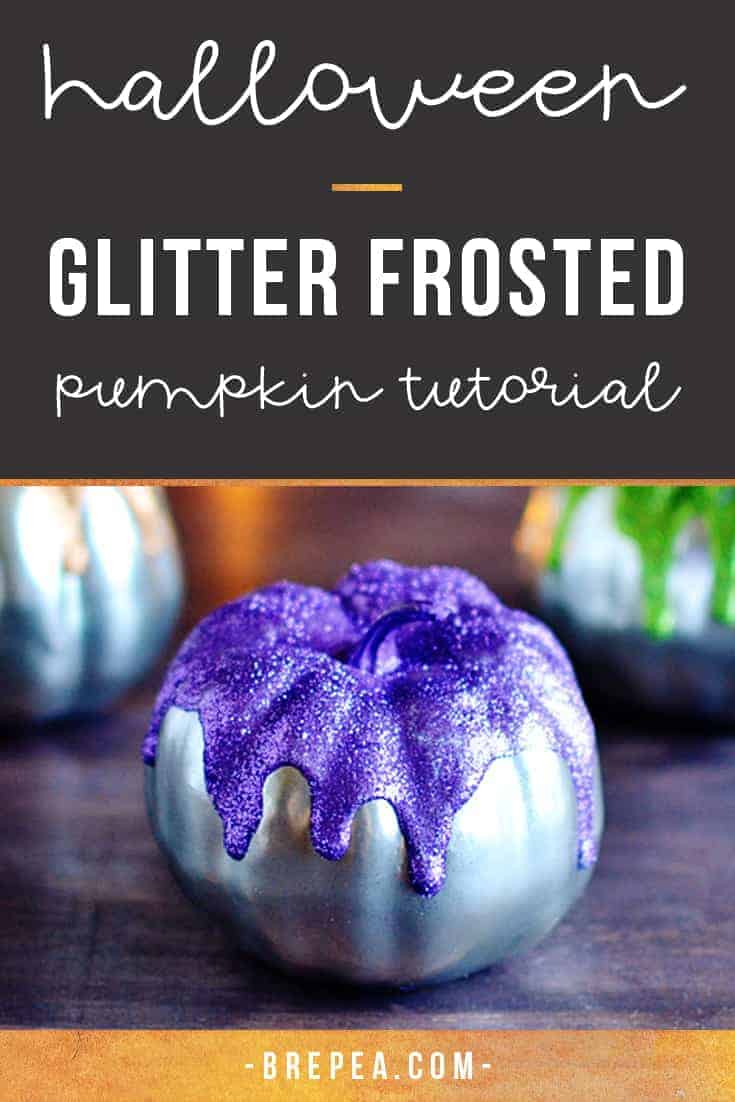
Step 3: Add the Mod Podge Drips
Use a clean foam brush to apply a generous layer of Mod Podge around the top of the pumpkin.
This is where you create the glitter frosting effect. Add enough Mod Podge that it begins to drip down several of the pumpkin’s ridges. I made some drips longer than others so the finish looked a little more natural and less perfectly even.
Don’t be stingy with the Mod Podge here. A thin coat will hold glitter, but it won’t create those thick, frosted drips that make these glitter pumpkins so cute.
Work on one pumpkin at a time so the Mod Podge is still wet when you add the glitter.
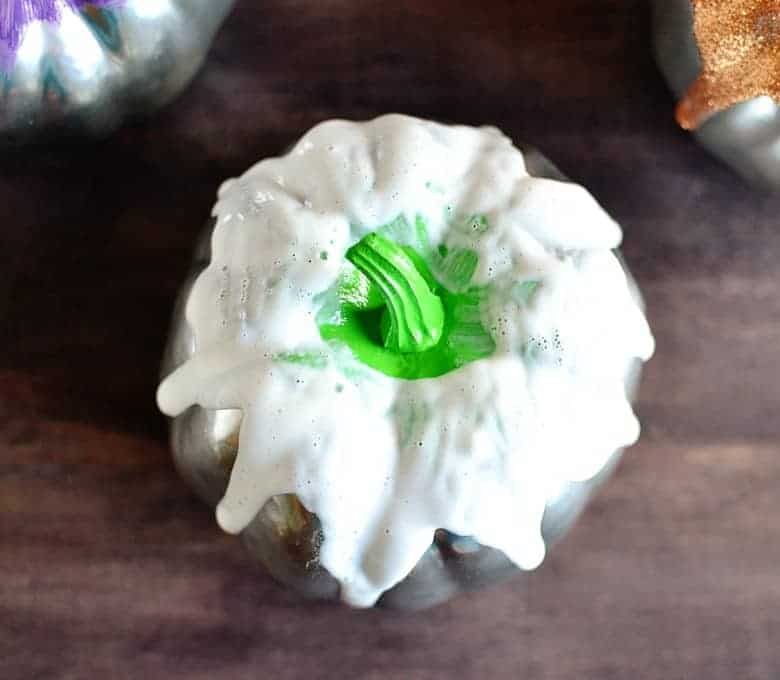
Step 4: Cover the Pumpkin with Glitter
Place the pumpkin over a tray, paper plate or folded piece of scrap paper to catch the extra glitter.
While the Mod Podge is still wet, sprinkle glitter generously over the entire coated area. Slowly turn the pumpkin as you work so you can cover the tops, sides and underside of every drip.
Fine glitter will give your pumpkins a smoother, more frosted finish. Chunky glitter will make them look more textured and dramatic. Either one works, it just depends on how much sparkle you are emotionally prepared to commit to.
Once the Mod Podge is completely covered, gently tap off the excess glitter. Pour the leftover glitter back into its container so you can use it on the next pumpkin.
Step 5: Let the Glitter Pumpkins Dry
Set the finished pumpkins somewhere they won’t be bumped, moved or investigated by curious children and pets.
Let them dry overnight before handling them. The surface may look dry sooner, but the thicker Mod Podge drips need extra time to dry all the way through.
Once they are completely dry, your metallic glitter pumpkins are ready to display.
Group several together in a bowl, add them to a Halloween mantel or style them with old books, brass candlesticks and amber glass for a more collected, vintage-inspired Halloween display.
This DIY Metallic Glitter Frosted Pumpkin Tutorial is brought to you by Plaid Crafts and Blueprint Social. All opinions are my own. This post may contain affiliate links.
So pretty and simple! I absolutely love the pumpkin with the orange glitter on top… so perfect 🙂
Such a great DIY and easy to make. Getting into Fal this year will be a pice of pumpkin pie!
D, xo || from https://livedreamcreate-d.com
I love pumpkins! I get so excited the beginning of September because then it begins. These are cute, I’ll have to grab a couple pumpkins for our Halloween parties.
I’m also a fan of going all out for each holiday!! Love these pumpkins. Definitely considering trying this method!
I love these! They would be such a fun project for my daughter and I to do this Halloween! I think the silver makes them so unique and fun 🙂
This is great! I can’t wait to try them with my daughter.
OMG these are super cute!!! Let’s face it anything glitter is right up my alley!!! Also thanks for the warning on not using fresh pumpkins!!!
I love the pumpkins.LOL! they are adorable.