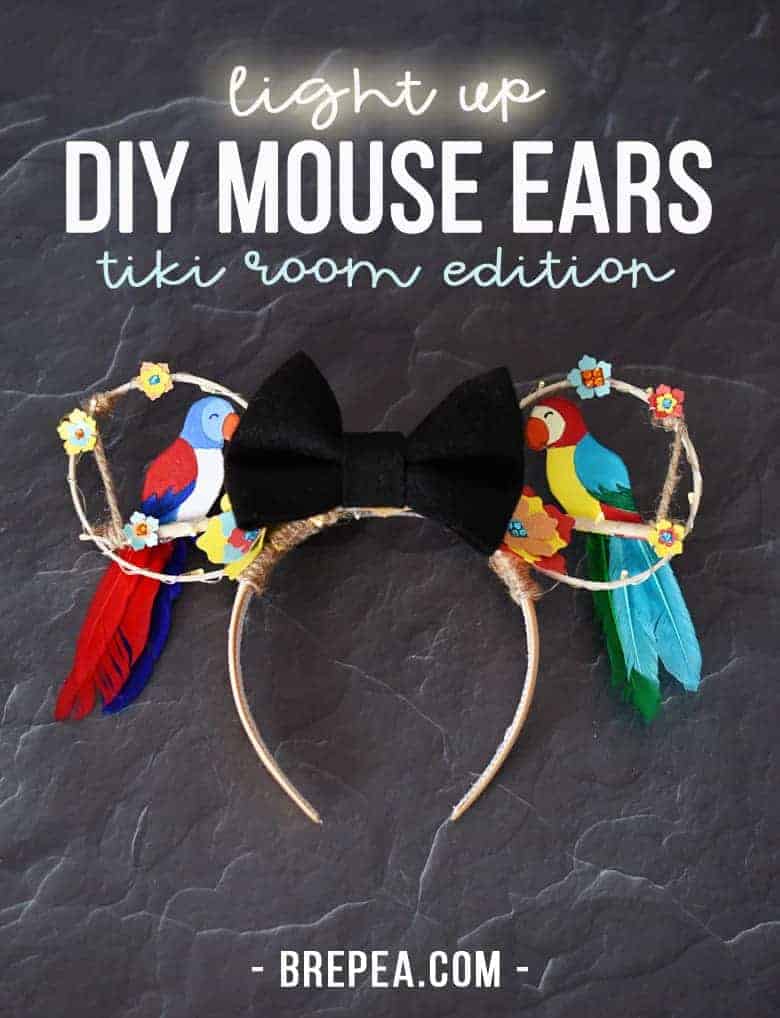
Looking to save some money by making your own DIY mouse ears for your next Disney trip? These no sew Tiki Room Minnie Mouse ears are a showstopper!
You can’t go to Disney World without a pair of Mickey Mouse (or Minnie Mouse) ears.
The problem is, most Disney mouse ears are SUPER EXPENSIVE. And don’t even get me started on the prices if you wait to buy them in the parks.
Rather than blow a portion of our vacation spending money on a dang set of ears, I decided to DIY. DIY is always the answer 😉
Today I’m sharing with you how I made these GORGEOUS light up DIY mouse ears. They’re an homage to one of my favorite classic Magic Kingdom attractions: The Tiki Room!
How do you make homemade mouse ears?
Gather your supplies…
- 1″ Wide Headband
- 1/8″ Thin Round Wood Dowel
- 1/8″ x 1/4″ Flat Balsa Wood Strip
- 1/4″ Thick Foam Sheet
- DecoArt Americana Premium Acrylic Paint (I was given these by DecoArt to try out, and they are awesome!)
- Feathers
- Twine
- Felt Bow
- Paper Flowers (or, you can make your own like I did!)
- Battery-Operated Fairy Lights
- Glue Gun + Lots of Glue Sticks

DIY Mouse Ears Tutorial: Tiki Room Edition
Step One: form and secure the mouse ears
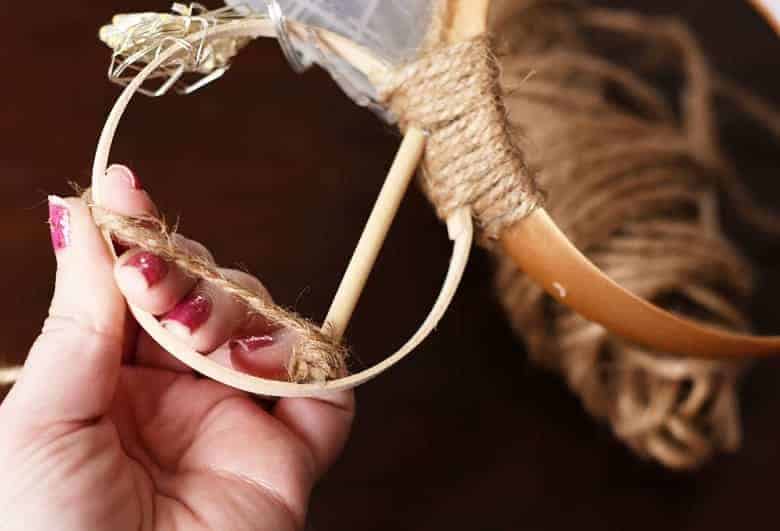
Cut your balsa wood strip in half and run under hot water. This will make it flexible without breaking.
Form your balsa wood strips for ears around a circular object. Bean’s lunch thermos was the PERFECT size (approx. 5″ wide).
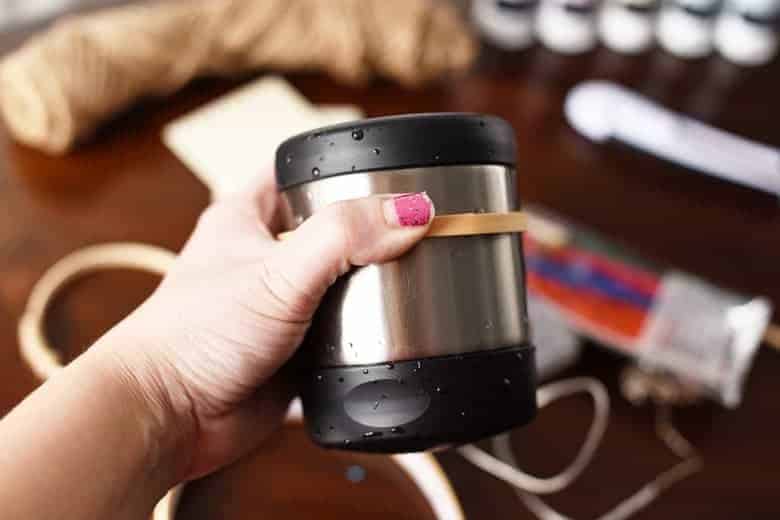
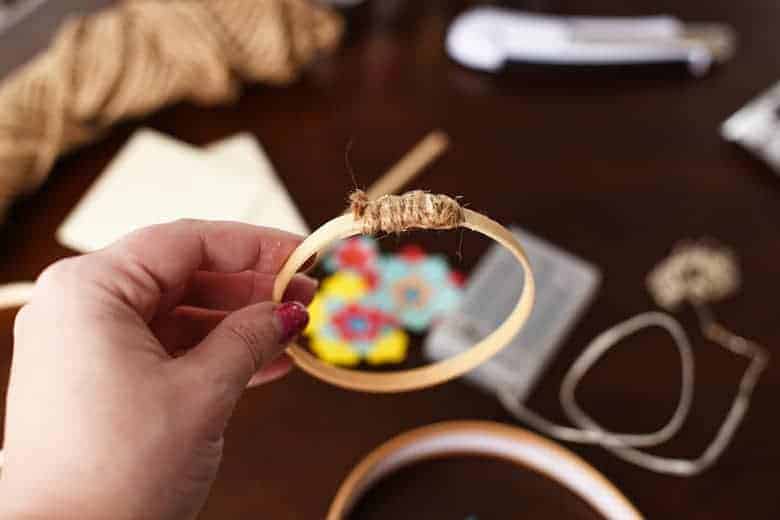
Slide the wood off your form and glue the ends together with plenty of hot glue.
Wind a strip of twine around the joint to secure even more. Attach the ends of the twine with hot glue.
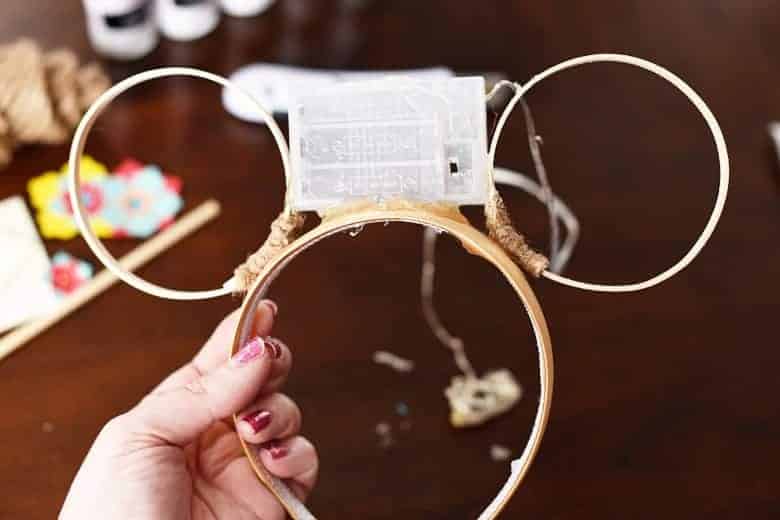
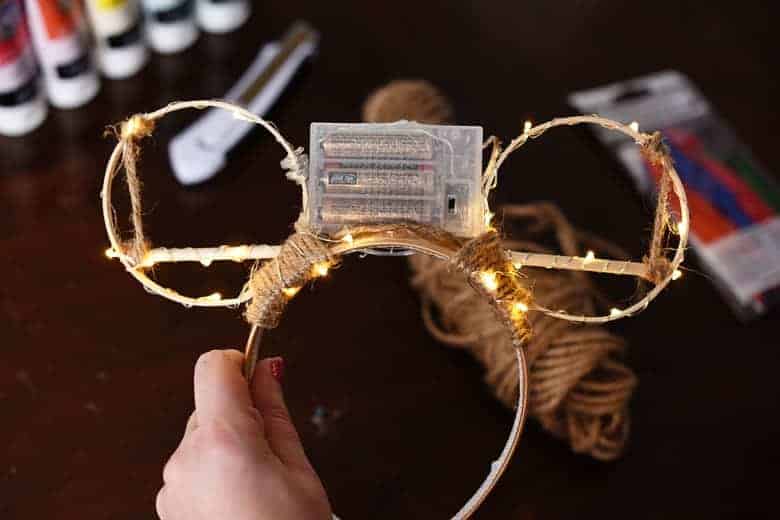
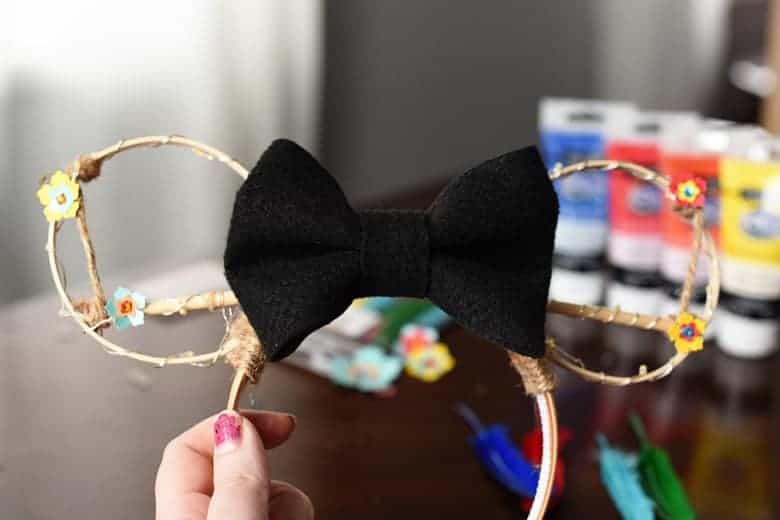
Step Two: Attach the mouse ears and battery pack
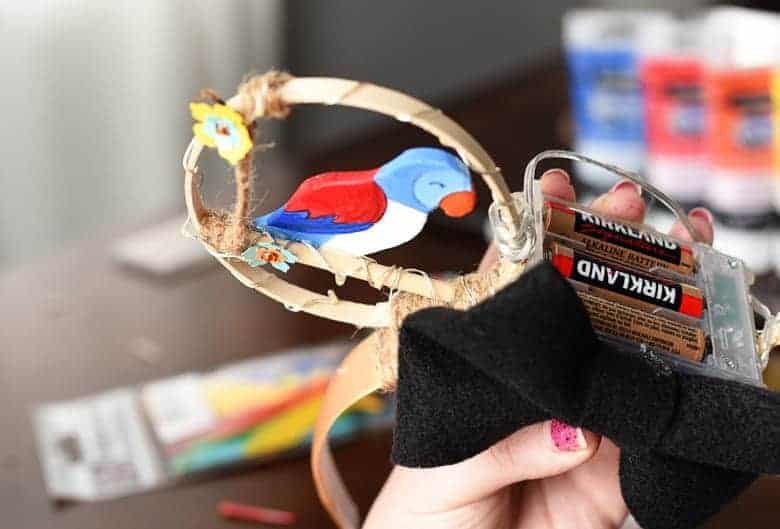
Place your battery pack in the middle of the headband and attach the bottom to the headband with hot glue. Make sure you can slide off the cover to replace batteries as needed and keep the switch clear to turn off and on!
Originally I glued the pack standing up. I ended up using my blow dryer to heat up the hot glue and manipulate it so that it was laying flat. I was learning as I went 😉
Once the battery pack is attached, glue the ears to the headband with more hot glue.
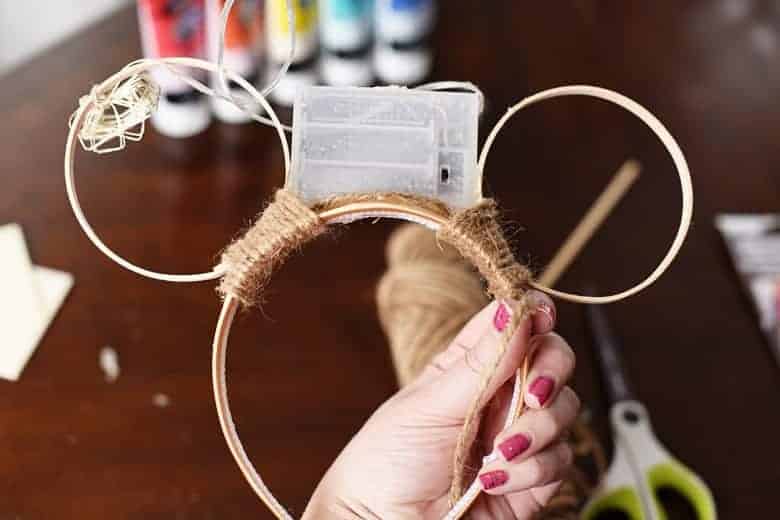
To give the ears more stability, wrap some twine around the headband itself and the ears. Secure the ends of the twine with hot glue.
Step Three: attach the lights and details where the birds will sit
Cut a piece of the round wood dowel to fit across the bottom of the ears. Secure with hot glue.
Then, take a small piece of twine and wrap a few times to cover the other dowel joint and attach towards the top side of the ear.
Wrap the fairy wire around the ears and dowels.
Step Four: make the birds
Originally, I attempted to cut the bird shapes out of a thin piece of balsa wood. HUGE FAIL.
I had a 1/4″ thick piece of foam on hand (for another pair of mouse ears) and used that instead.
I printed out some parrot clip art and used that as my guide. Sandpaper helped smooth out all of the edges.
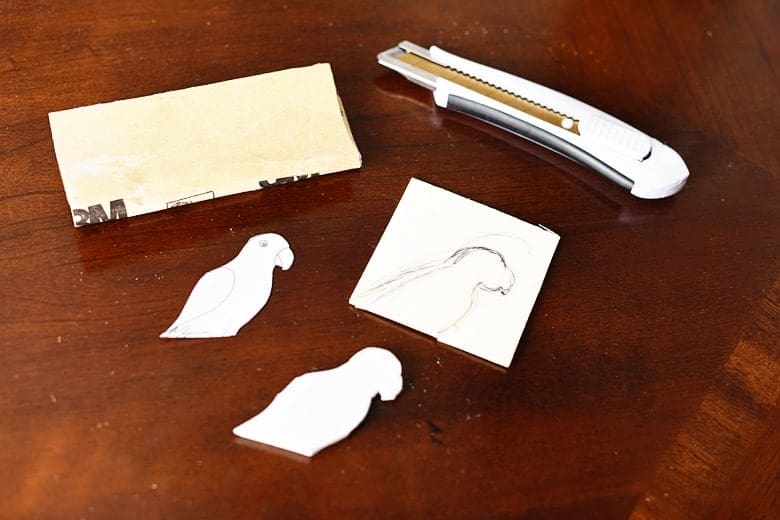
I used this Tiki Room cartoon art as my inspiration for Pierre and Jose, the birds I chose to make. There are plenty of Tiki Room birds to choose from!
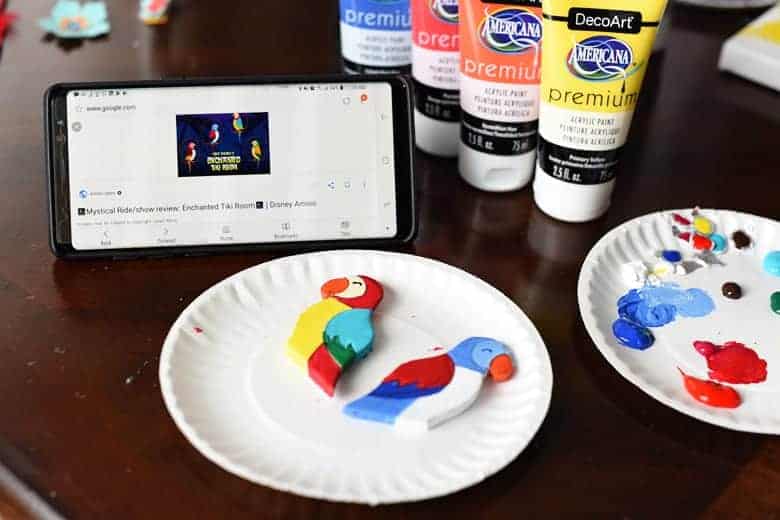
Using the DecoArt Americana Premium Acrylics, paint your foam outlines to match the colors of your birds. Make sure you also paint the edges!
Step Five: attach the decorations and bow
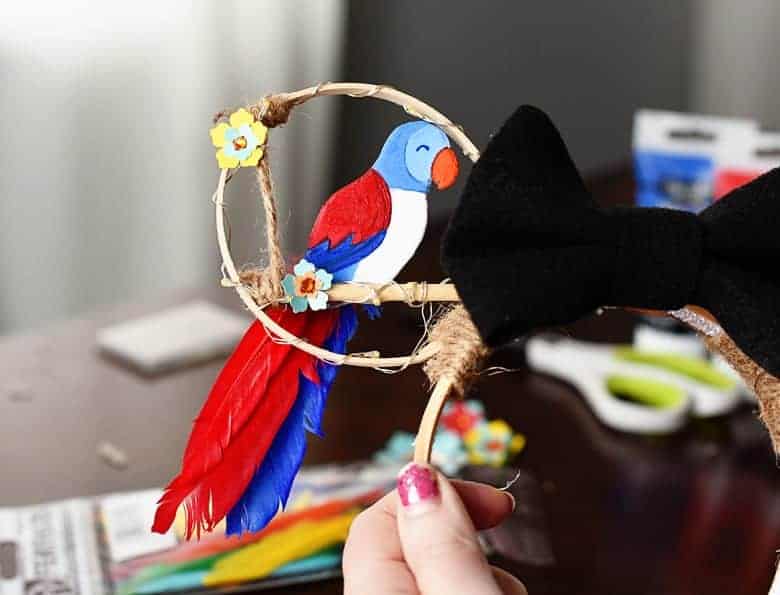
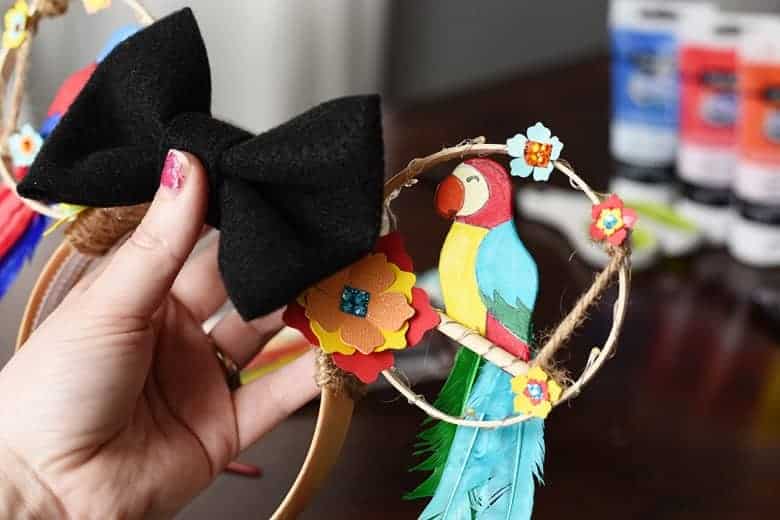
While your birds are drying, attach the paper flowers to your ears sporadically. I couldn’t find flowers that I liked, so I ended up making my own with my Cricut.
Attach your choice of bow (I made a black felt one) with hot glue to the center of the headband to cover the battery pack.
Step Six: attach the birds and their feathers
Once your birds have dried, attach them to the round wood dowels with hot glue.
Attach three feathers in the colors of your bird to the back of the foam bird piece with hot glue. Make sure the feathers are layered next to each other and not on top of each other so you can see all of them.
Last but not least, wear those ears to Disney and wow everyone! 😉

I can’t WAIT to wear these to our next trip to Disney in just a few short weeks! Although I’m going to have to fight Bean because she thinks they’re hers hehe
What other Disney-themed mouse ears should I attempt? Leave me a suggestion in the comments below! The more obscure, the better!
The next time you plan a Disney vacation, make a pair of these DIY Minnie Mouse Ears to take with you!
RELATED POSTS ABOUT DISNEY WORLD:
- The #1 Best Disney Tip We Learned the Hard Way
- How We Learned to Skip the Lines at Disney, Even During Peak Season!

Aww! Those are super adorable! Love that they light up!
You are so sweet Cahlean, thank you! I can’t wait to turn them on at night in the Magic Kingdom 😀
These are so adorable! And I feel like they’d be easy to customize based on your Disney vacation. Like if you wanted ears for Pirate Night on the cruise ships, Halloween ears if you go to Mickey’s Not So Spooky Halloween Party, etc.
That is such a great idea, Rachel! Looks like I have more mouse ear crafting in my future 😉
Oh, Bre, these are WAY too cute & fun! <3 it!!!
Aww, thanks so much Jill!