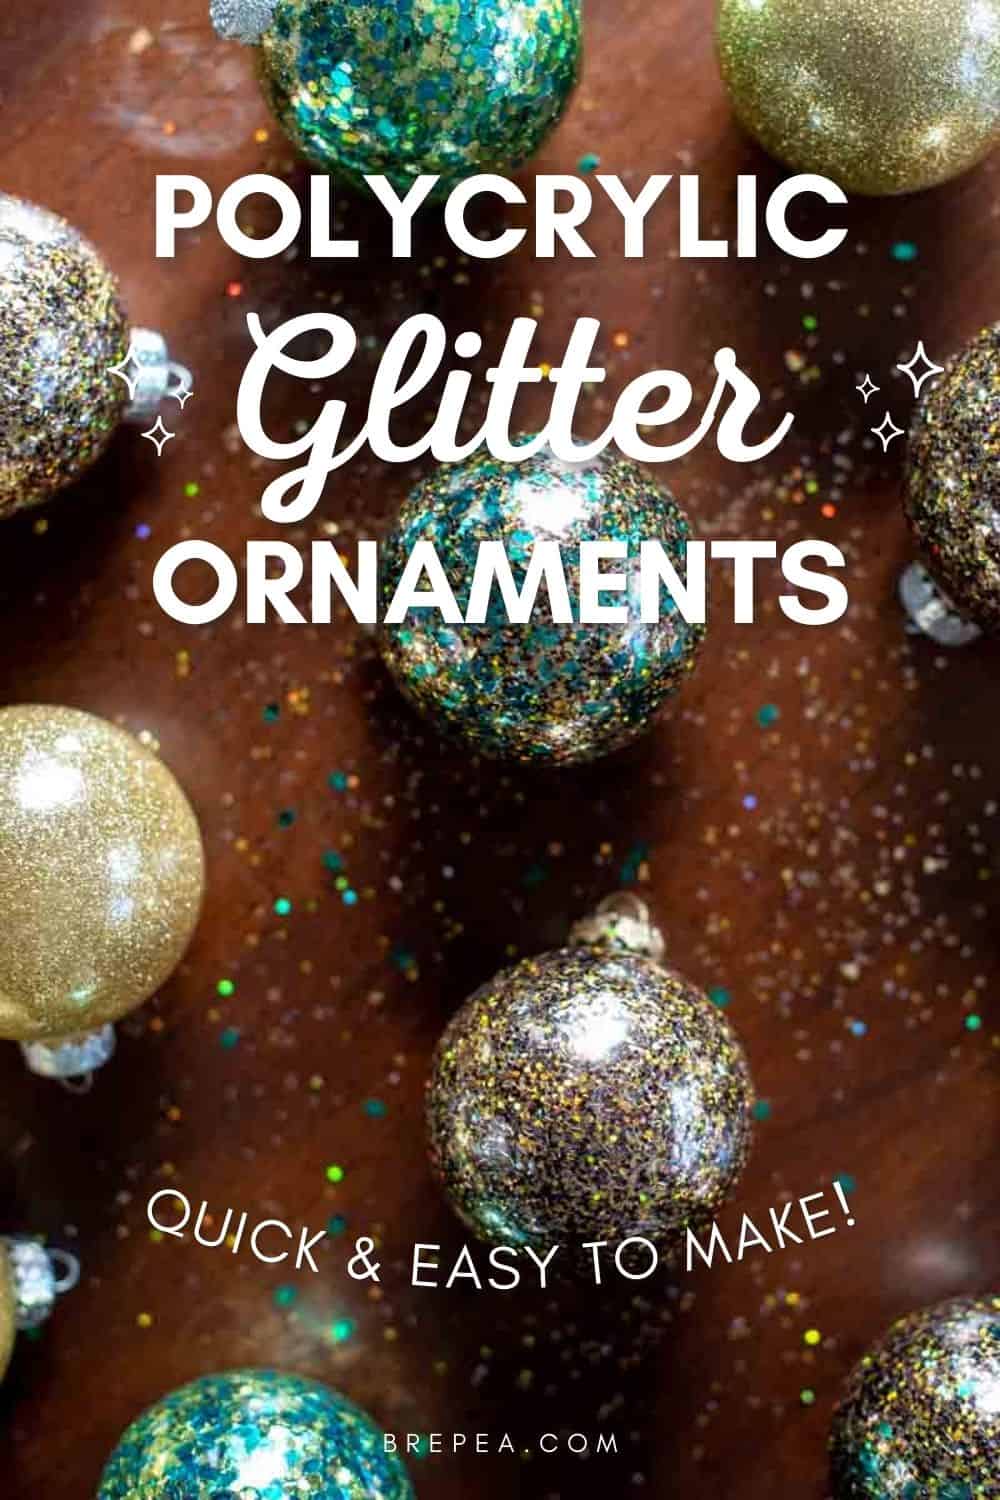
Learn how to easily make custom polycrylic glitter ornaments with extra fine or chunky glitter, the perfect Christmas craft for beginners!

Are you intimidated by the thought of using polycrylic for handmaking glitter ornaments?
Maybe you think you’ll somehow “mess it up”. Or maybe you don’t have any prior experience with polycrylic.
Rest assured because I’m here to tell you, making polycrylic glitter ornaments could not be easier or more beginner friendly!
You might be wondering, do I really have to use polycrylic to make these?
Through my research, polycrylic is the best way to make DIY glitter ornaments that will help the glitter coat thoroughly and evenly, and the best way to ensure your ornaments last through years of use and storage.

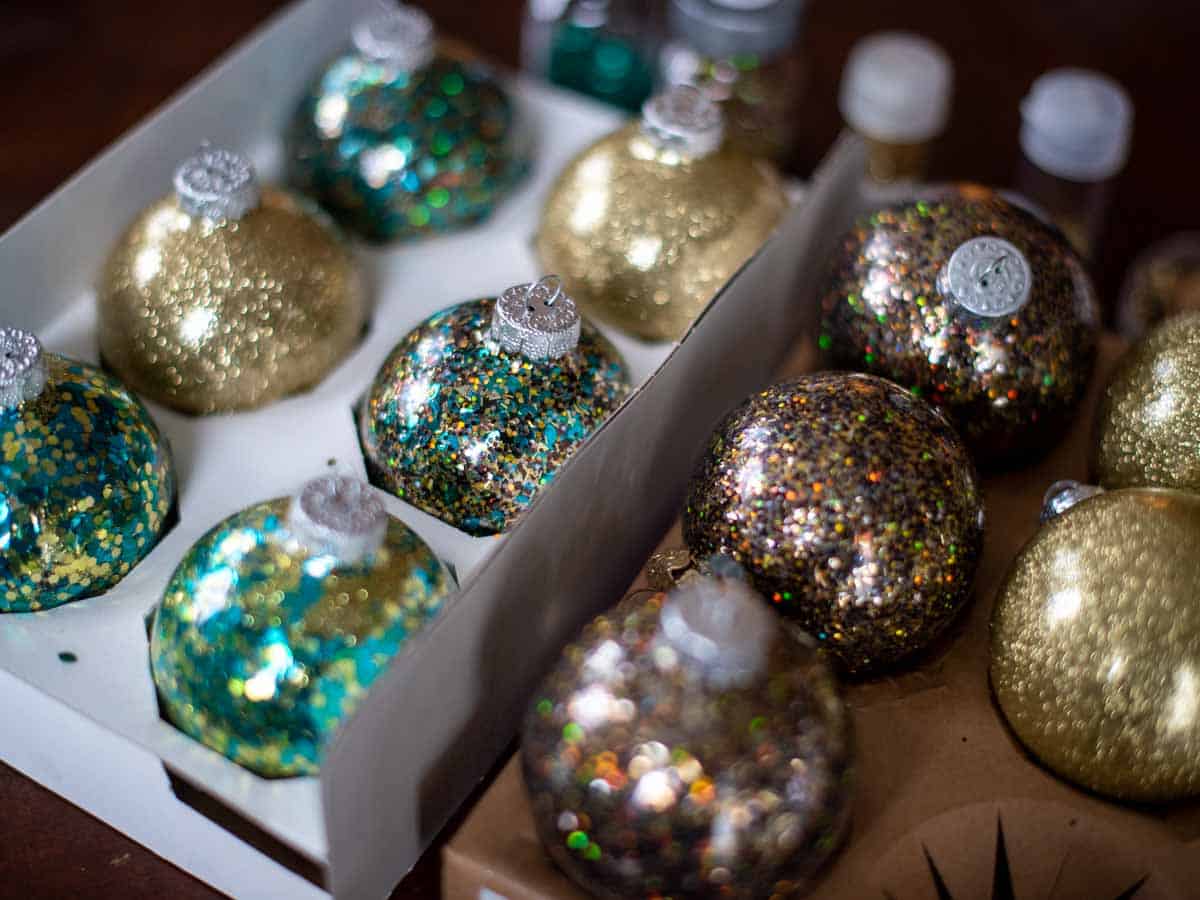
I haven’t seen any tutorials for DIY glitter ornaments using chunky glitter, so I had to try for myself.
I was worried the chunky glitter might be too heavy for the poly, but I’m happy to report they turned out great and give a unique look as an alternative to extra fine glitter!
Whether you go the extra fine or chunky route, here’s how you can easily make your own polycrylic glitter ornaments for Christmas.
Polycrylic Glitter Ornaments Tutorial Snapshot
EASE: so easy and older kid friendly!
PROS: gorgeous end result that’s easily customizable
CONS: glitter tends to be messy when working with
WOULD I MAKE THIS AGAIN? yes

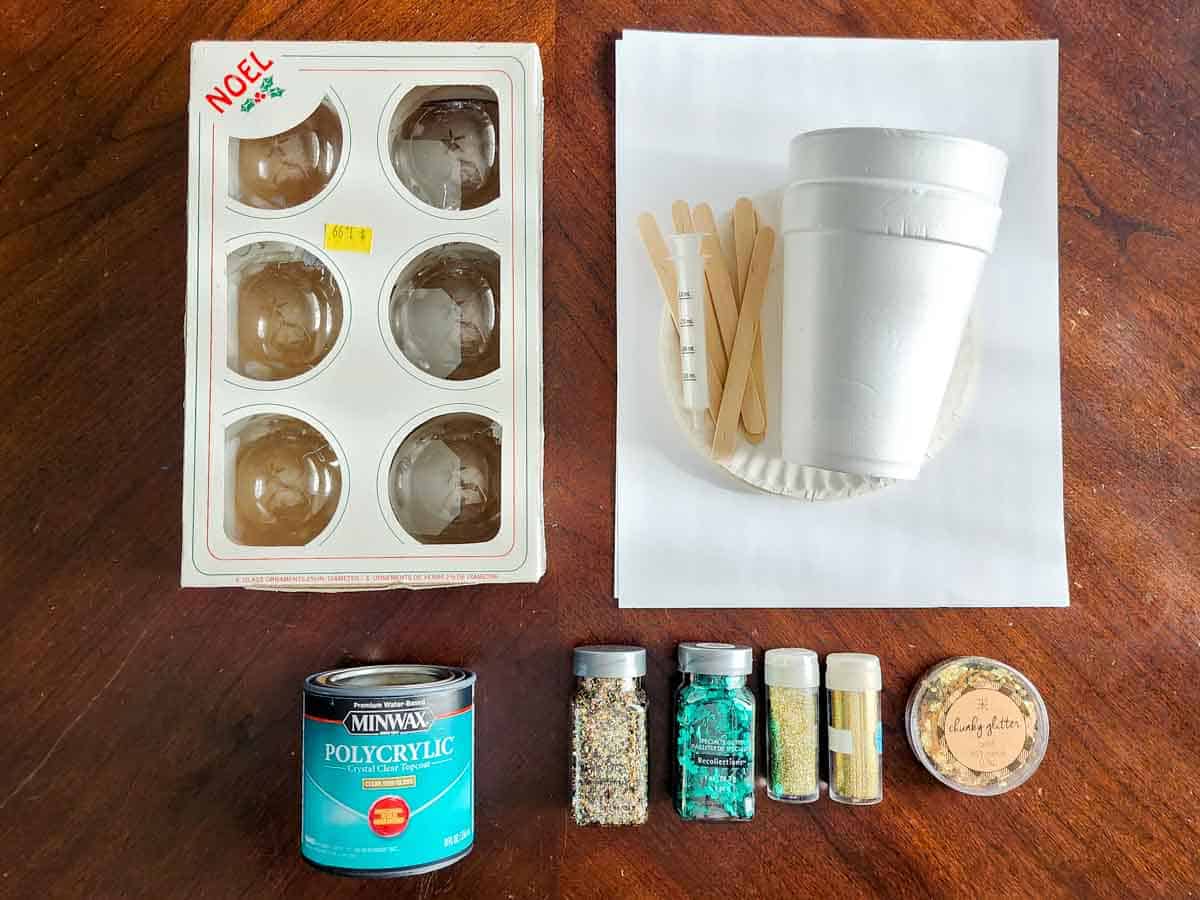
DIY Polycrylic Glitter Ornaments Supplies
Any links below to supplies or tools used may be affiliate links and might earn me a small commission if you decide to purchase, thank you!
FAQs about making polycrylic glitter ornaments before you get started…
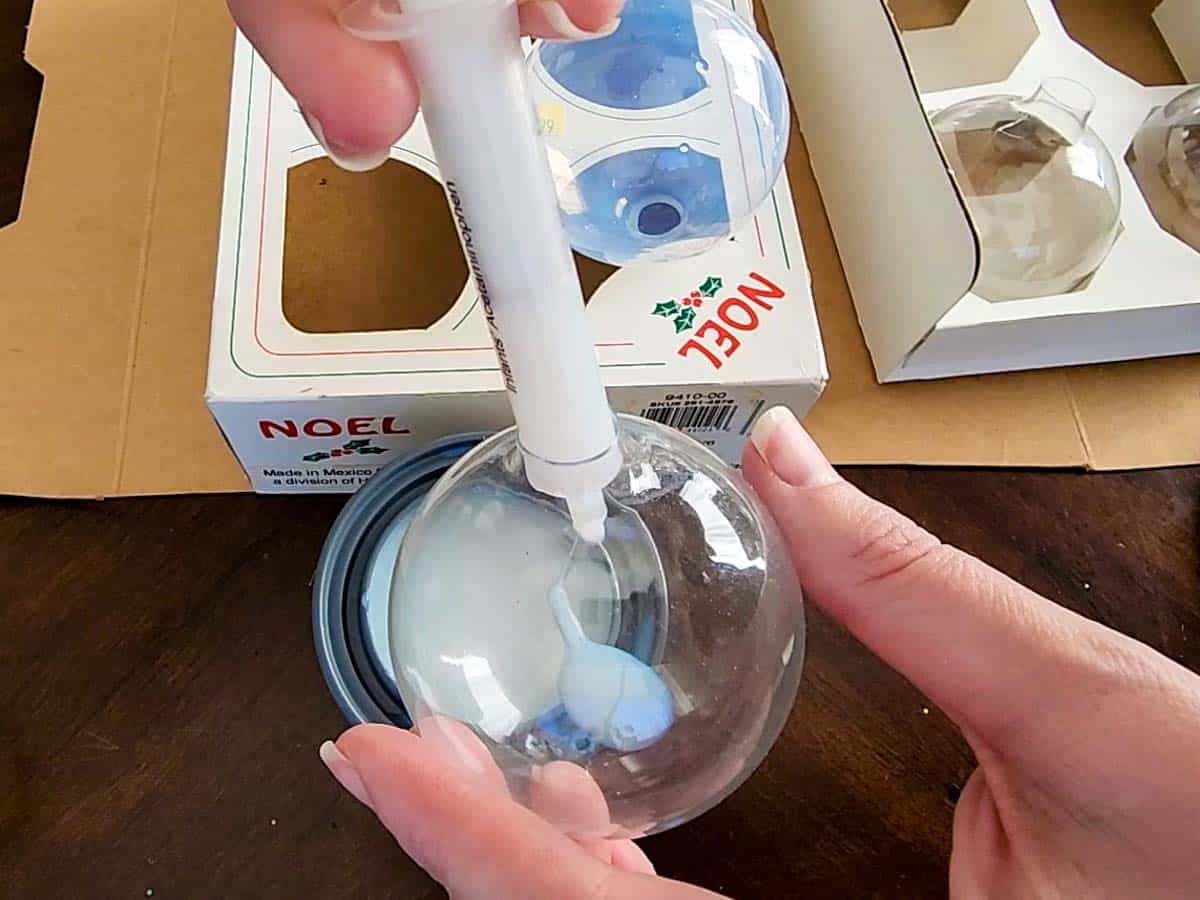
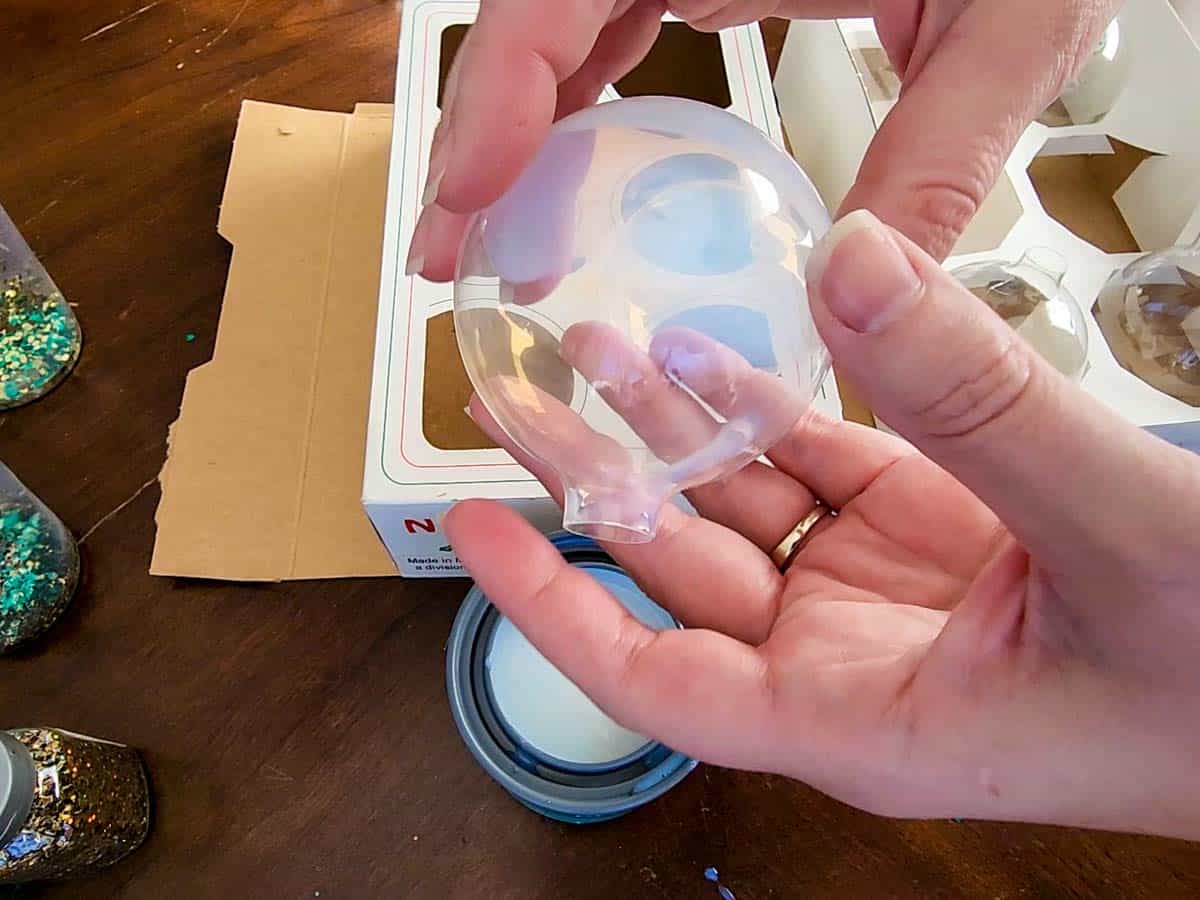
Step One: Pour polycrylic inside the ornament
Take the top off your polycrylic, stir gently with a popsicle stick, and then pour (or syringe) polycrylic into your clear ornaments.
I had a leftover syringe from some children’s medicine that worked perfect for this project. Otherwise, first pour some polycrylic in a flexible disposable cup like a dixie cup and then pour into the ornament.
For a standard sized ornament, I found that approximately 3.75 mL (3/4 of my syringe) was just about the perfect amount of polycrylic without wasting too much.
Gently swirl the ornament around so that the polycrylic coats the entire inside of the ornament.
Then, tip the ornament upside down and let it drain over a disposable cup to remove the excess poly. I didn’t have enough cups on hand, so I just used the holders the ornaments came in over some cardboard to catch the drips.
Let the polycrylic sit no longer than 1 minute before proceeding to the next step. Trust me, this is key to an even coat of glitter without gaps! I waited too long on a few and noticed that the glitter didn’t stick as well because the polycrylic had started to dry and had a few gaps in it.
Pro tip: make sure the ornament is sitting balanced upside down so that the polycrylic drains out evenly.
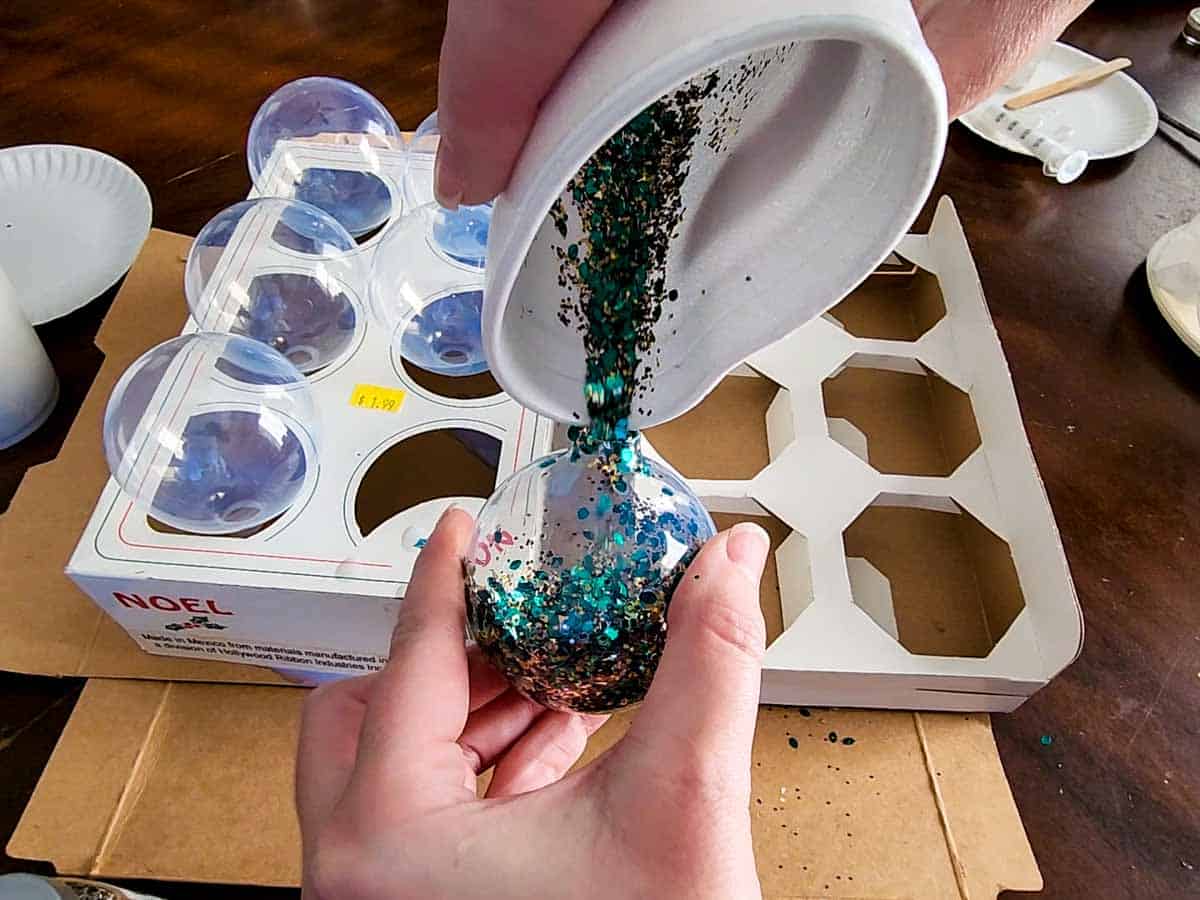
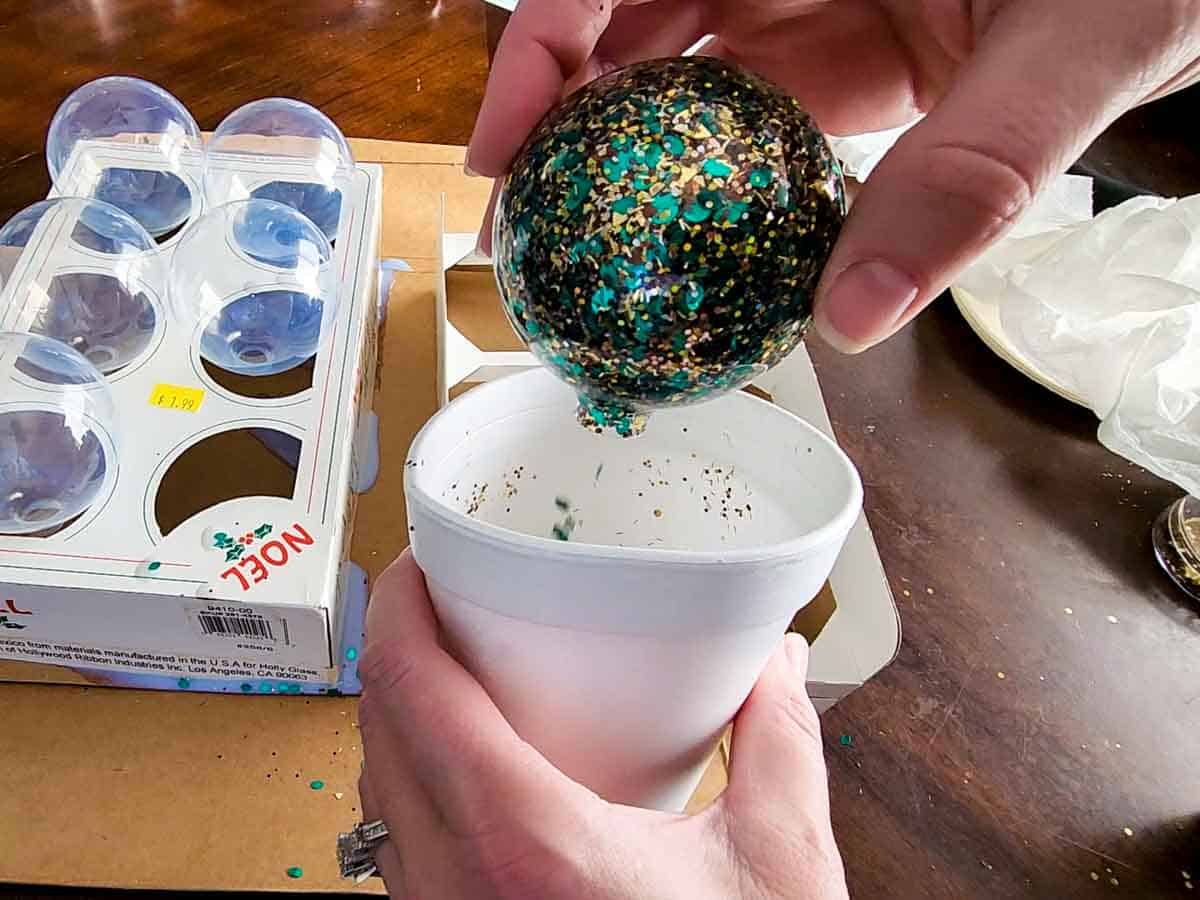
Step Two: Pour glitter inside the ornament
Using a flexible disposable cup (like styrofoam or a dixie cup) or if you’re extra fancy a small funnel that will fit into the mouth of the ornament, pour a generous amount of glitter inside the ornament.
I wanted to create a few custom glitter mixes for mine, so I did this first in the cup by mixing with a popsicle stick and then poured it into the ornament.
Pro tip: you will need far more glitter than you think in order to coat the inside evenly!
Another option, if you’re using extra fine glitter, is to fold up a piece of paper and use that to funnel the glitter into the ornament.
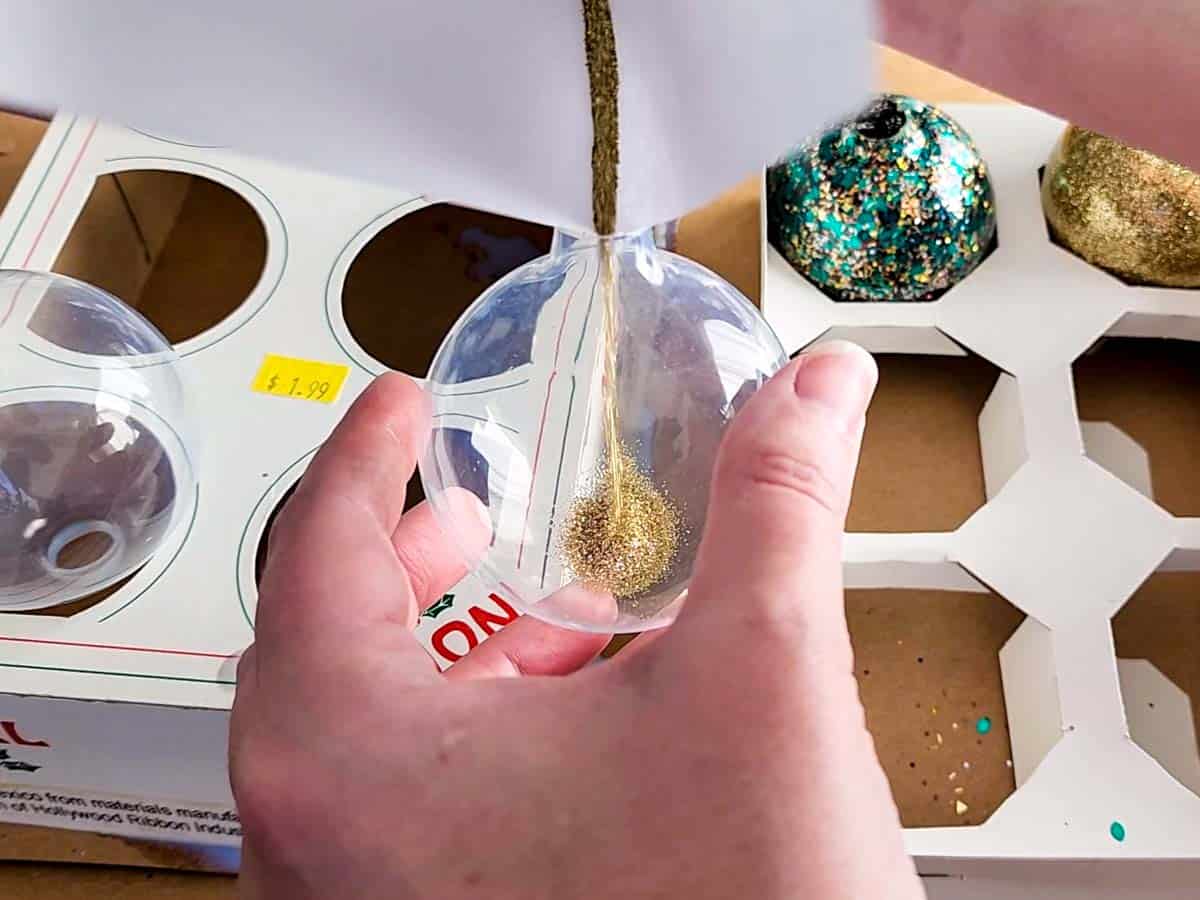
Then, swirl the glitter around the inside of the ornament letting it stick to the insides. Work your way up to the mouth of the ornament as you continue to swirl.
If you find that you didn’t pour in enough glitter to start, no worries! Just pour some more in and continue to swirl and gently shake the ornament until it’s evenly coated.
Then, tip the ornament upside down and gently tap to remove any excess glitter.
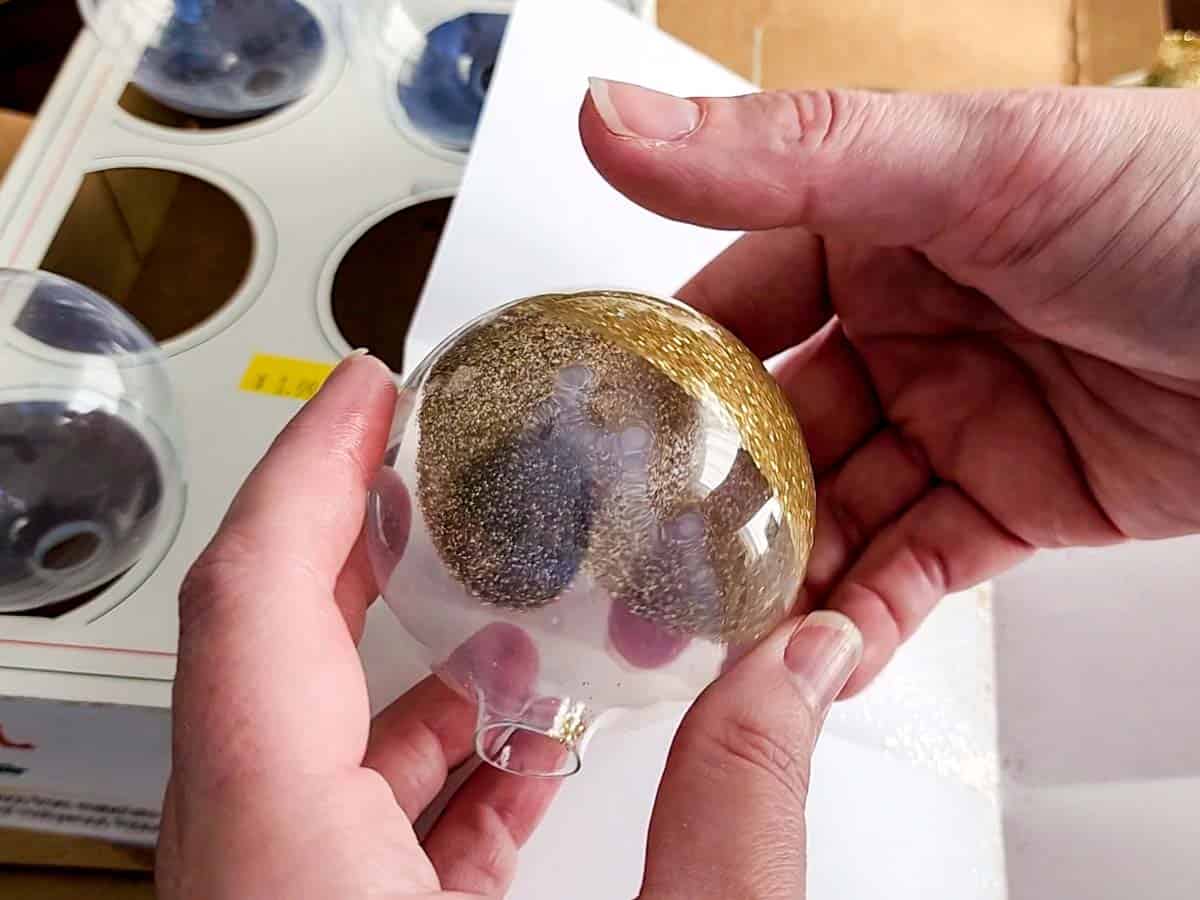
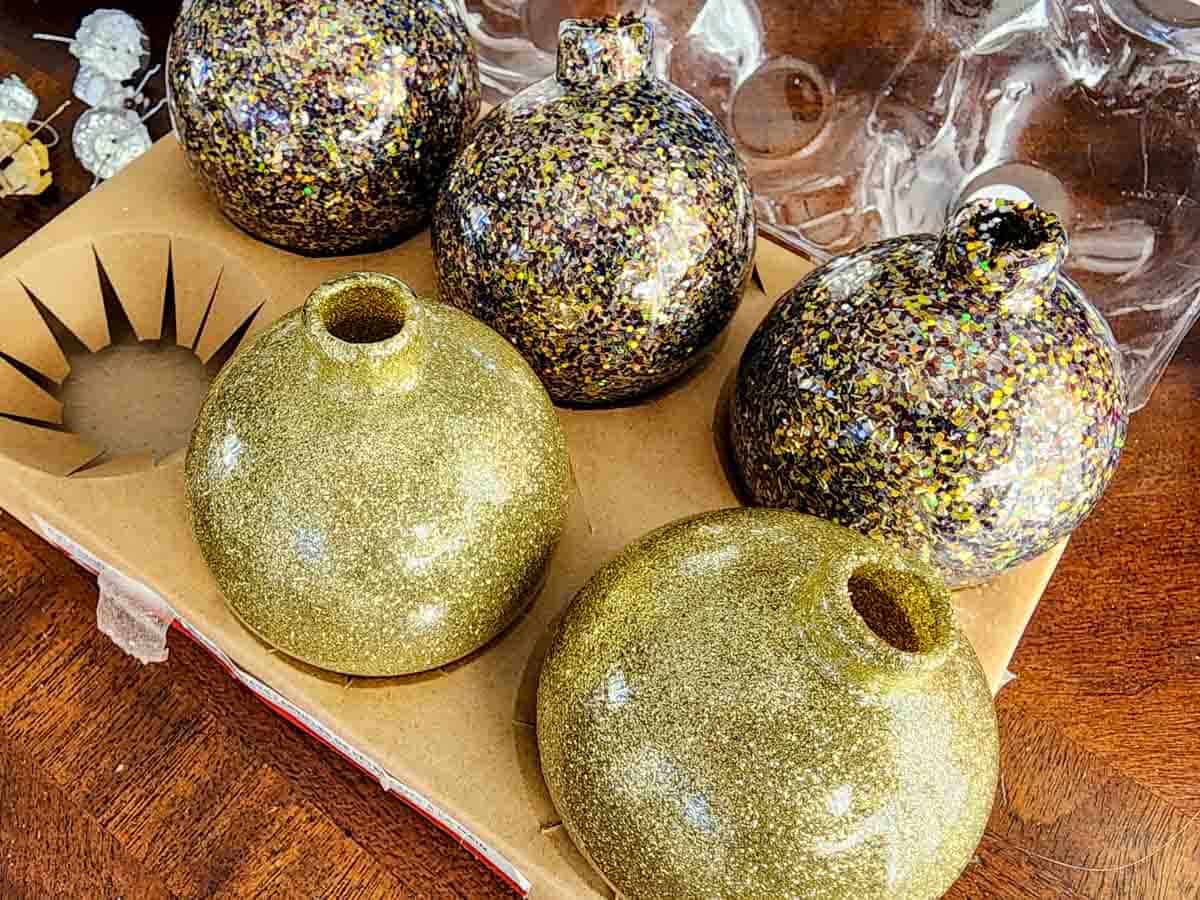
Step Three: Let the ornament dry fully and reassemble
Once the ornament has been thoroughly glittered, let it dry upright for about an hour.
Lesson learned: if you notice gaps in the glitter right away DO NOT try to add more polycrylic and glitter when the polycrylic is still cloudy and wet. I made this mistake and it made everything drip and run on the inside!
Instead, wait a few hours until the ornament is completely dry, and then you can try adding more polycrylic and glitter to fill any gaps.
Keep in mind that, depending on the kind/quality of glitter you use, the dye on the glitter could bleed slightly if you add more polycrylic. Even once the first coat is dry.

One of my glitters that I used did bleed during the application of the 2nd coat (the chunky turquoise glitter bled onto the gold turning it slightly green), so this is a possibility to keep in mind before you attempt to fill any gaps.
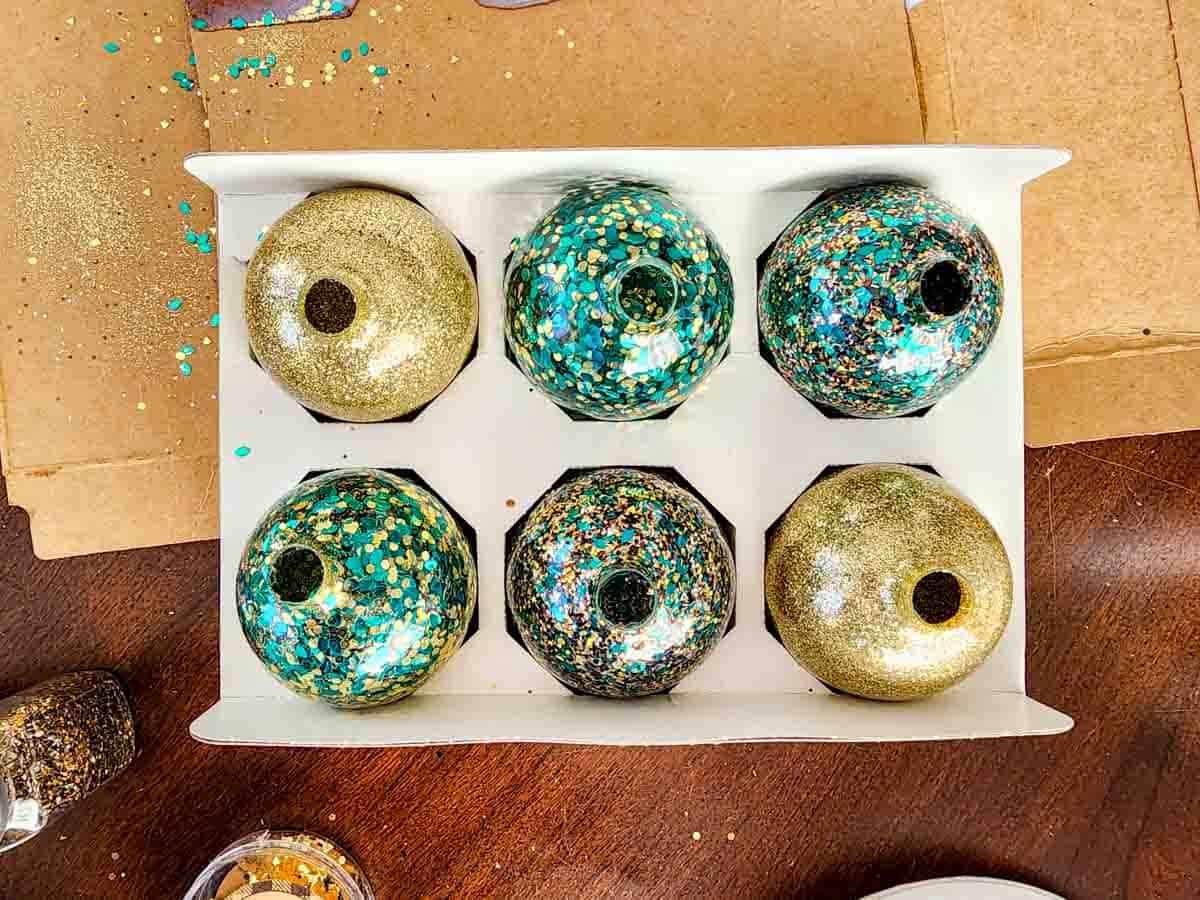
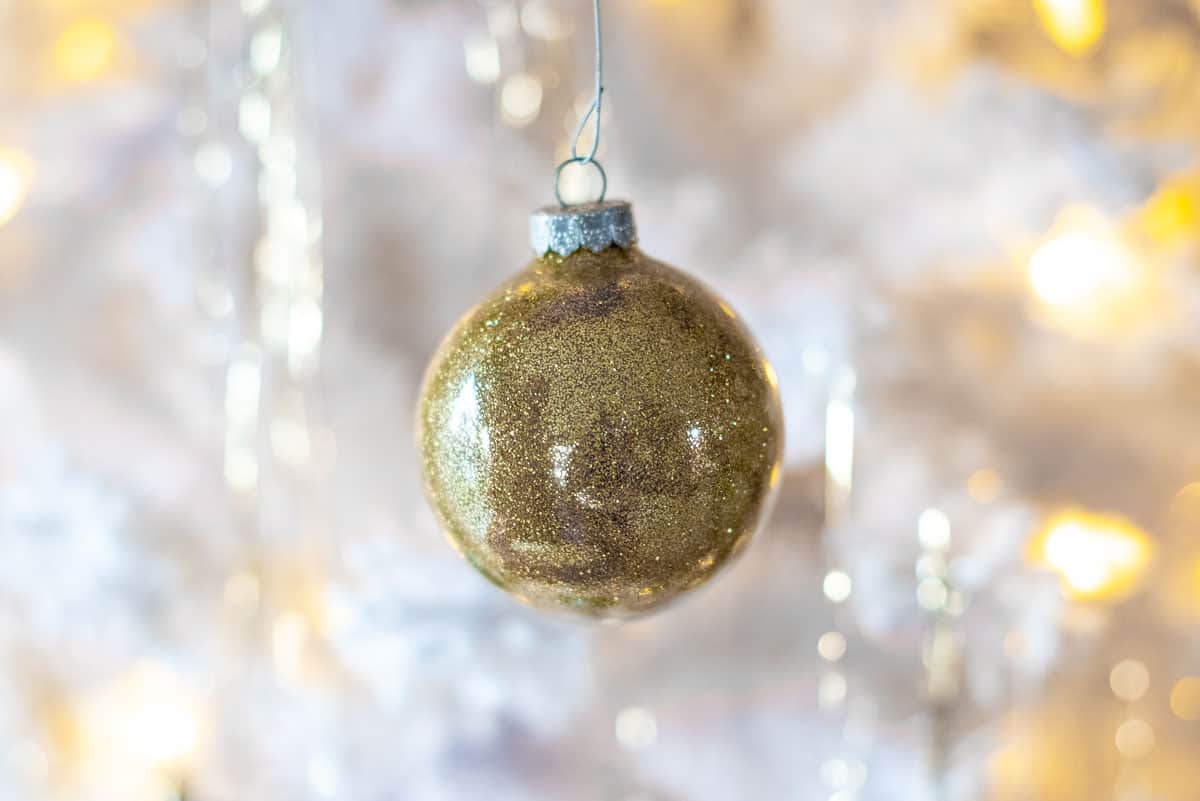
You’ll know your ornaments are dry and ready to reassemble when the polycrylic and glitter go from slightly cloudy to clear and really shiny.
Mine took about an hour to dry, but I waited a little longer just to make sure.
Once you’re sure your ornaments are dry, reassemble by inserting the prongs of the metal top into the neck of the ornament being careful not to let them scratch along the inside.
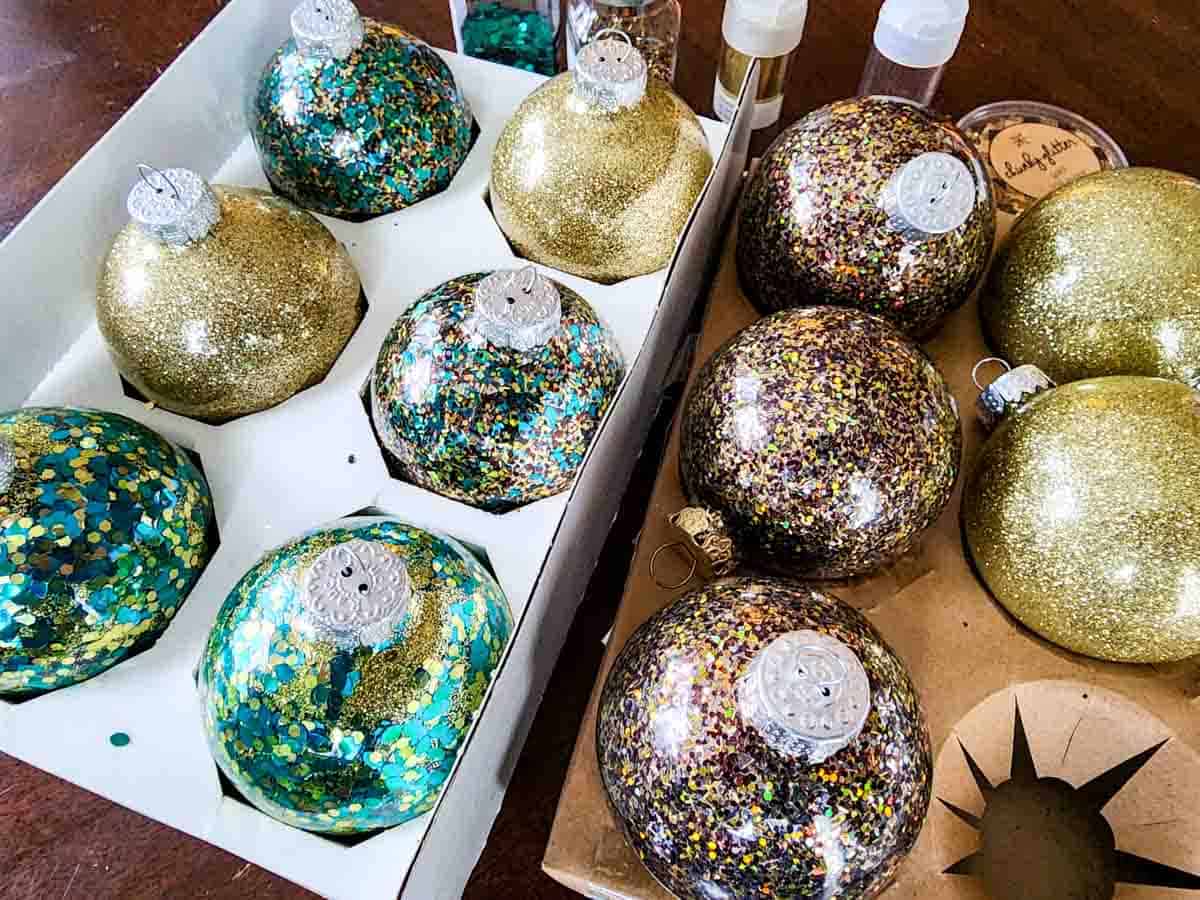
The longer the prongs of the wire holding the top are, the more likely they may chip the glitter on the inside, so you might want to trim them shorter.

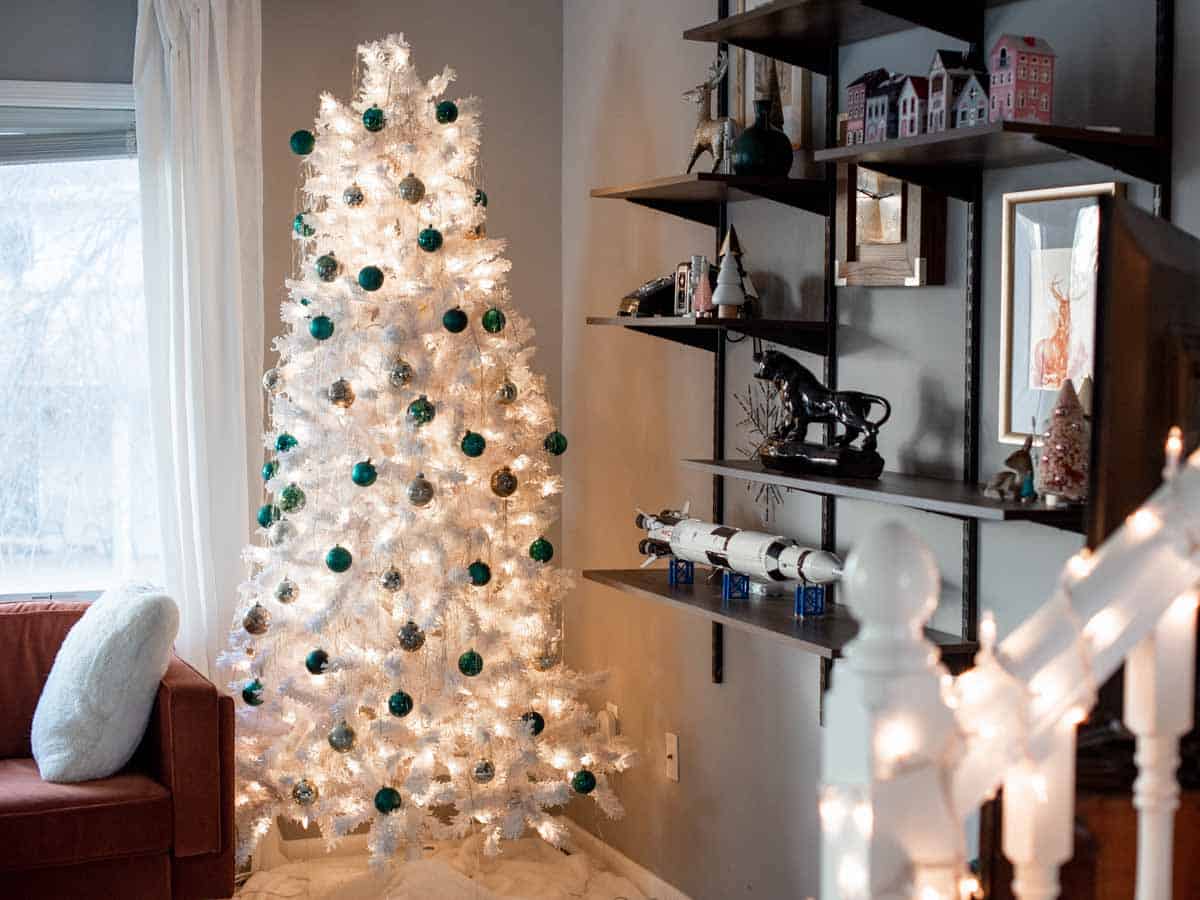
Once your ornaments are all assembled, attach a hanger and enjoy the sparkle they add to your tree!
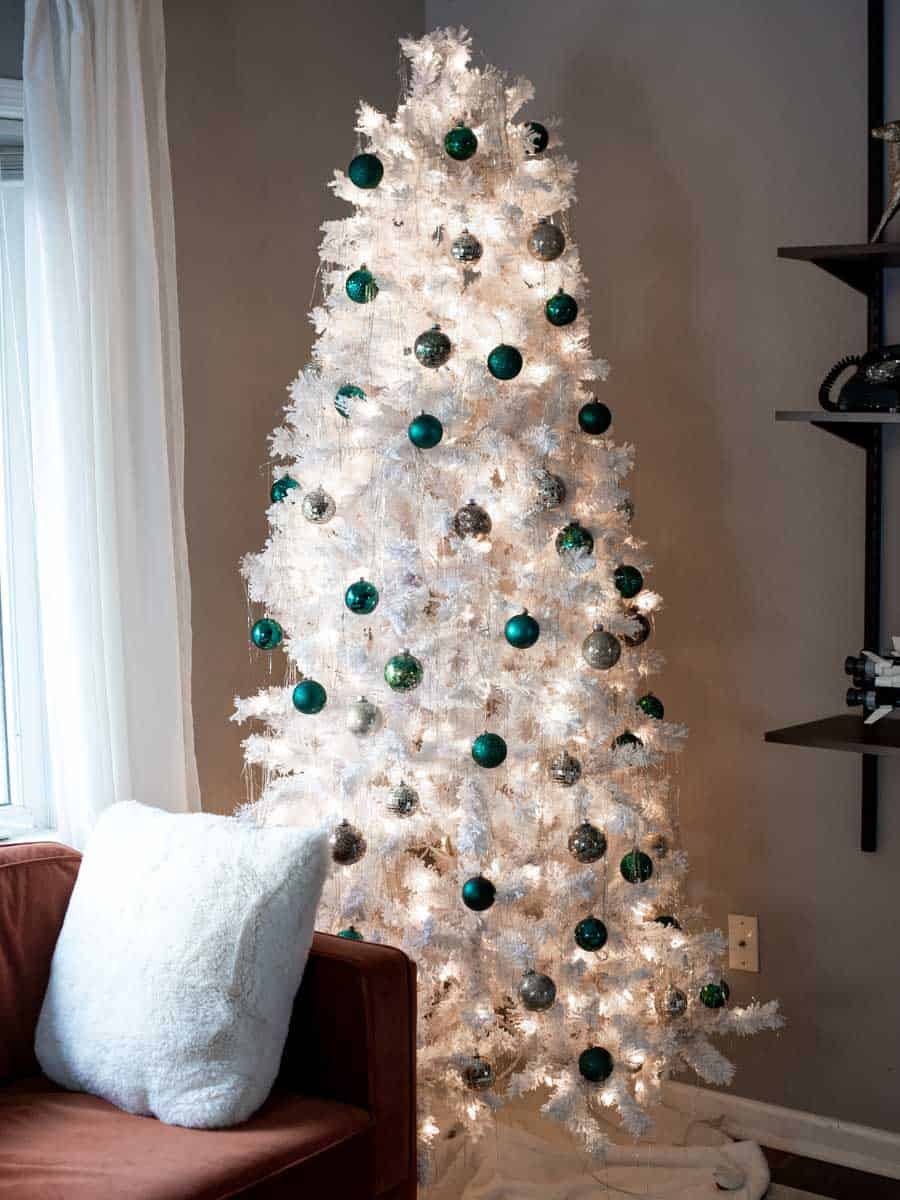
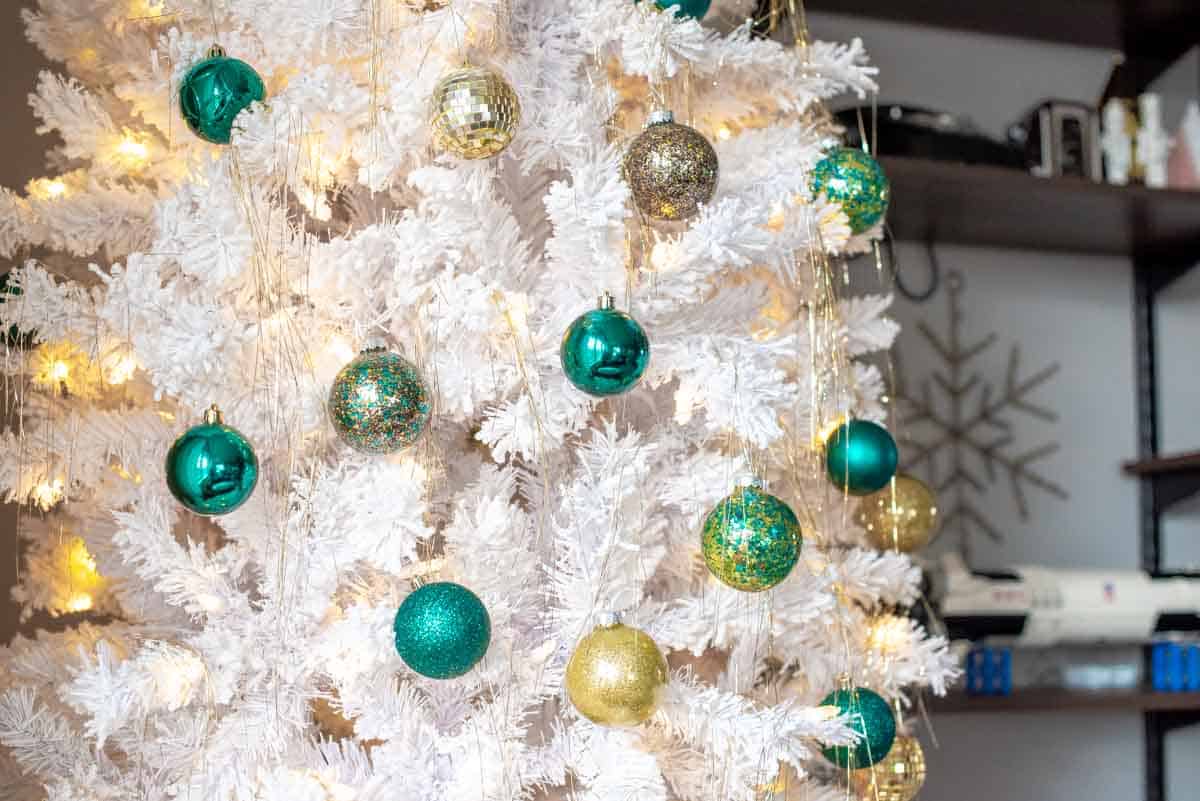
Now that you know how easy it is to make polycrylic glitter ornaments, pick up your supplies and make some for your Christmas tree this year!
Don’t forget to pin this for later!

Polycrylic Glitter Christmas Ornaments
Materials
Tools
- Flexible disposable cups or plastic syringe
Instructions
- Pour or use a syringe to insert polycrylic into clear ornaments, swirl the ornament to coat the inside evenly.
- Tip the ornament upside down to drain excess polycrylic over a disposable cup.
- Use a flexible disposable cup or a small funnel to pour a generous amount of glitter into the ornament. Swirl the glitter inside the ornament, working up to the mouth. Tap the ornament upside down to remove excess glitter.
- Allow the ornament to dry upright for about an hour. Then, carefully reassemble the ornament by inserting the metal top prongs into the neck.
Notes
- Avoid adding more polycrylic and glitter if gaps are noticed immediately; wait until completely dry.
- Trim longer prongs to prevent scratching the glitter inside.