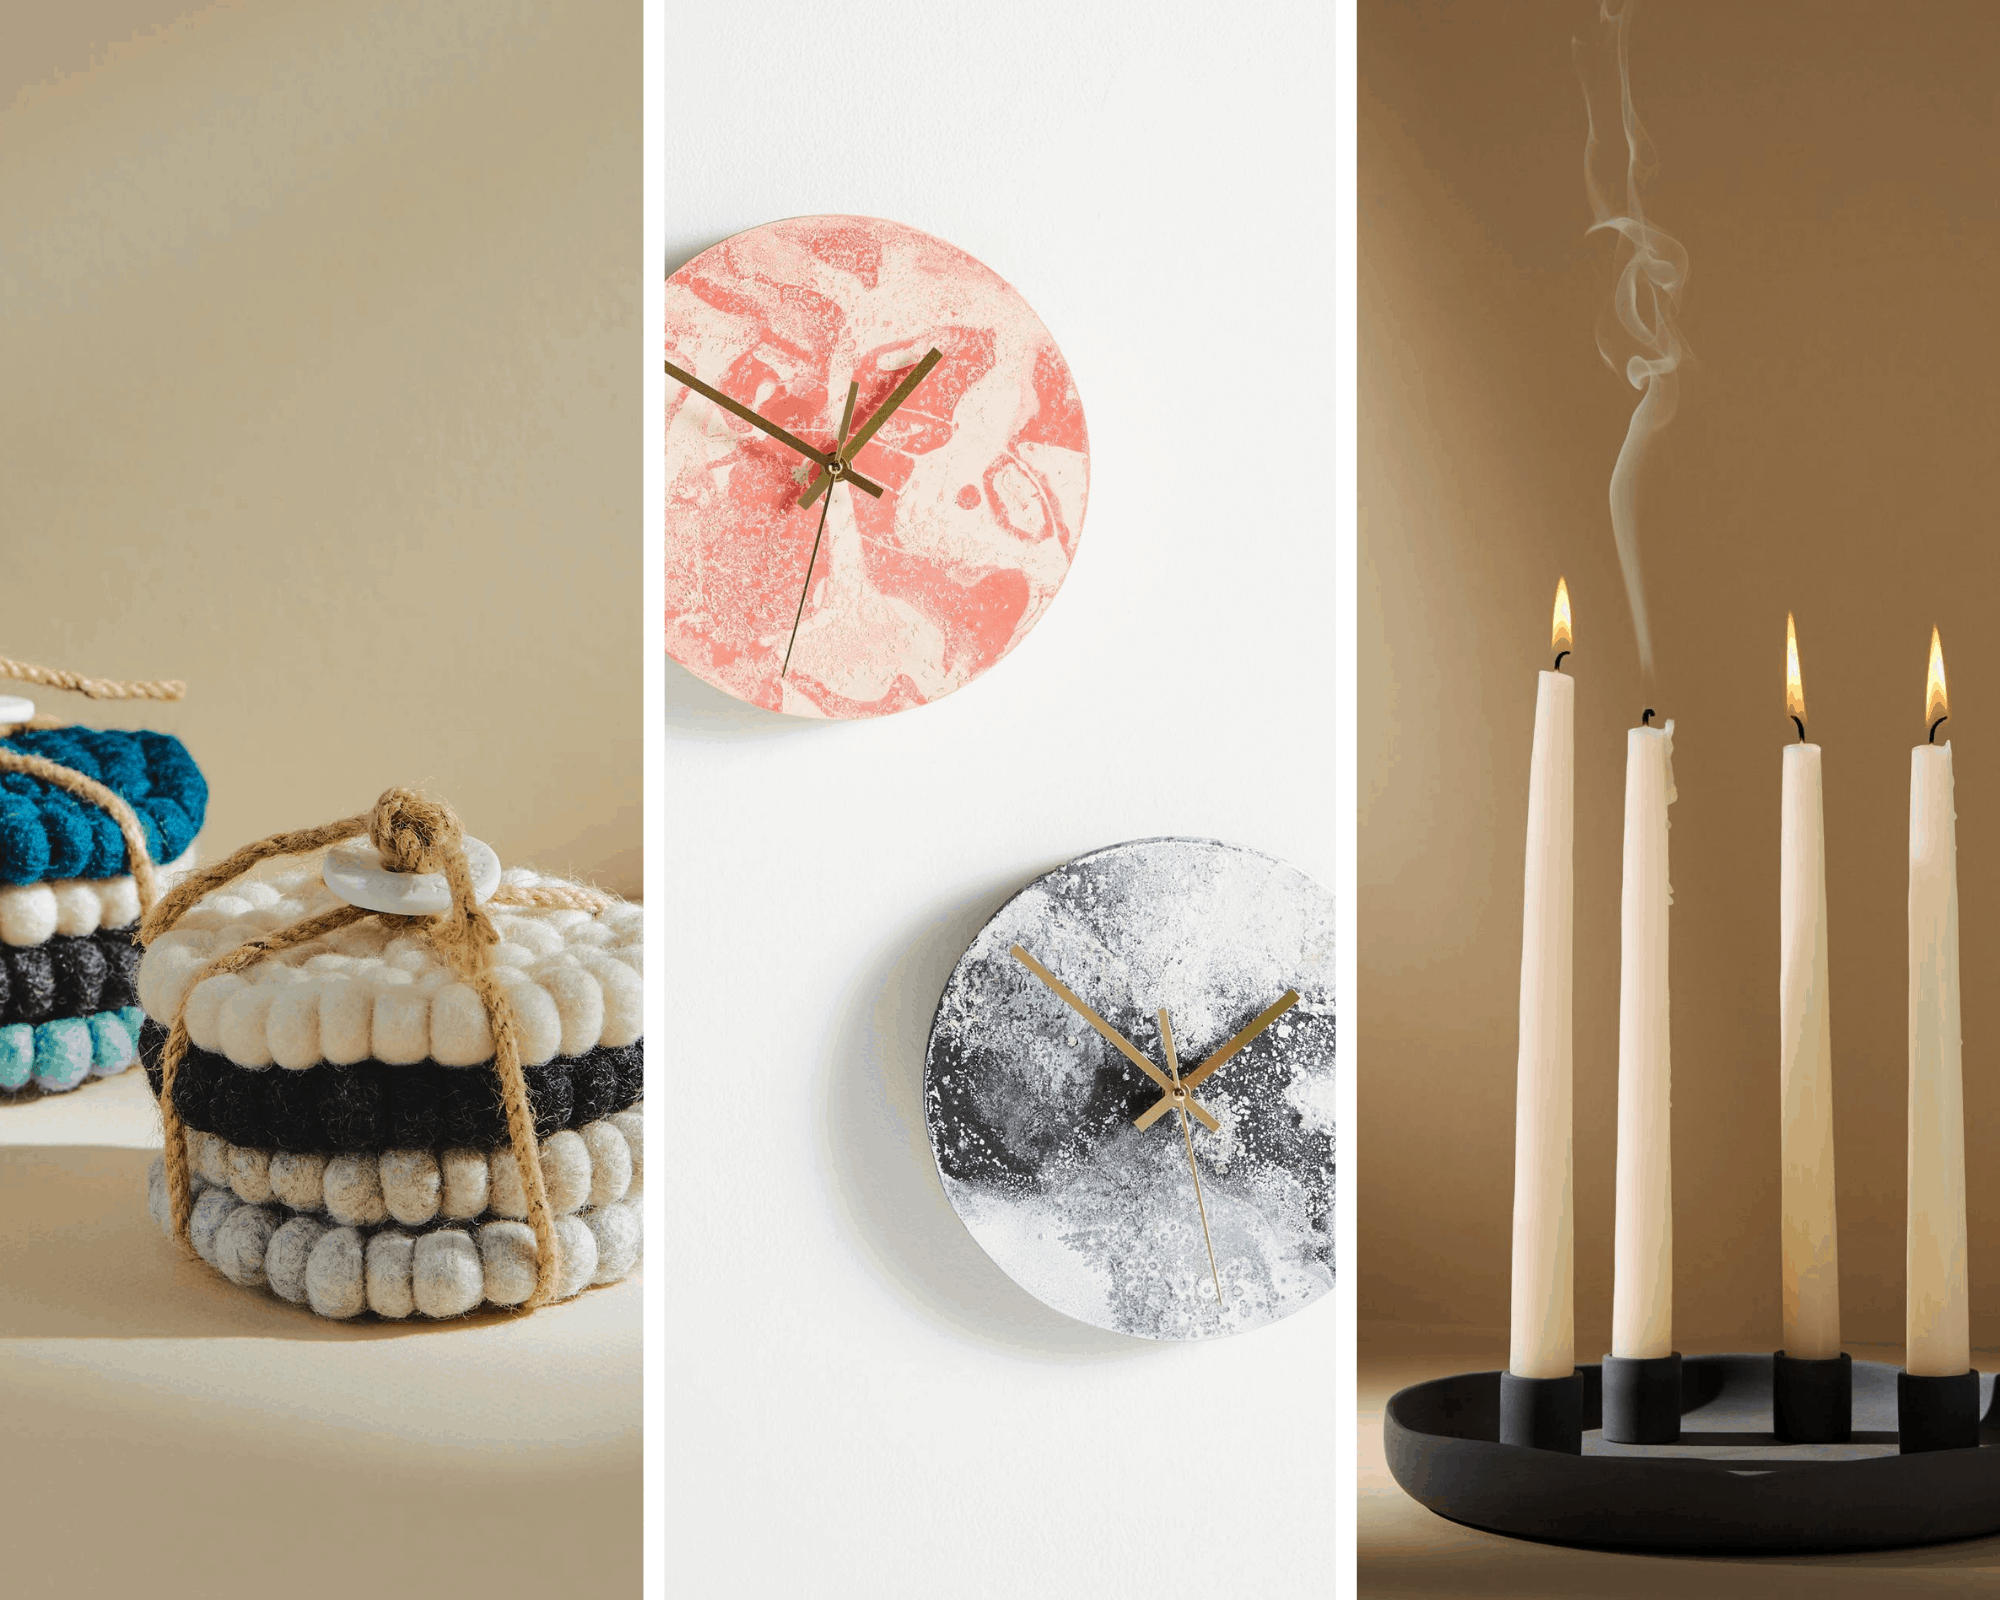
Anthropologie decor has my heart… but not my budget.
So when I spotted a $98 marble wall clock, $38 sculptural candle holder, and $24 coasters on one of my late-night Pinterest scrolls, I had a thought:
What if I could recreate all of them using polymer clay?
Not fancy resin.
Not concrete.
Not a specialty material.
Just good old Original Sculpey®, the same clay I’ve been using since I was 10 years old!
What I didn’t realize back then (and honestly didn’t fully appreciate until now) is that once baked, Original Sculpey® can be:
• Sanded smooth like stone (whaaattt?!)
• Drilled through for hardware (you’re joking!)
• Painted
• Glued
• Styled like high-end sculptural decor
So I tested it. And I recreated nearly $160 worth of Anthropologie-inspired decor for under $25.
Here’s exactly how I did it, and what I learned along the way!
Does Polymer Clay Really Work for Home Decor?
If you’re thinking,
“Isn’t Sculpey just for beads and kids’ crafts?”
I thought that too.
But once baked properly, Original Sculpey® becomes firm and durable. I’ve sanded it smooth, drilled into it for clock hardware, and used it for functional decor pieces.
The key is:
• Bake fully
• Let it cool completely
• Sand for a refined finish
• Use proper thickness for durability
When done right, it looks far more expensive than it is.
Does Polymer Clay Actually Work for Home Decor?
Short answer: yes, and it’s wildly underrated.
Original Sculpey® isn’t just for beads and miniatures. Once baked, it becomes:
- Firm and durable
- Sandable for a smooth finish
- Drillable (yes, really)
- Paintable with acrylic paint
- Lightweight but sturdy
I’ve:
- Used it for functional coasters
- Drilled through it for hardware
- Sanded it smooth like stone
As long as you bake it fully and let it cool completely, it holds up beautifully for decorative home pieces.
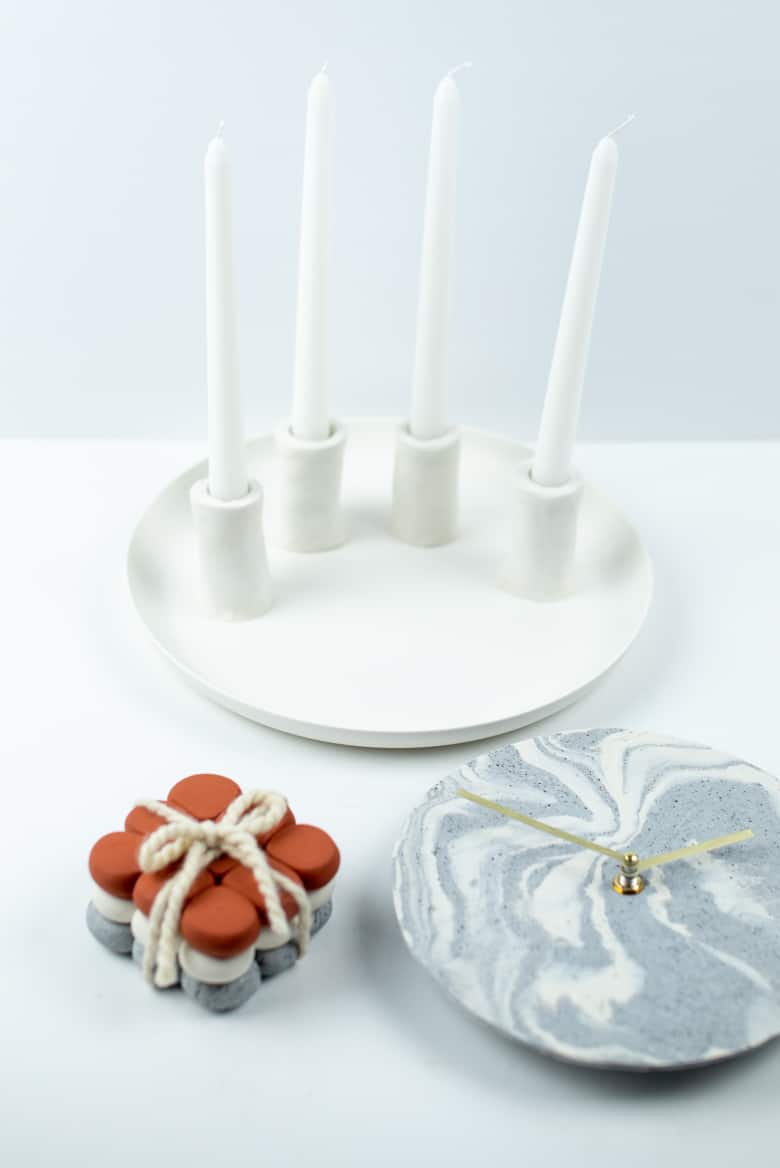
3 DIY Home Decor Anthropologie Inspired Projects Made with Original Sculpey Polymer Clay
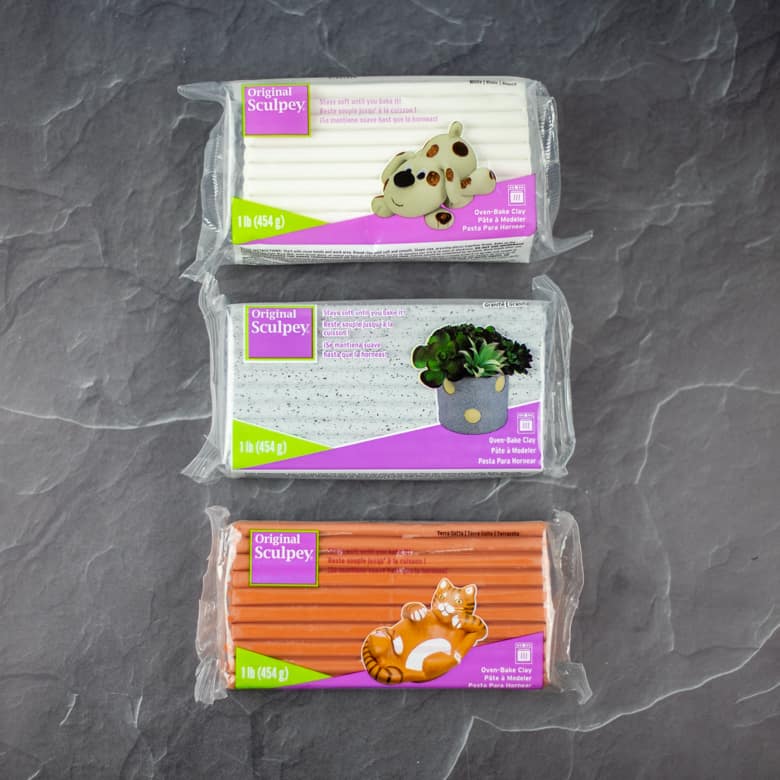
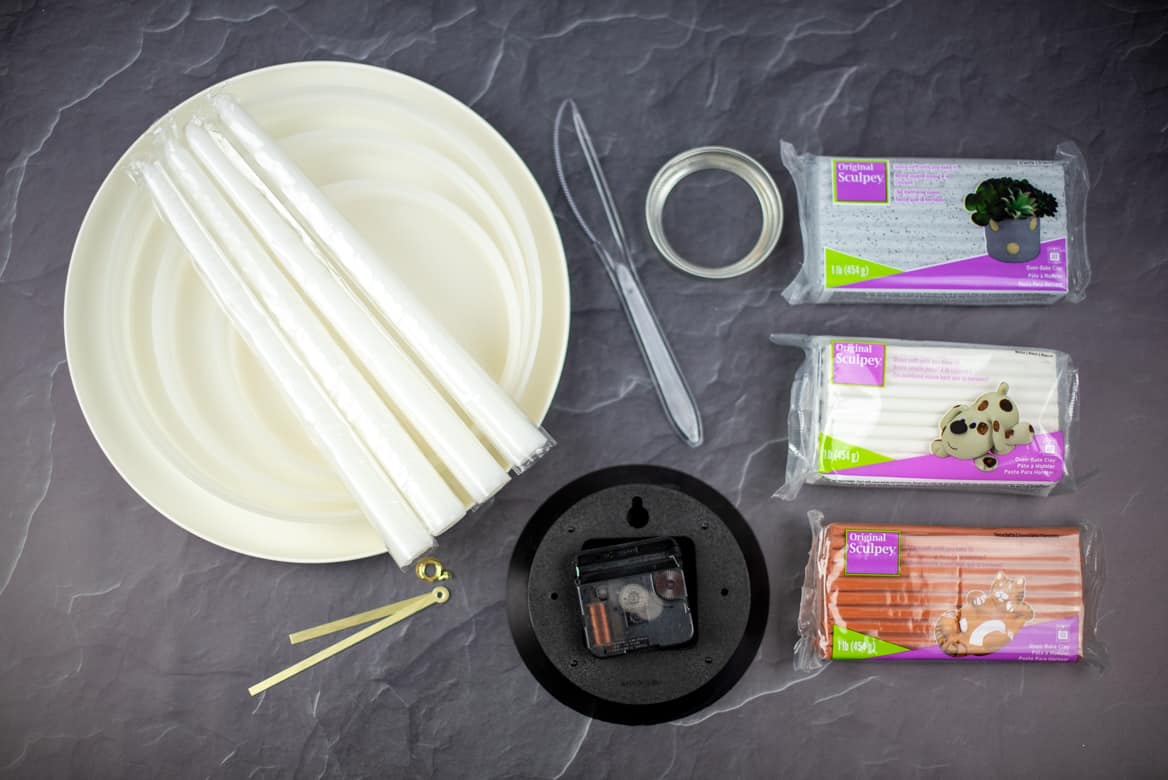
Supplies Used for All 3 Projects:
- Original Sculpey® – Terra Cotta
- Original Sculpey® – White
- Sculpey® Premo – Gray Granite (for that subtle stone fleck look)
Why I love it:
It’s easy to condition, blends beautifully for marble effects, and sands down smoothly after baking.
Tools That Make This Look High-End (Not Homemade):
- Acrylic craft rolling pin (smoother than a kitchen rolling pin, which I had to resort to)
- Assorted circular cutters or lids (for clean edges)
- Assorted clay tool kit
- Multi-grit sandpaper pack (80 & 220 grit)
- Electric drill + small drill bit set
- Clock movement mechanism kit
- Gel super glue
- Taper candles
- Parchment paper
- Rubbing alcohol (for surface prep)
- Cornstarch (prevents sticking when forming holders)
Before you begin any of these projects, protect your workspace with a layer of wax paper.
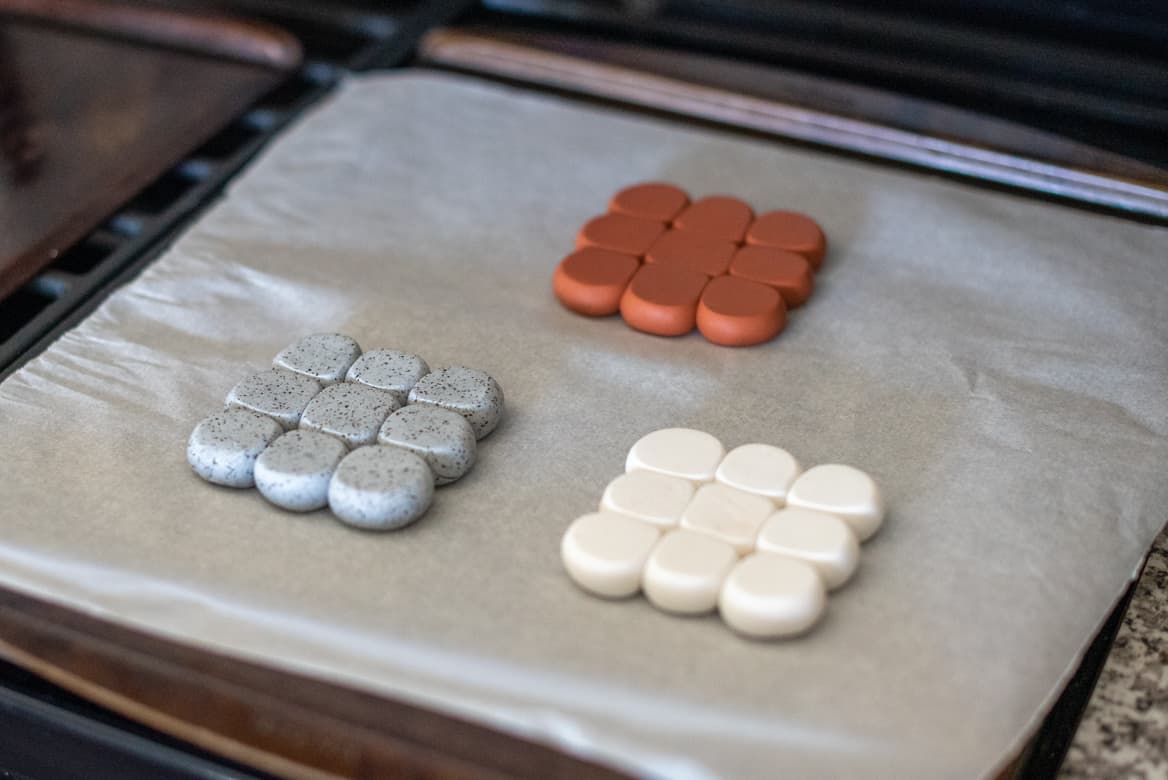
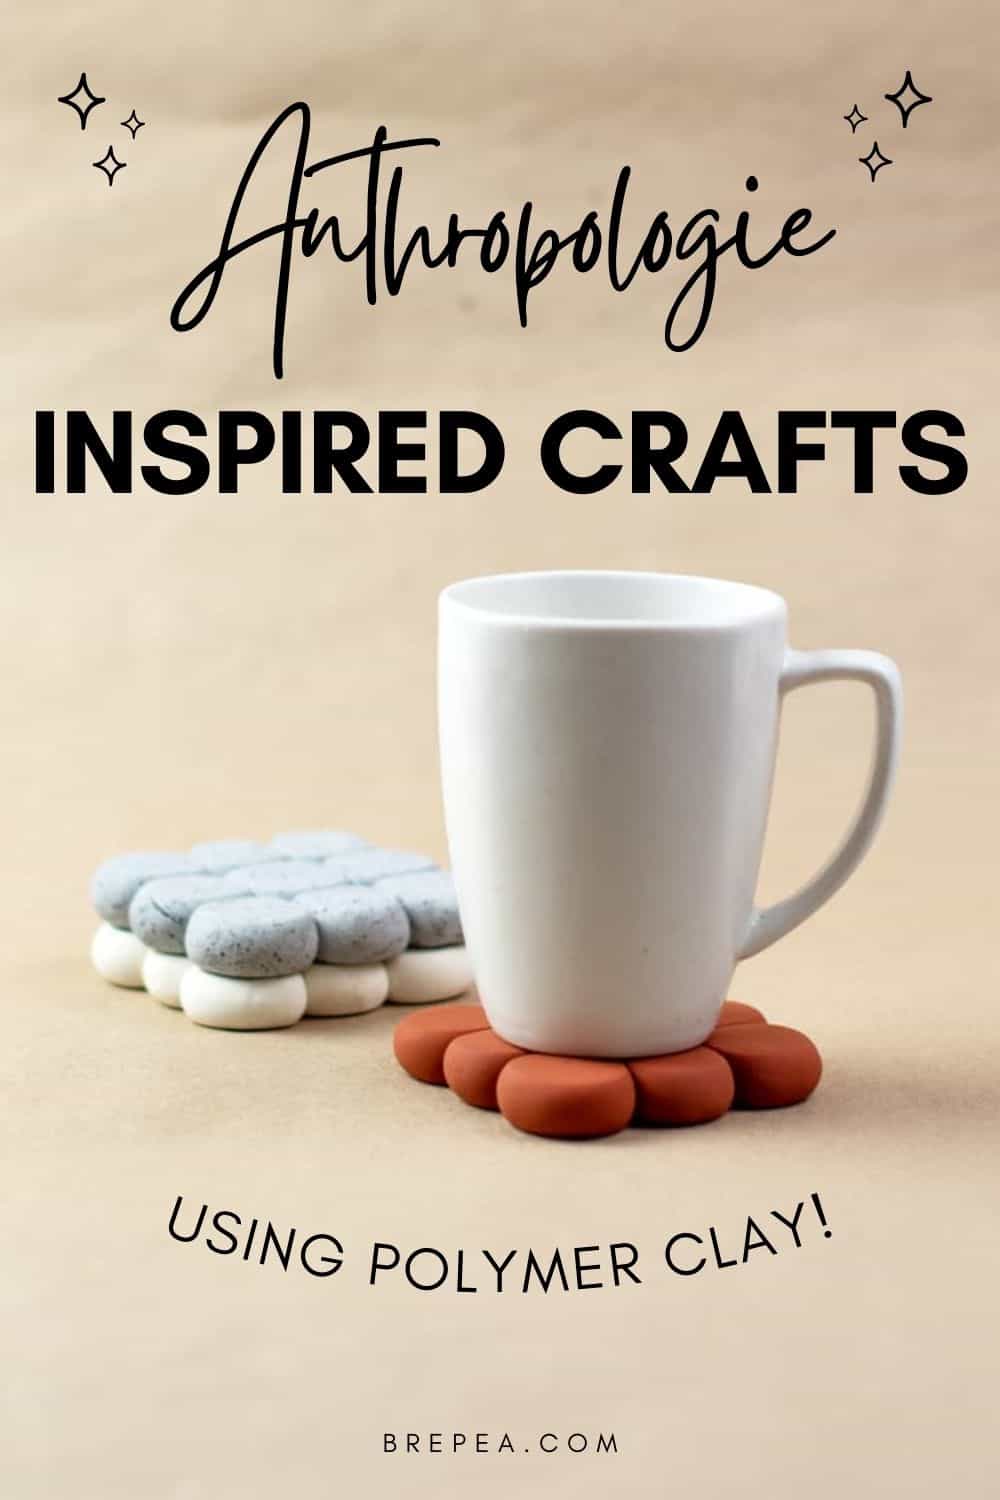
Project #1: Sculptural Polymer Clay Coasters (Anthro-Inspired)
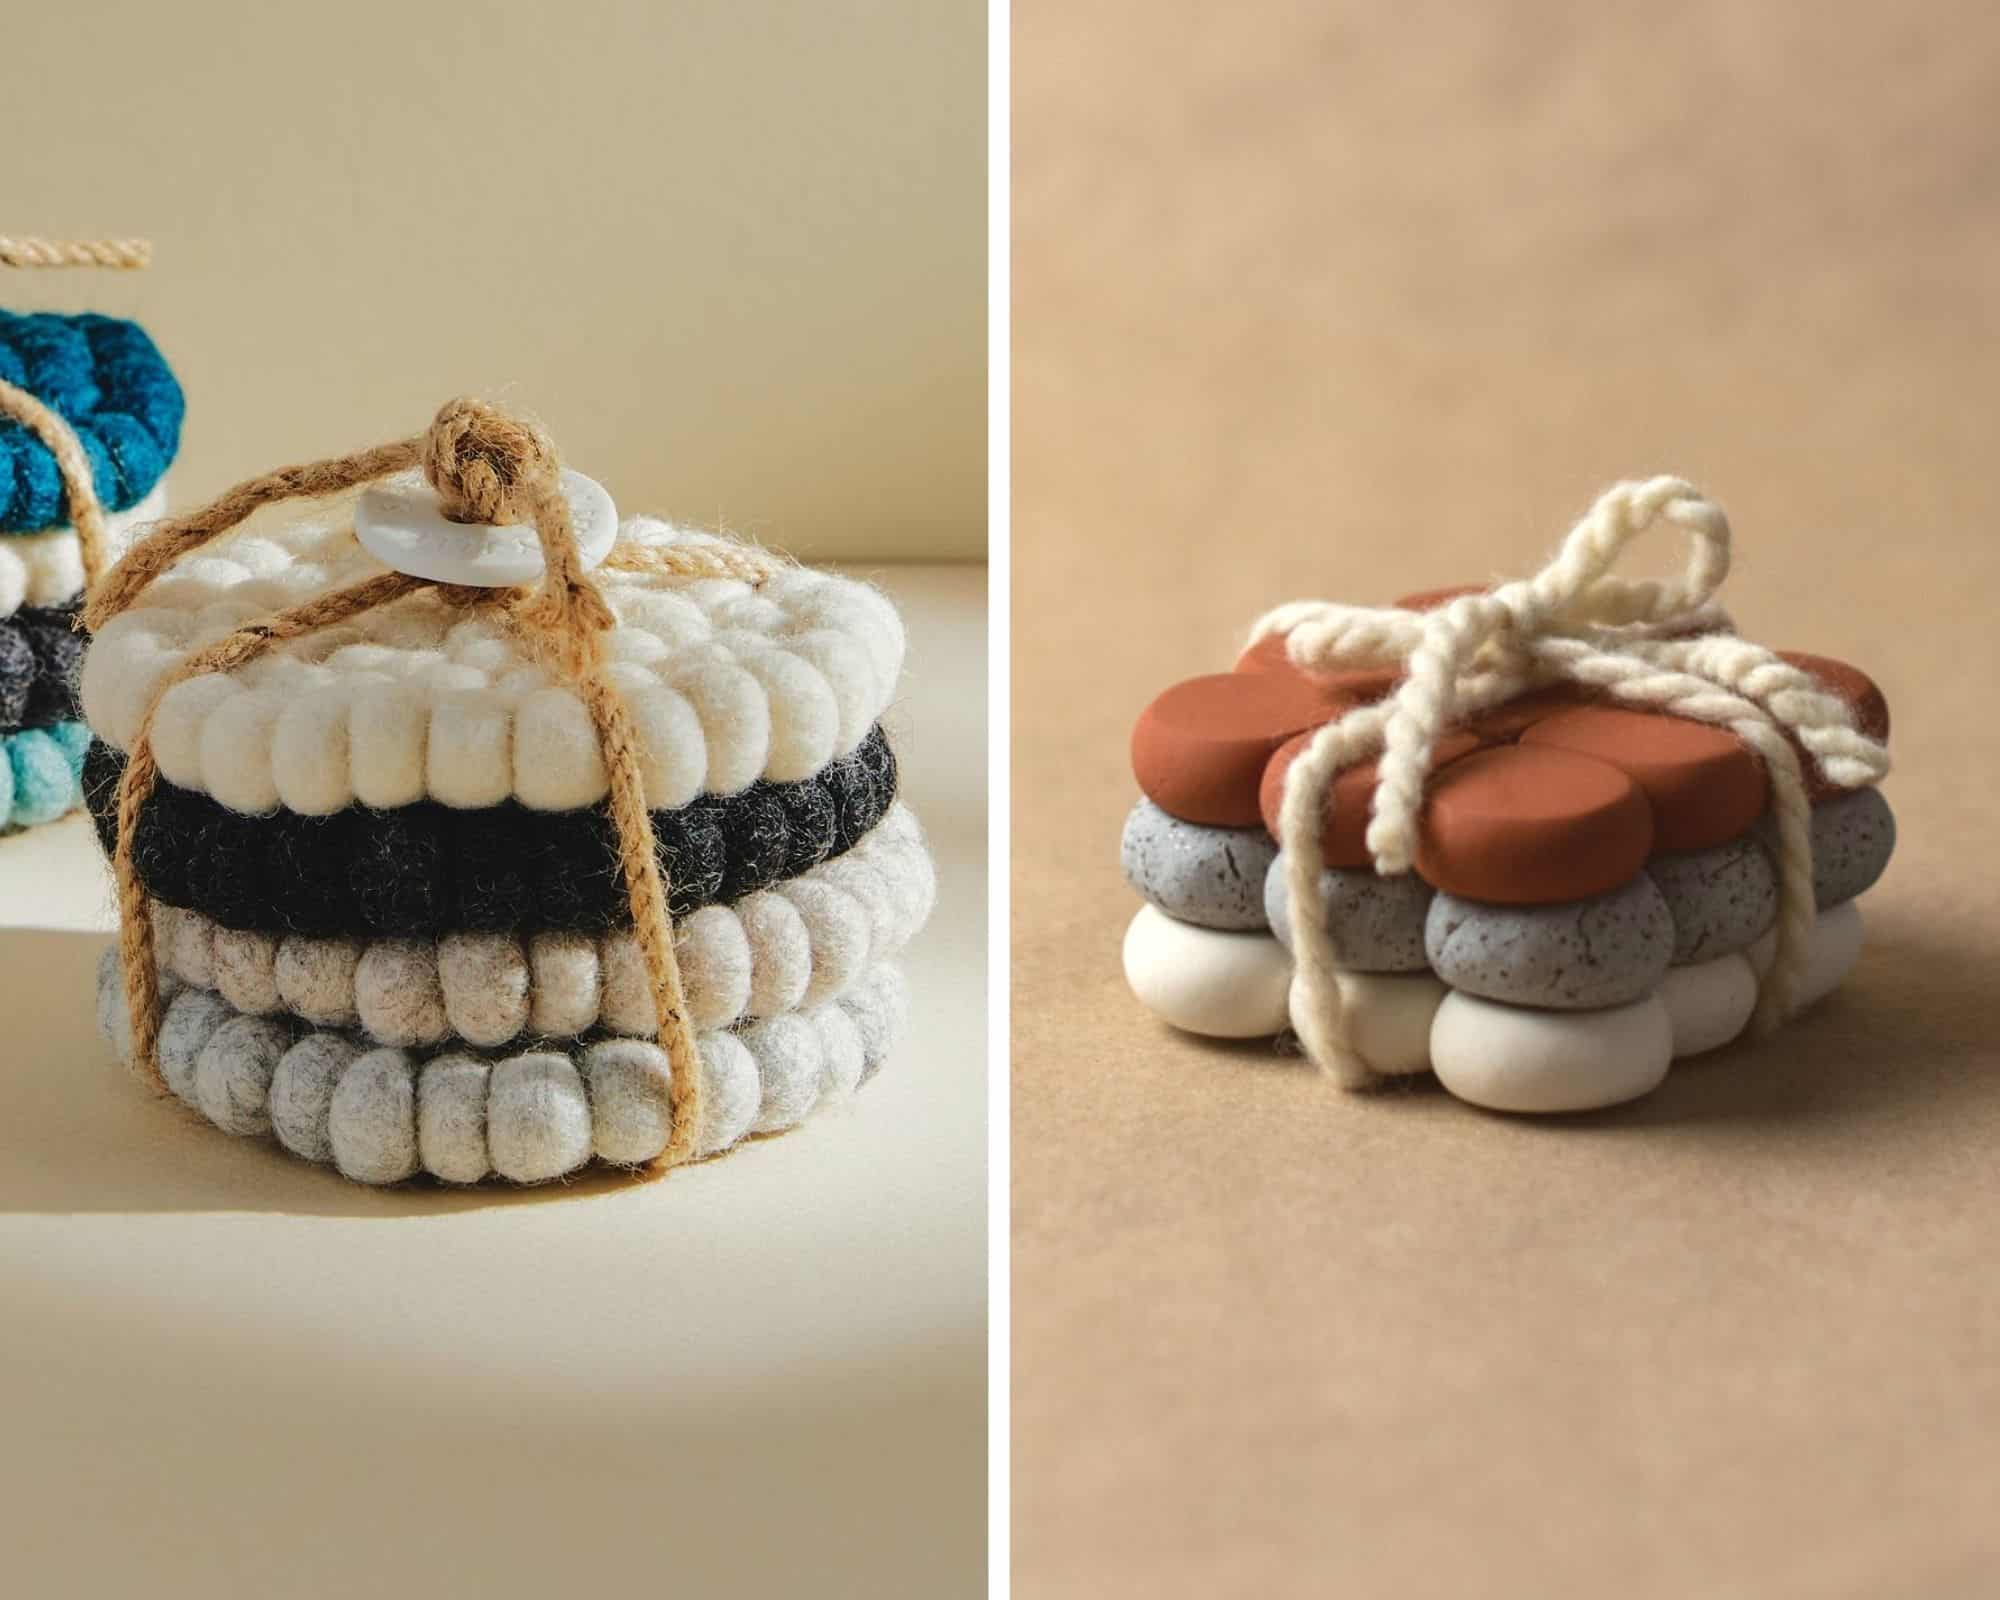
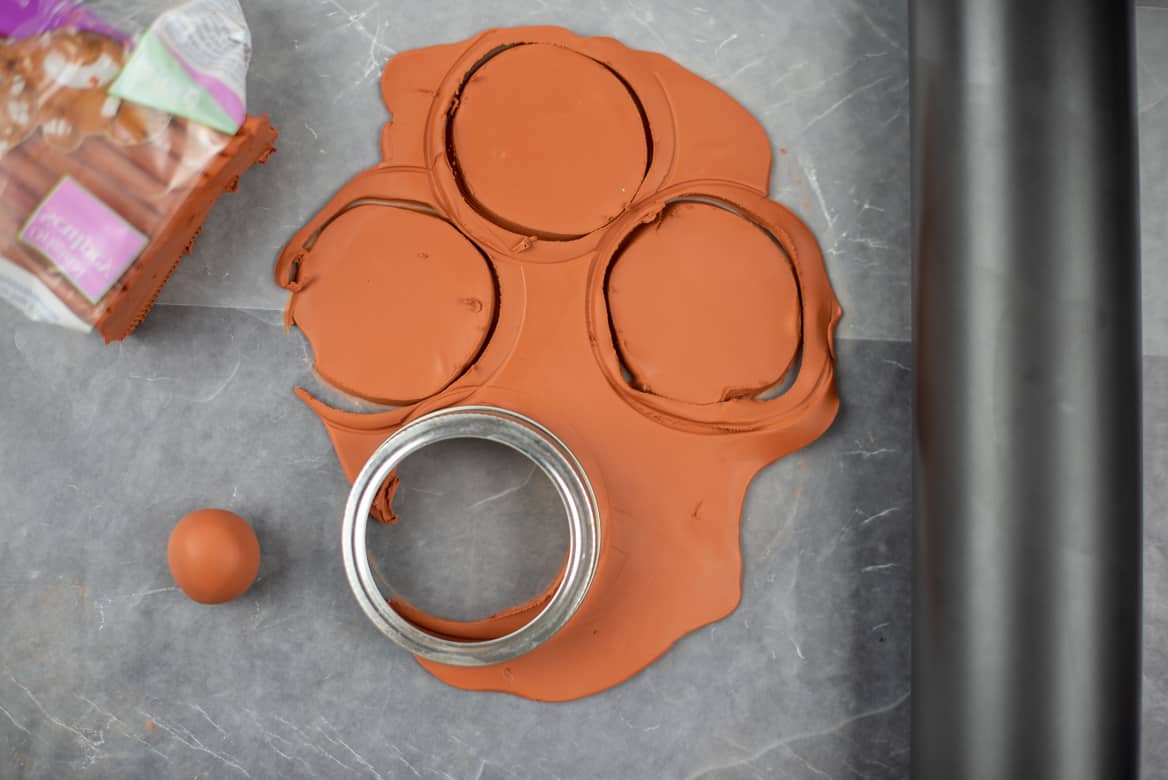
Step 1: Form Even Clay Balls
So that all of my balls are the same size, I cut out circles using a mason jar lid and plastic knife.
Then, after I rolled the clay circle around in my hand to create a ball, they all turned out pretty much identical.
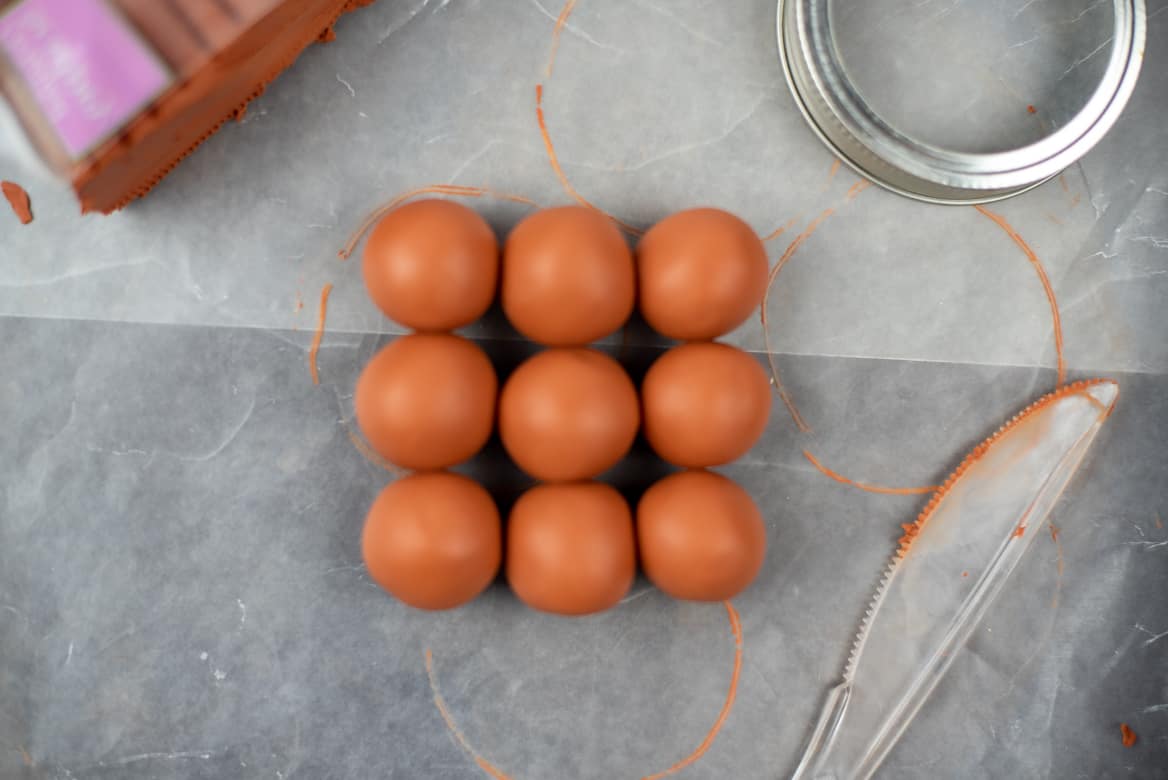
Step 2: Create the Sculptural Square Shape & Flatten for Functionality
I wanted my coasters to be square instead of round, so I made a square out of 9 balls.
Because I am using these for coasters, I wanted the top to be flat enough for a cup or mug to rest on. So, I covered the balls with wax paper and flattened by pressing a plate down on top.
I pressed until the coaster was a little less than 1/2″ thick.
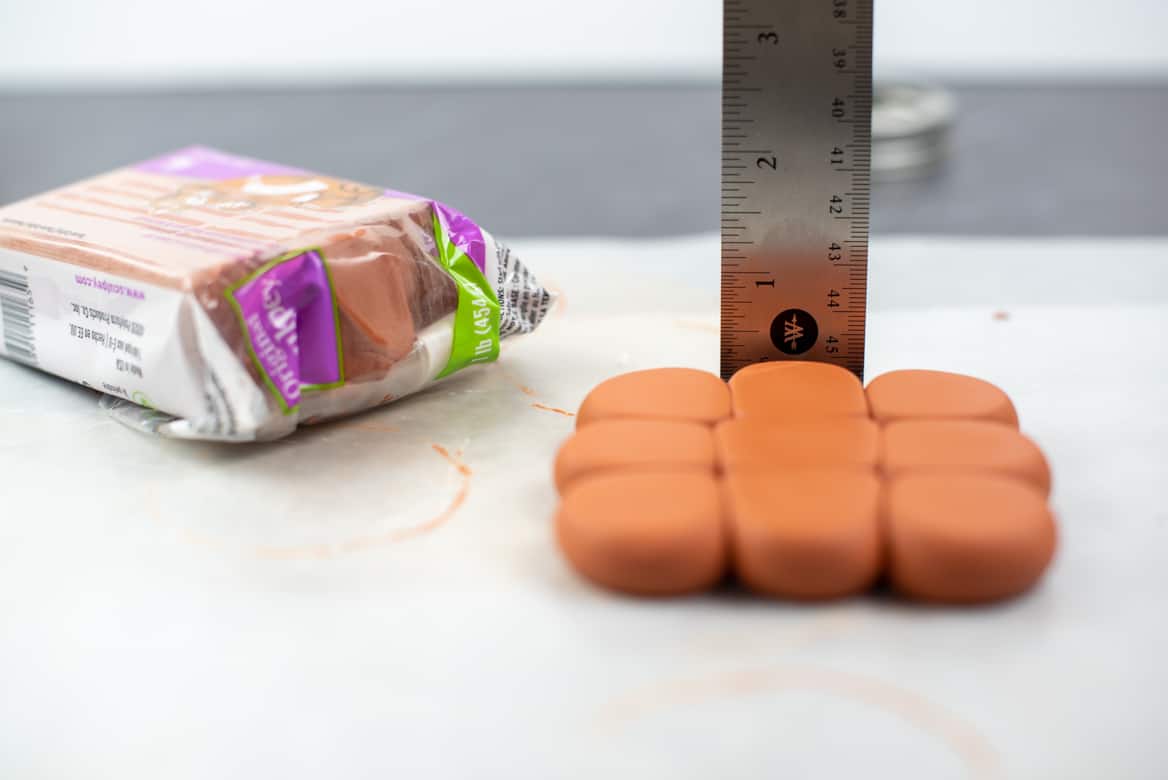
If you’re also using these as a coaster, you’ll want to do this step as well. Feel free to experiment with how flat you press!
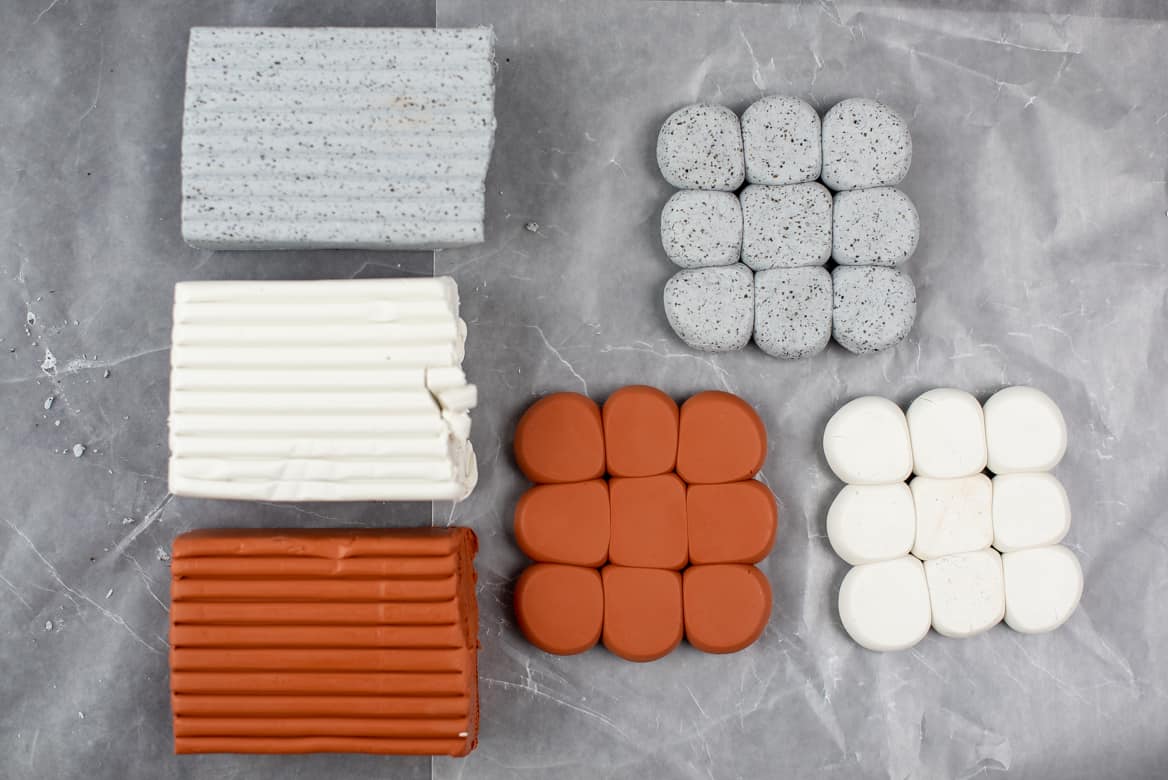
Repeat steps 1-3 for every color of Sculpey you are using.
Pro tip: start with your lightest color first! This will prevent color transfer. I did not do this and even though I washed my hands several times thoroughly, some of the terra cotta color came off on the white while I was shaping the balls.
Step 3: Bake Properly
Place the coasters on a parchment paper lined baking sheet and bake at 275 for 15 minutes per 1/4 inch thickness.
My coasters were about 1/2″ thick, so I baked for 30 minutes.
Sculpey is safe and non-toxic, so you can bake it in your home oven without any worry!
Step 4: Cool + Optional Sanding
Once your timer goes off, take them out of the oven and let them cool on the baking sheet so they stay nice and flat.
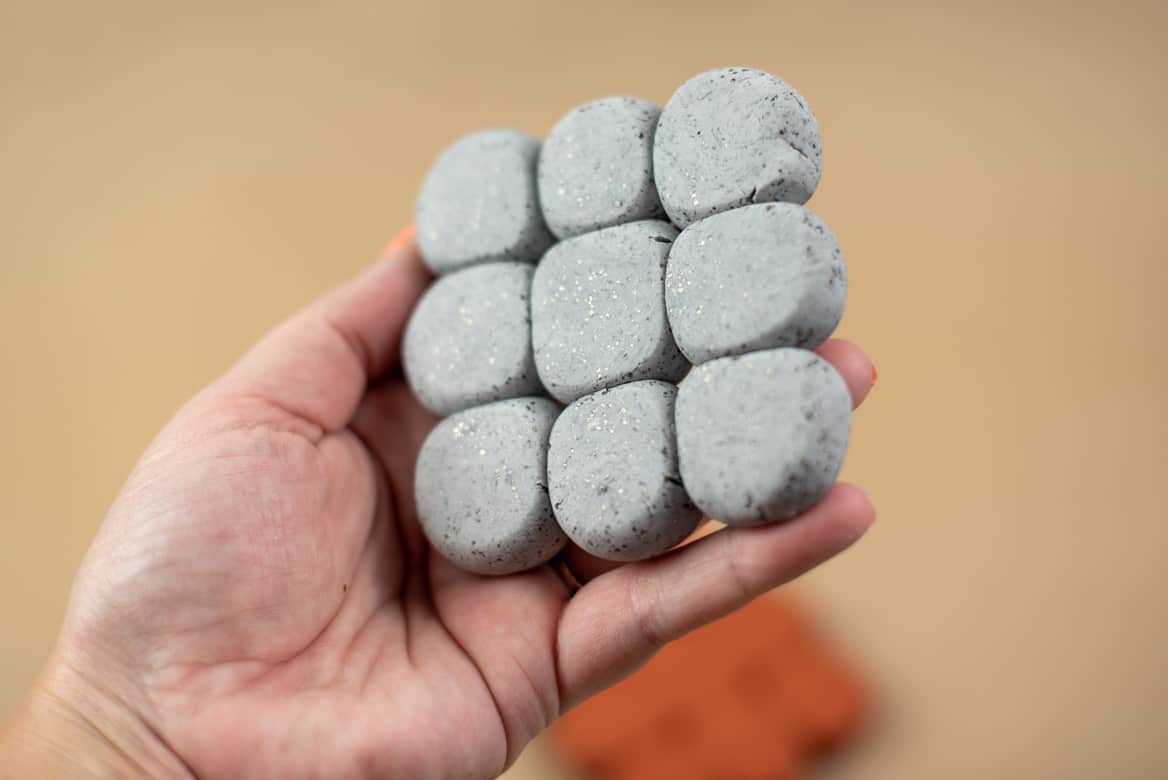
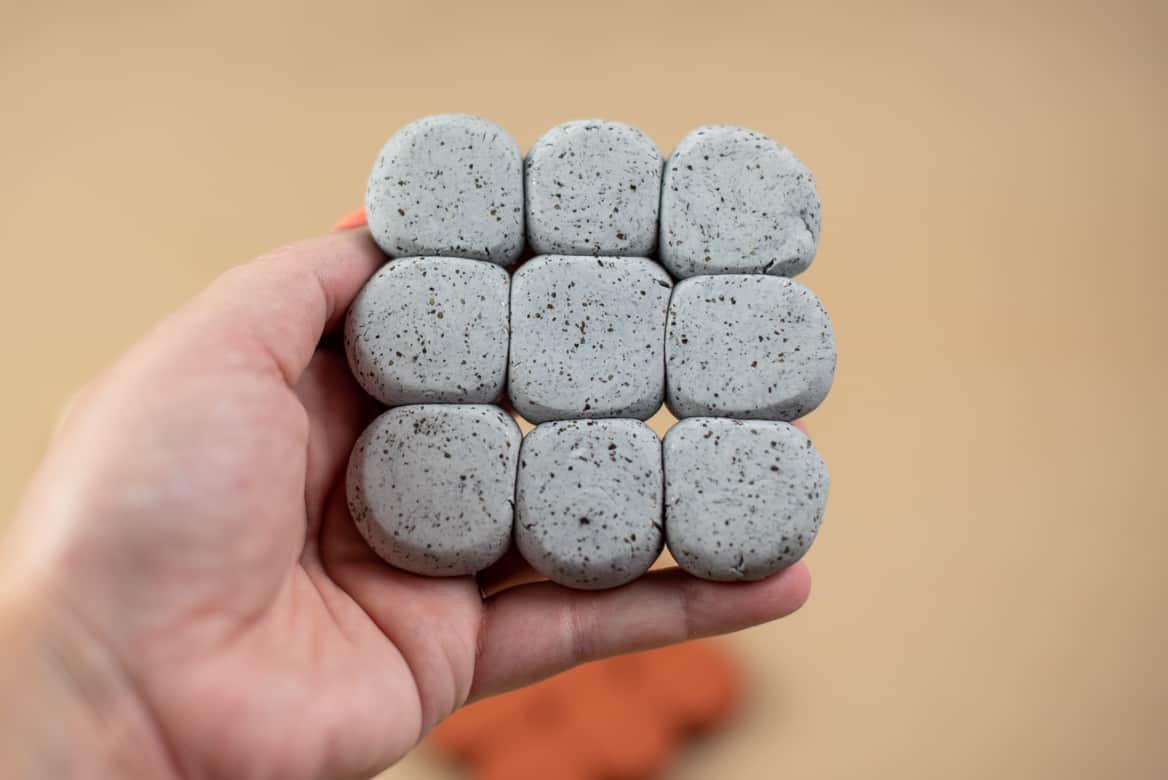
Once completely cool, if you want to make your coasters extra smooth you can gently buff them with the 220 grit sandpaper.
Cost Breakdown
Anthropologie Version: $24.95 (set of 4)
My Version: ~$8 total (approx. 1/4 block of Original Sculpey® per coaster
Savings: ~$17
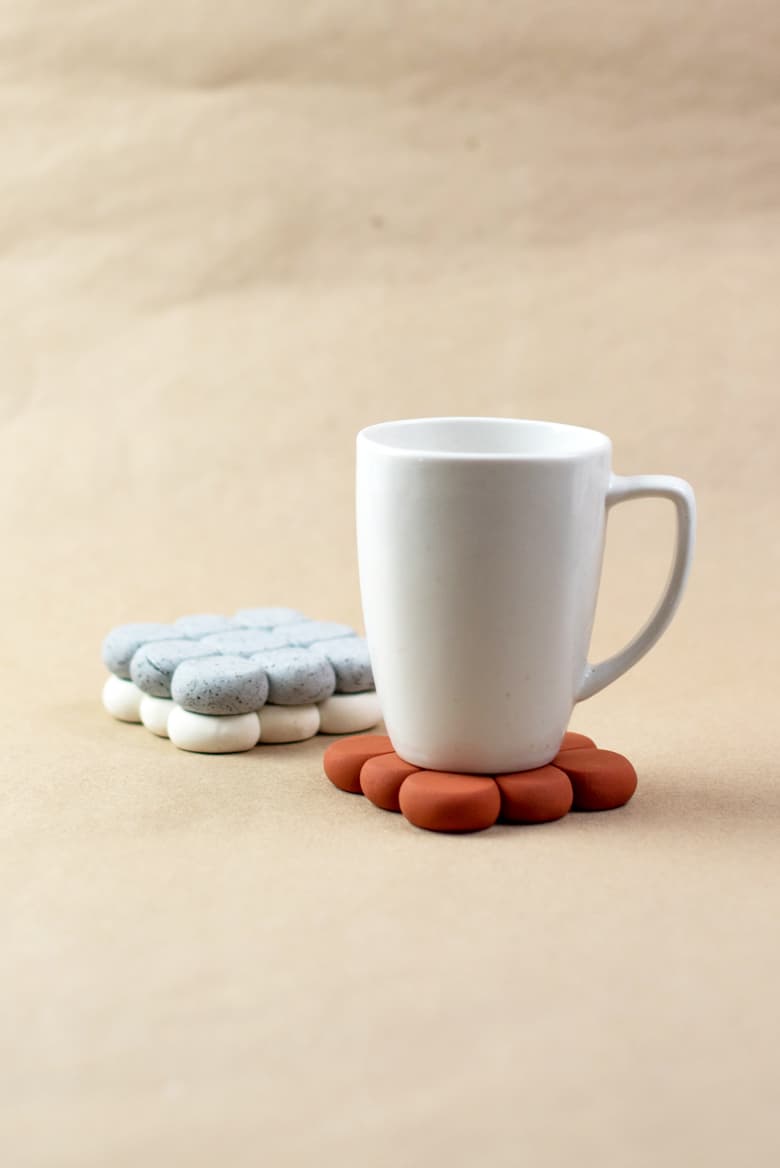
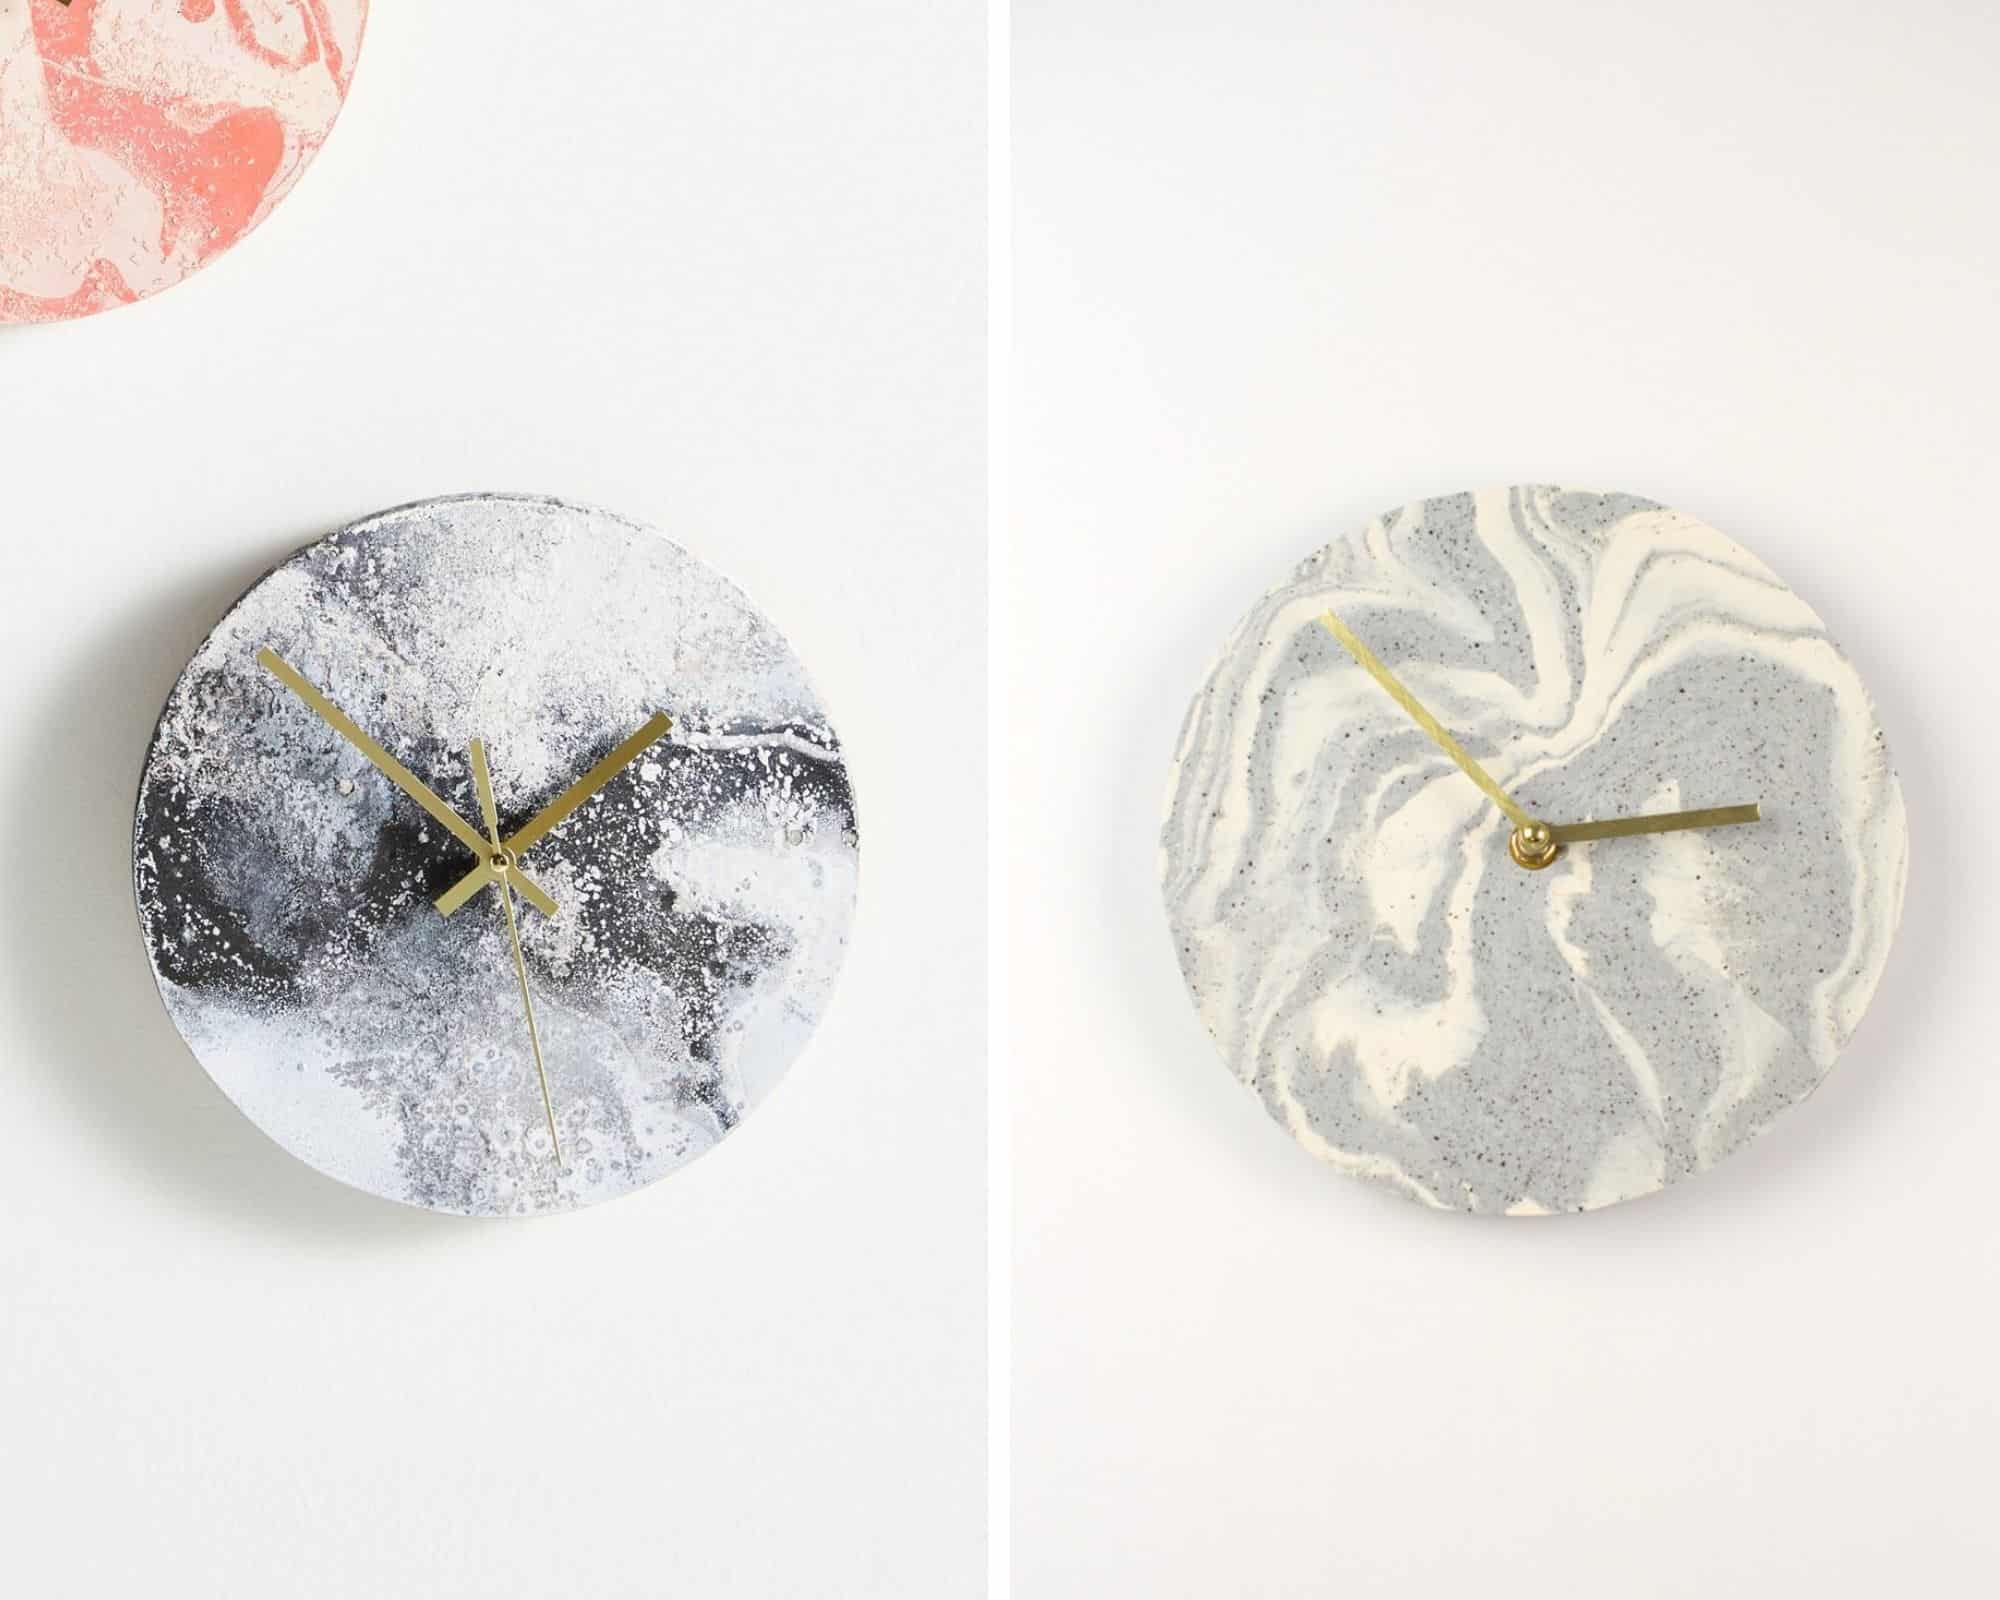
The granite Sculpey has flecks that reflect light which give it a really cool effect.
Because of the colors of the clay I think this kind of looks like half of a neapolitan ice cream sandwich which I’m not mad at!

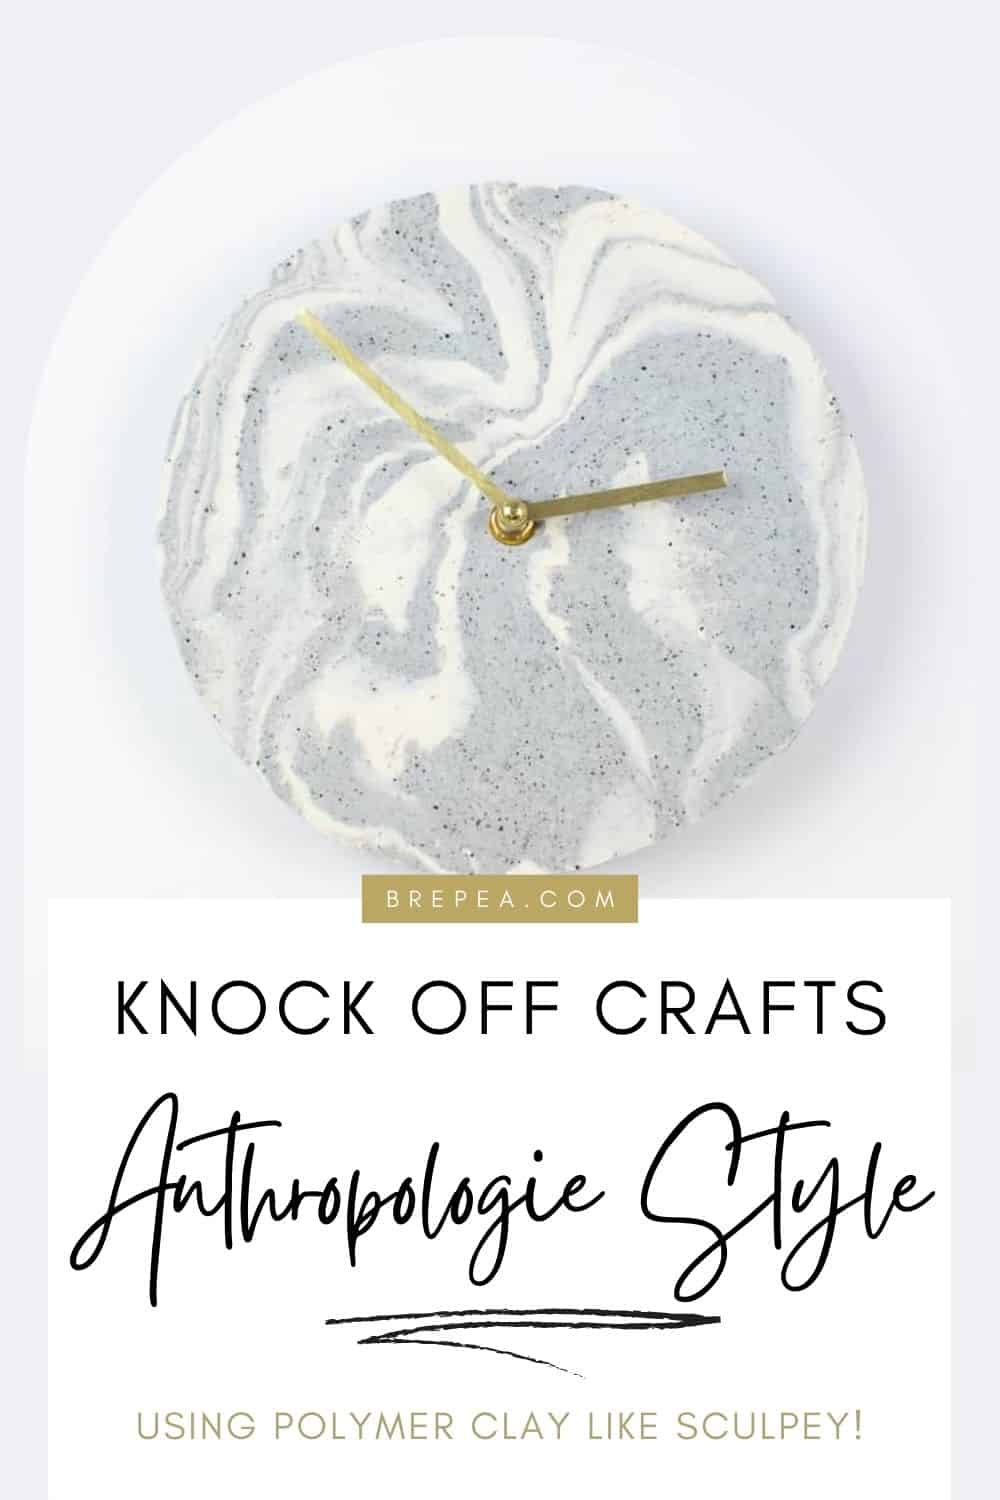
Project #2: Marble Polymer Clay Wall Clock Dupe
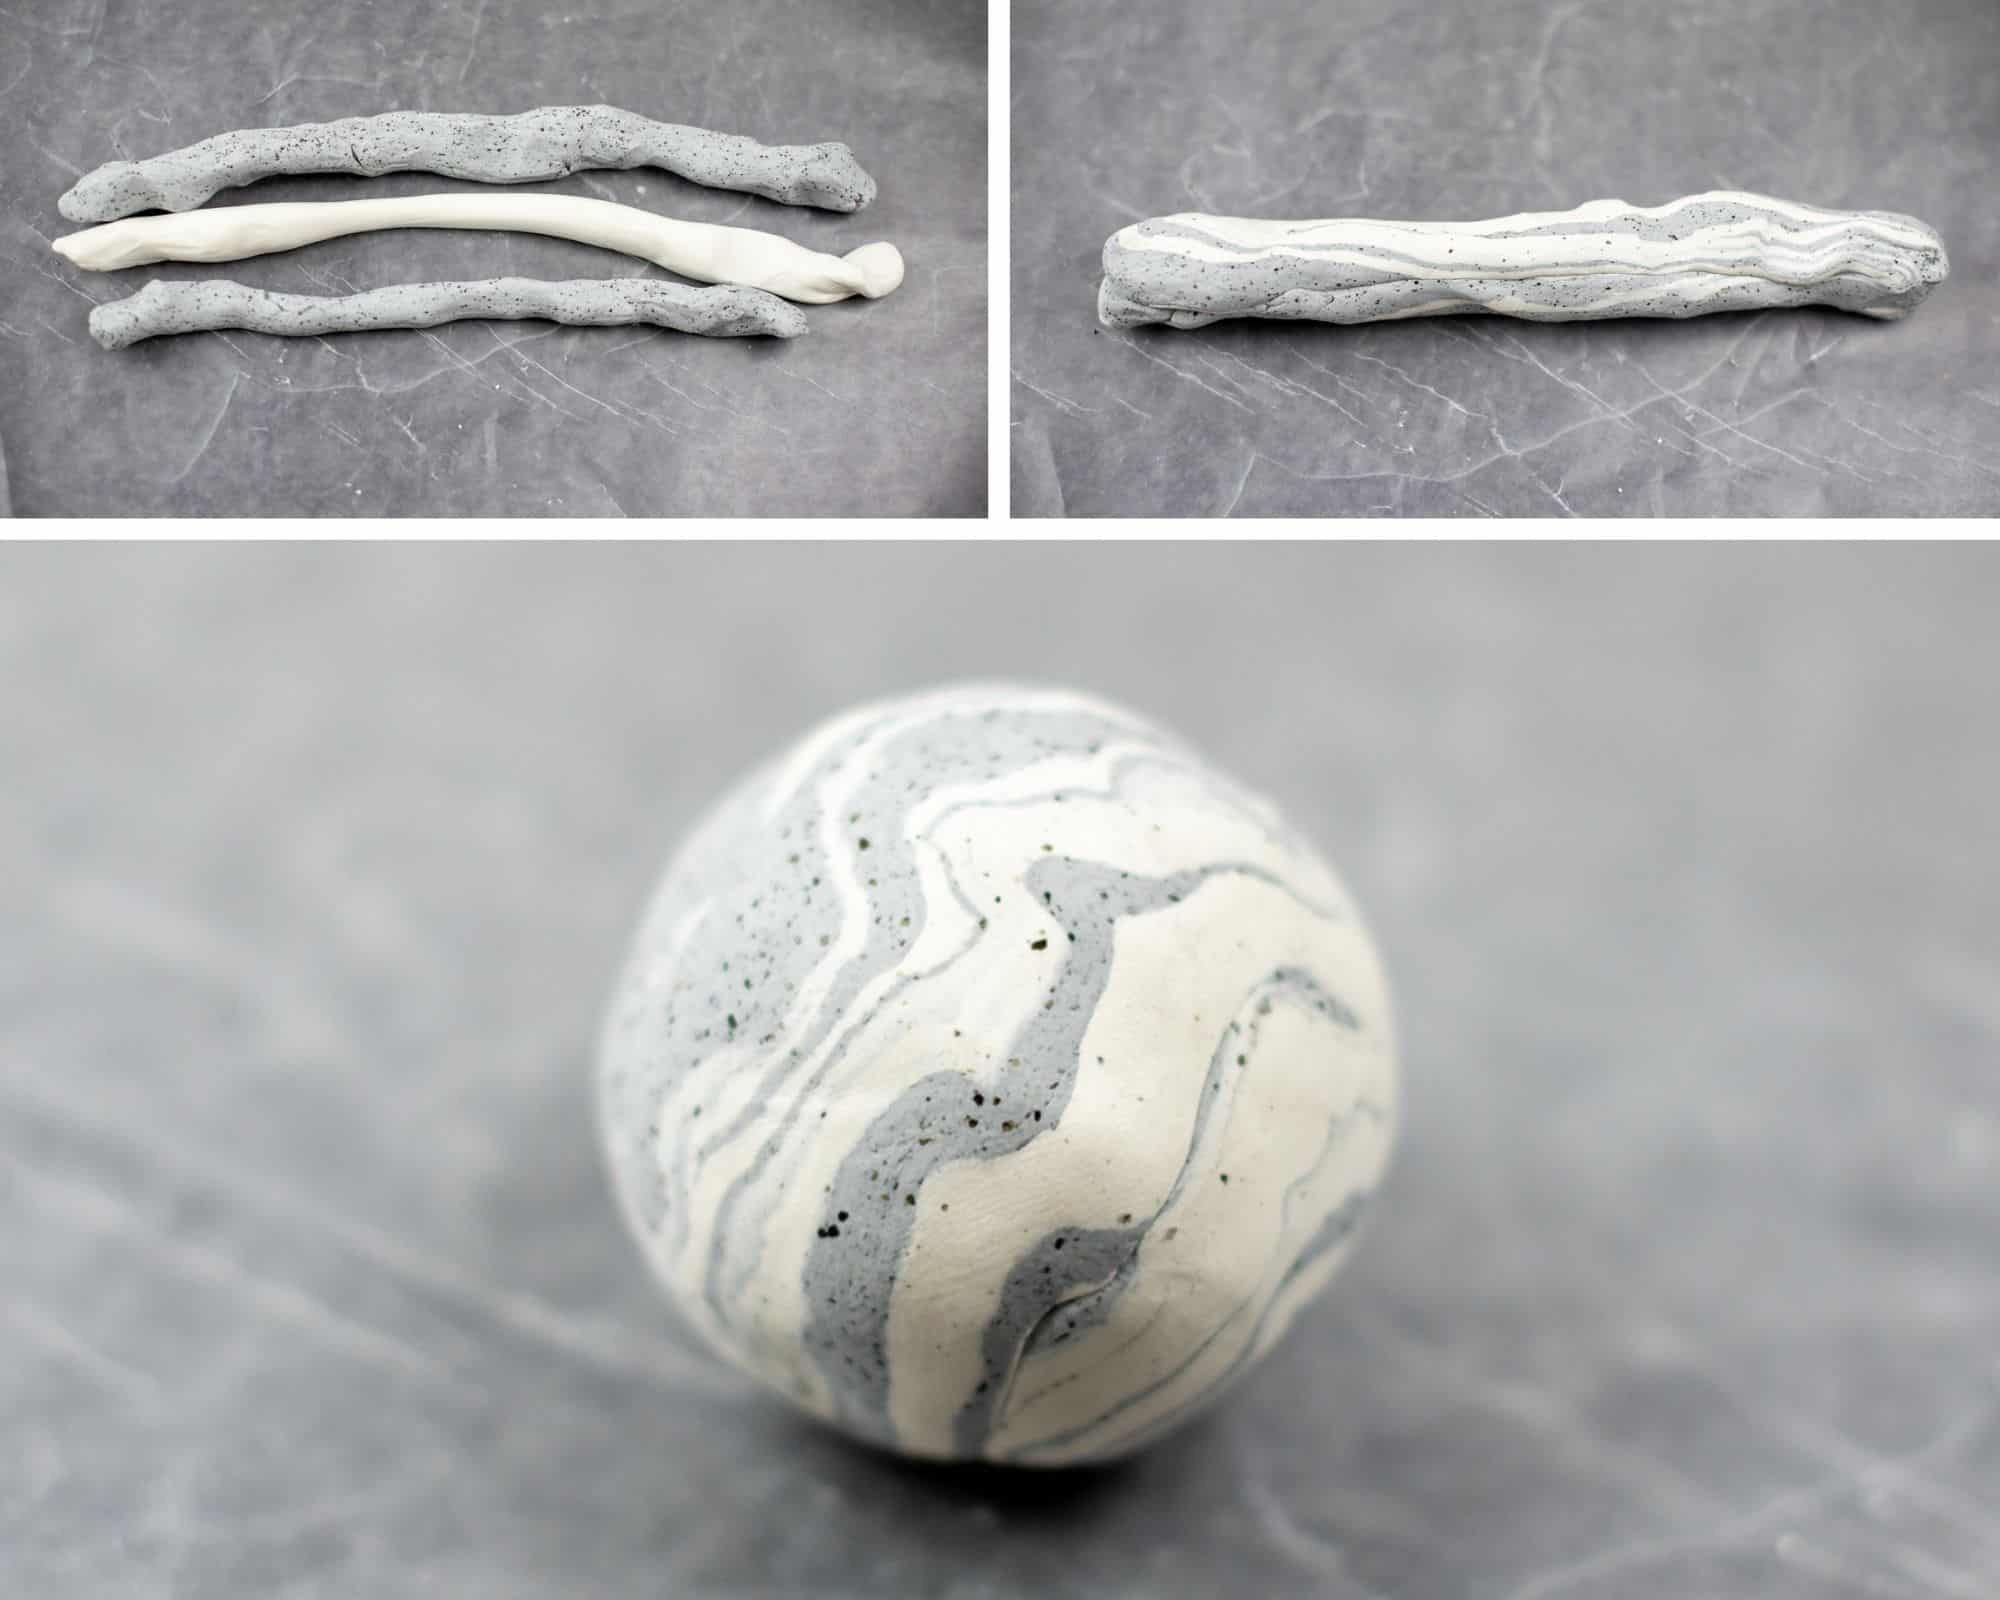
Step 1: Create the Marble Effect
Using Sculpey® in Granite and White (the granite gives that subtle stone fleck look), roll out a few ropes. If you want more dramatic veining, you can also try the variety pack!
I wanted to see more of the granite than white, so I rolled out 2 ropes of granite with 1 rope of white.
Then, wind them around each other and blend them together.
Finally, fold the large rope in half a couple times and then roll into a large ball.
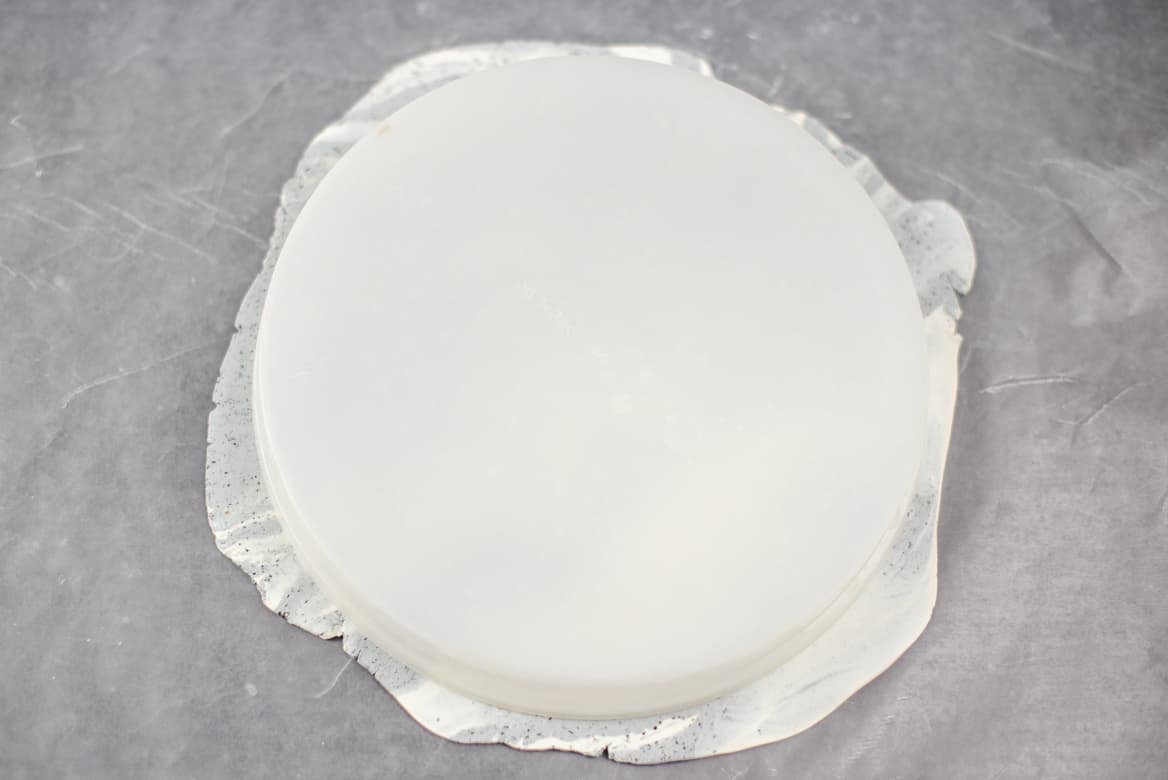
Step 2: Roll & Cut the Clock Face
Press the ball flat using your hands, and then roll out until approximately 1/2-1/4″ thick using a rolling pin.
Then, using a large circle as a template (I used a big lid for a bowl) cut out your clock face circle.

Step 3: Bake
Bake at 275 for 15 minutes per 1/4″ thick. My clock was about 1/4″ thick, and in the end it baked for a total of 20 minutes.
When your timer goes off, take it out of the oven and let it cool on the sheet so that it stays flat.
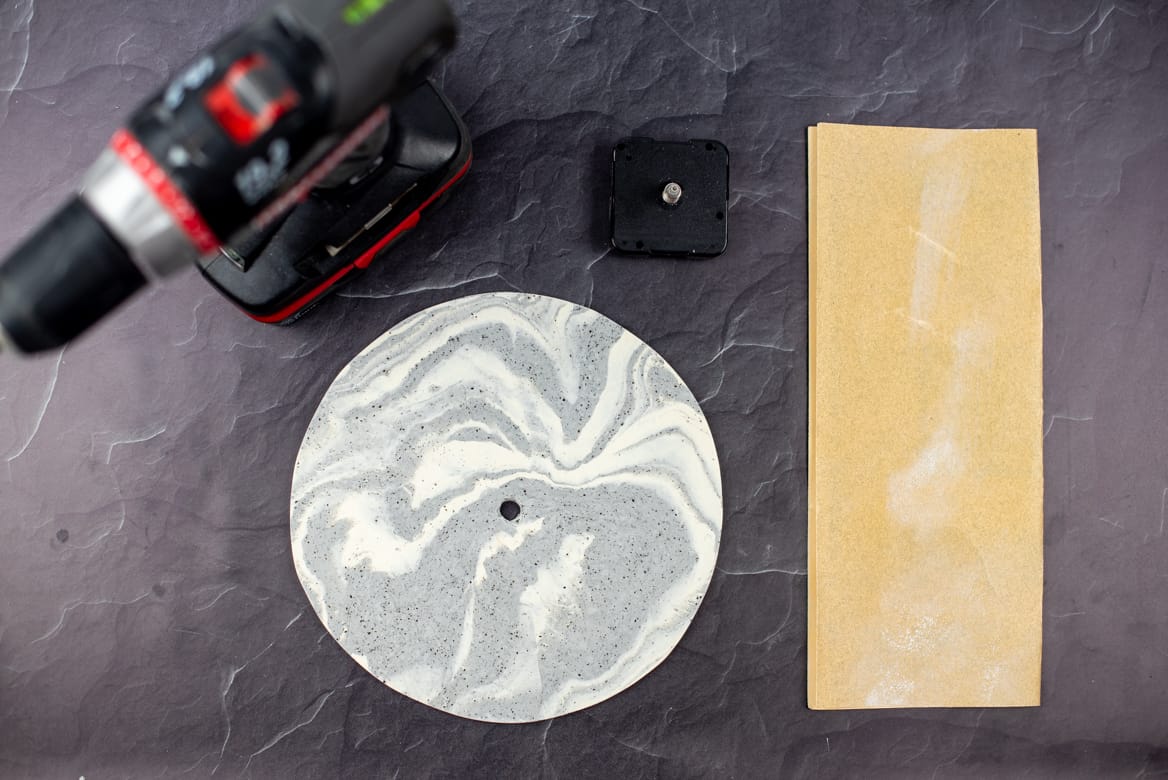
Step 4: Drill the Center Hole
Using a basic cordless drill and a small drill bit set, drill a hole out of the center of your circle. Go through the front of the clock for a cleaner finish.
I first drilled a pilot hole with a 1/4″ bit and then finished with a 3/8″ bit. The size hole you need will depend on the mechanism you are using.
You can also sand the edges and face down using fine 220 grit sandpaper for a perfectly smooth finish.
Step 5: Attach the Clock Mechanism
I used a mechanism from an old clock I had. If you don’t have one from an old clock, you can use an inexpensive clock mechanism kit (they come with everything: shaft, washer, nut, hands).
Slide the threaded shaft of the clock mechanism through the hole from the back of the clock.
Then, from the front, add the washer (if included), screw on the retaining nut, and tighten gently by hand. Don’t overtighten, snug is perfect.
Follow your mechanism’s instructions to attach the hands in this order:
- Hour hand
- Minute hand
- Second hand (if included)
Press straight down an d make sure to avoid bending the arms.
Before inserting the battery, gently rotate the hands to make sure they aren’t touching each other.
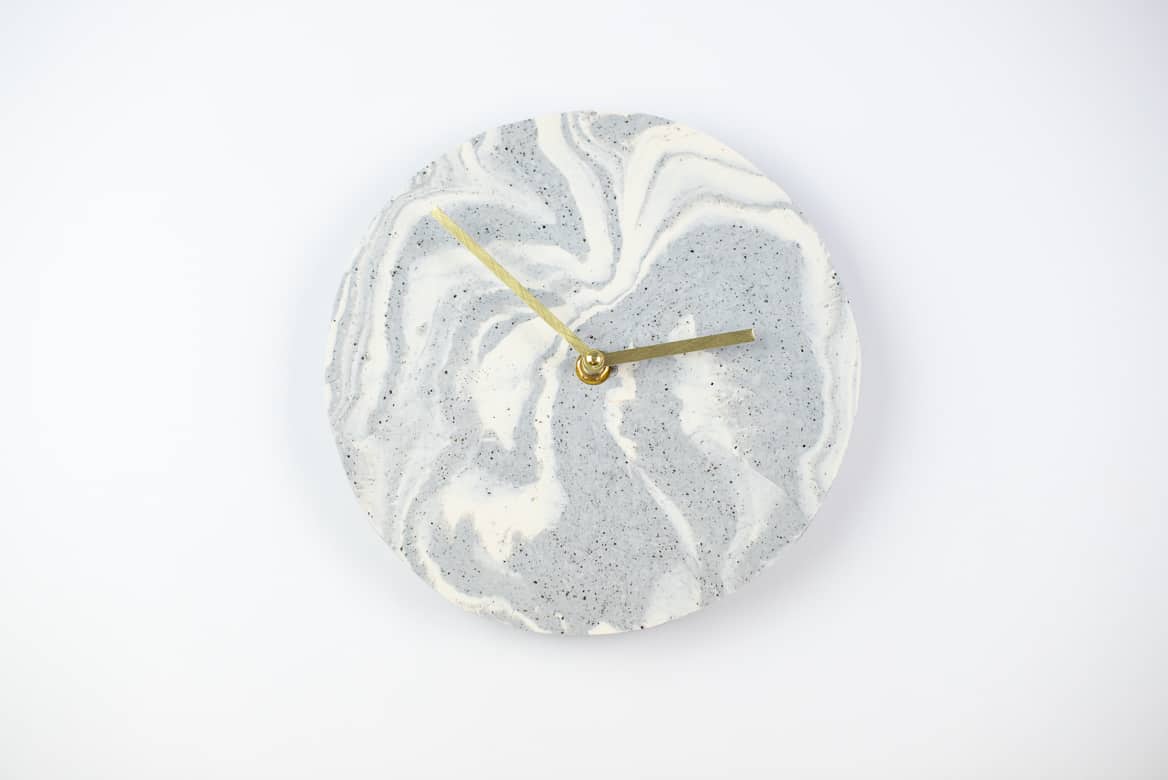
Cost Breakdown
Anthropologie Version: $98
My Version: ~$8 (plus clock kit if needed)
Savings: ~$90
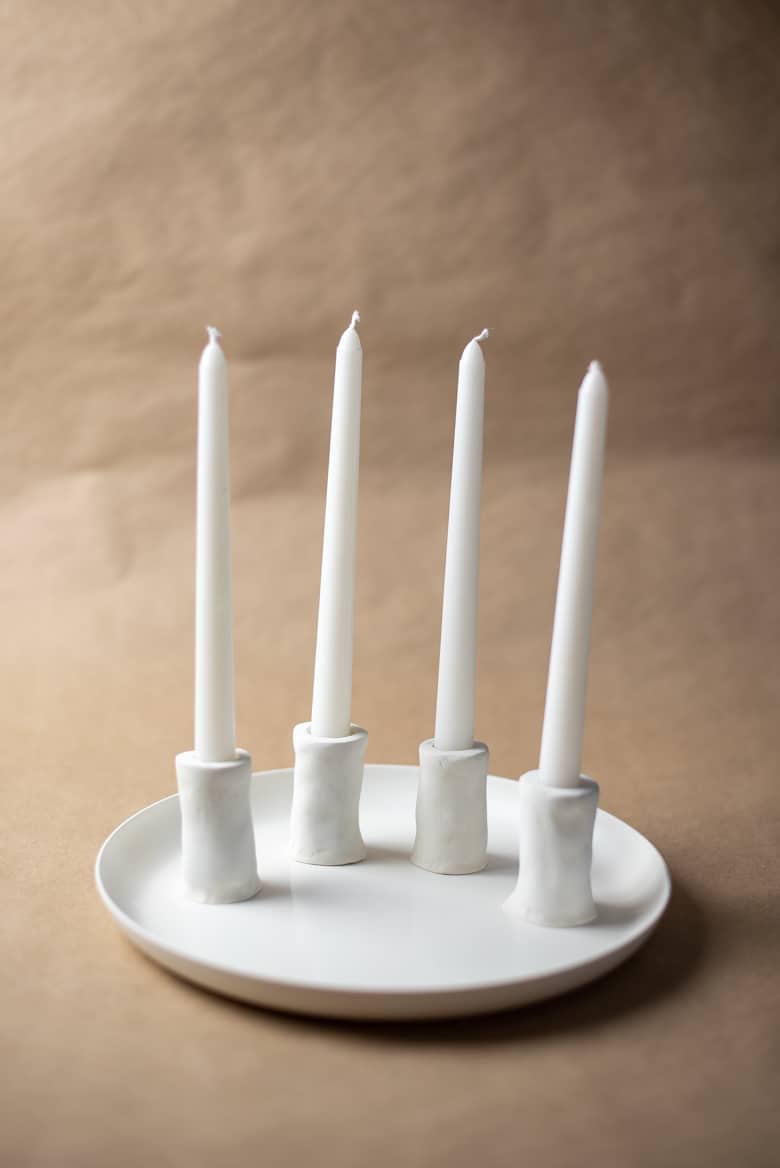
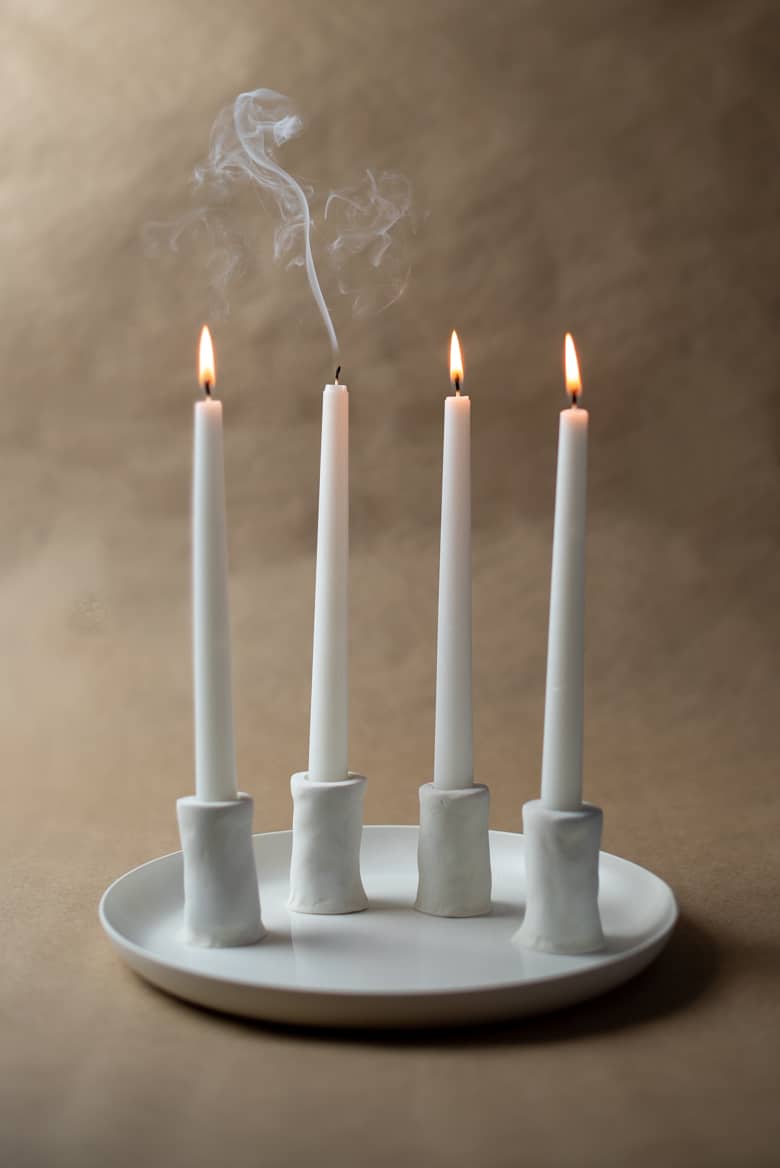
Project #3: Sculptural “Franka” Inspired Candle Holder
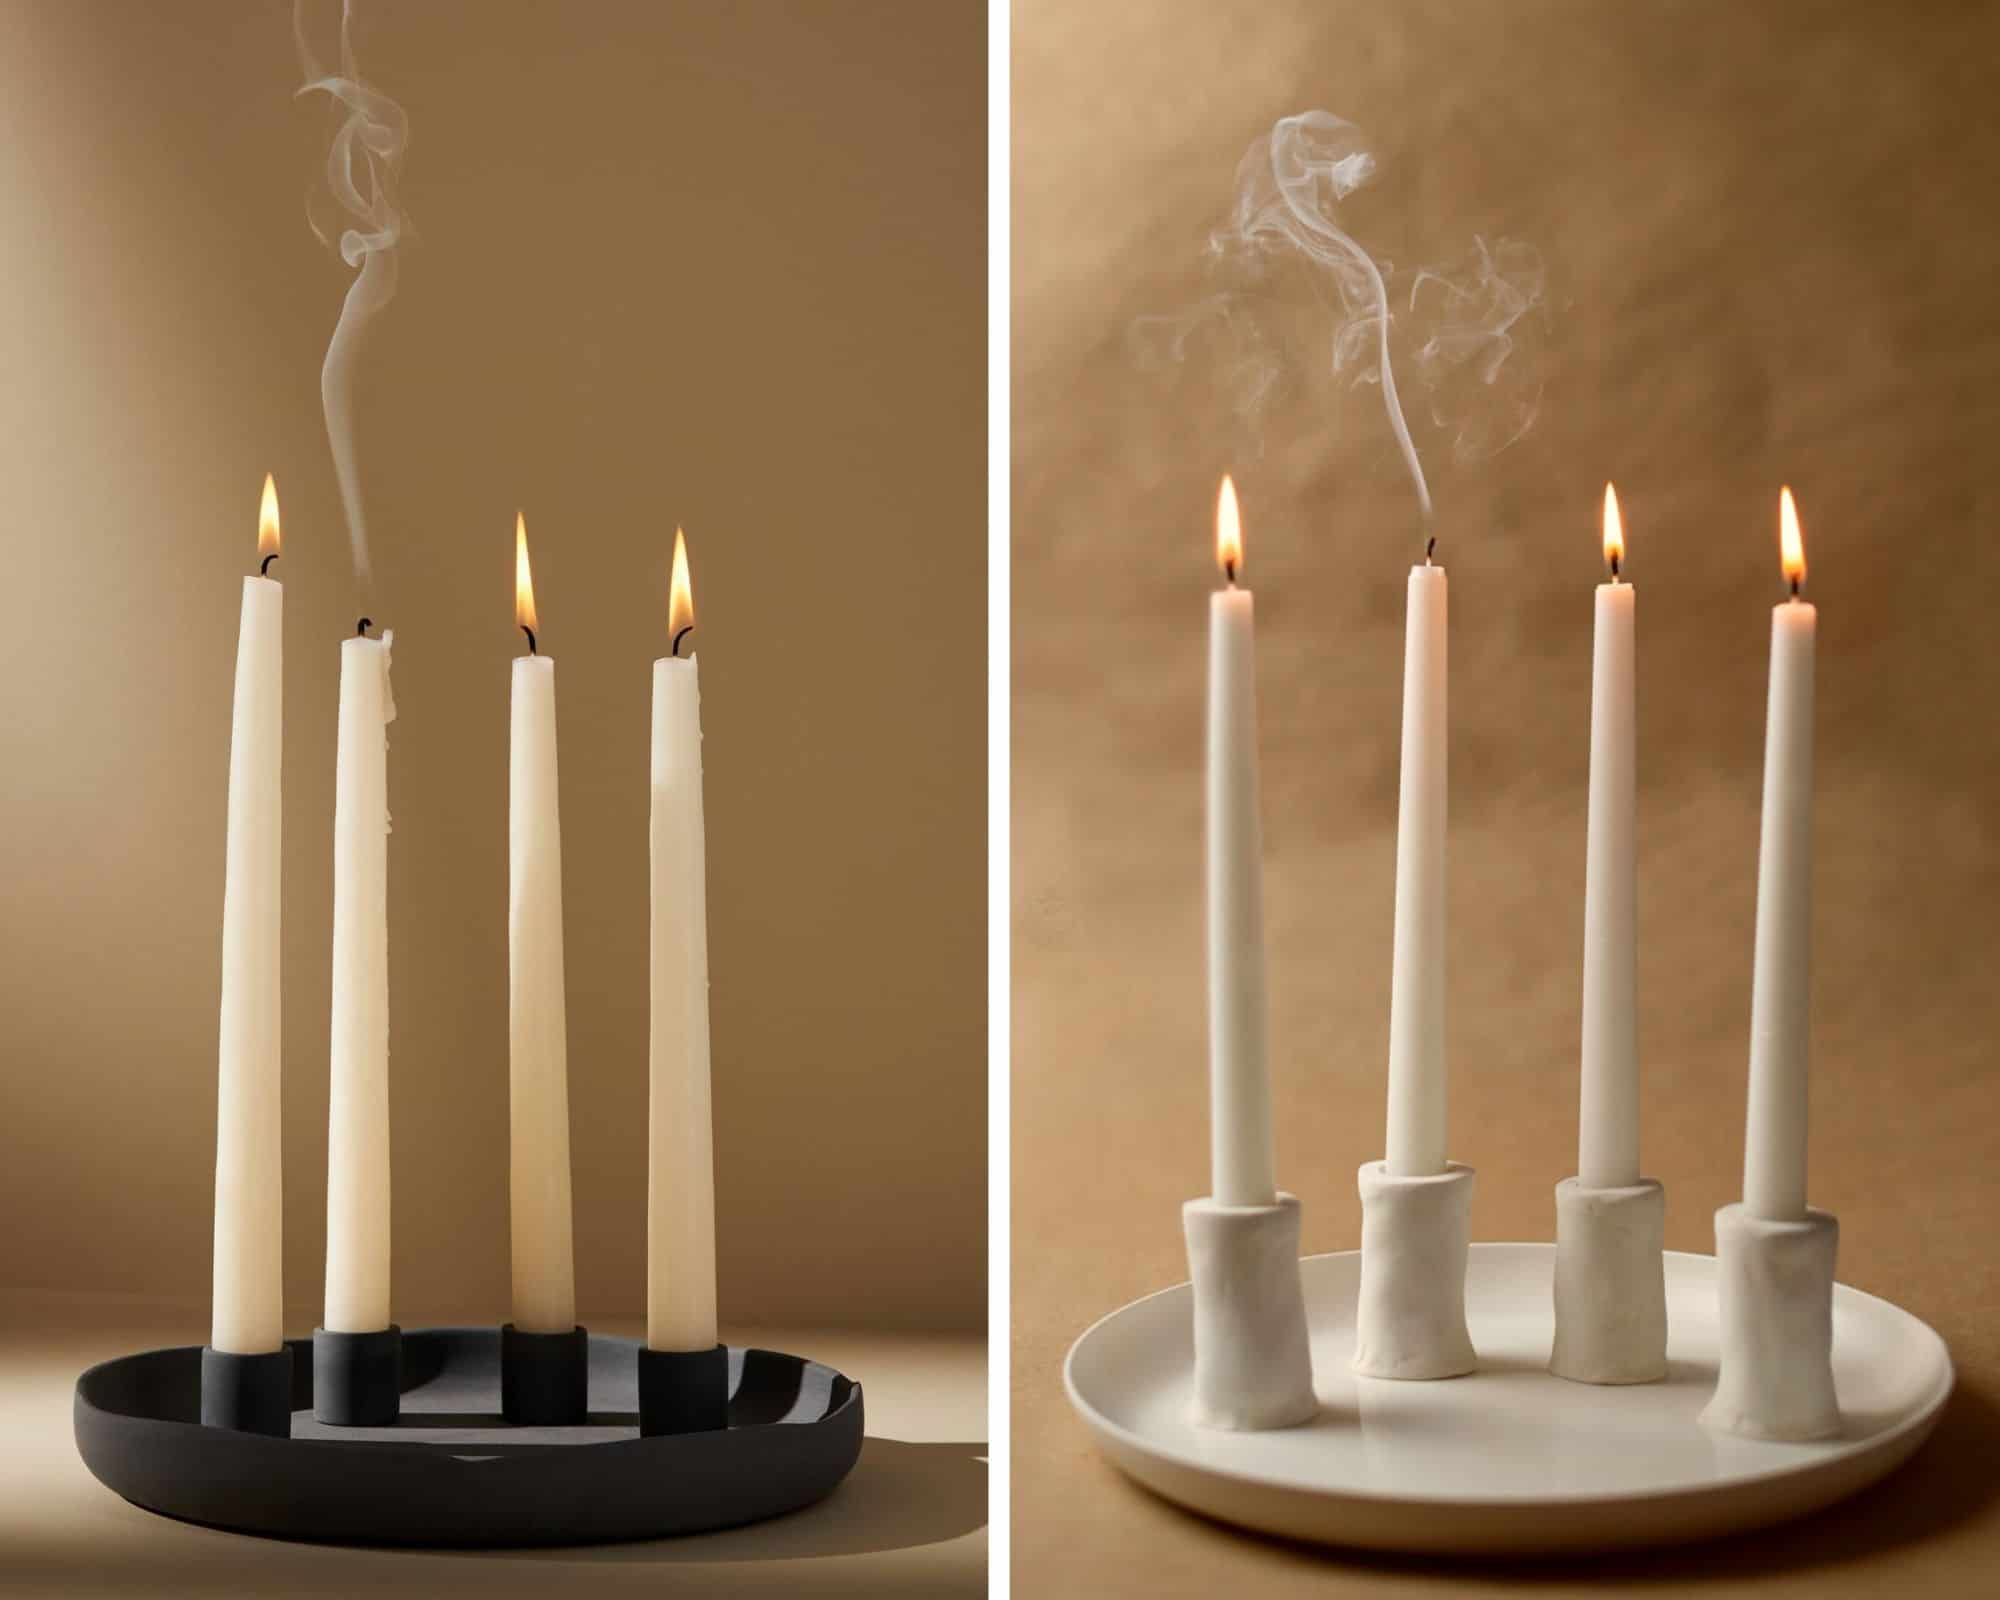
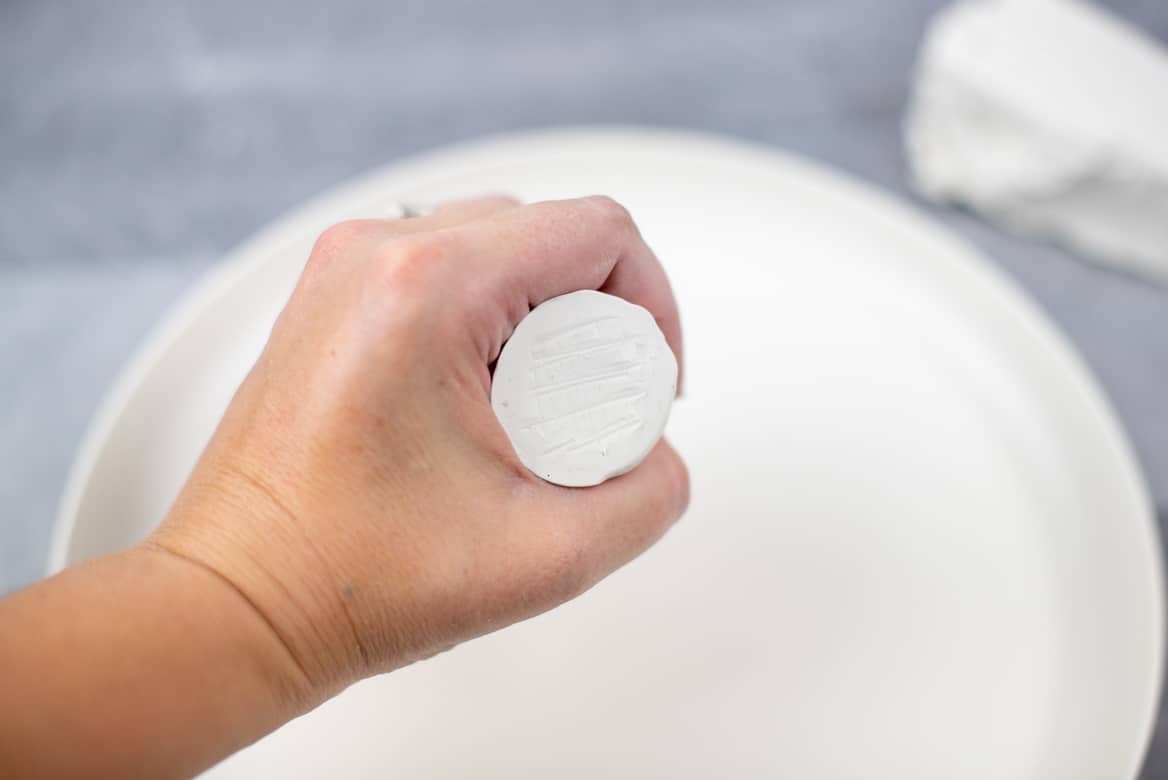
Step 1: Form the Bases and Shape Around Taper Candles
Make four equally sized balls for your candle holders. My balls were about 1.5″ wide.
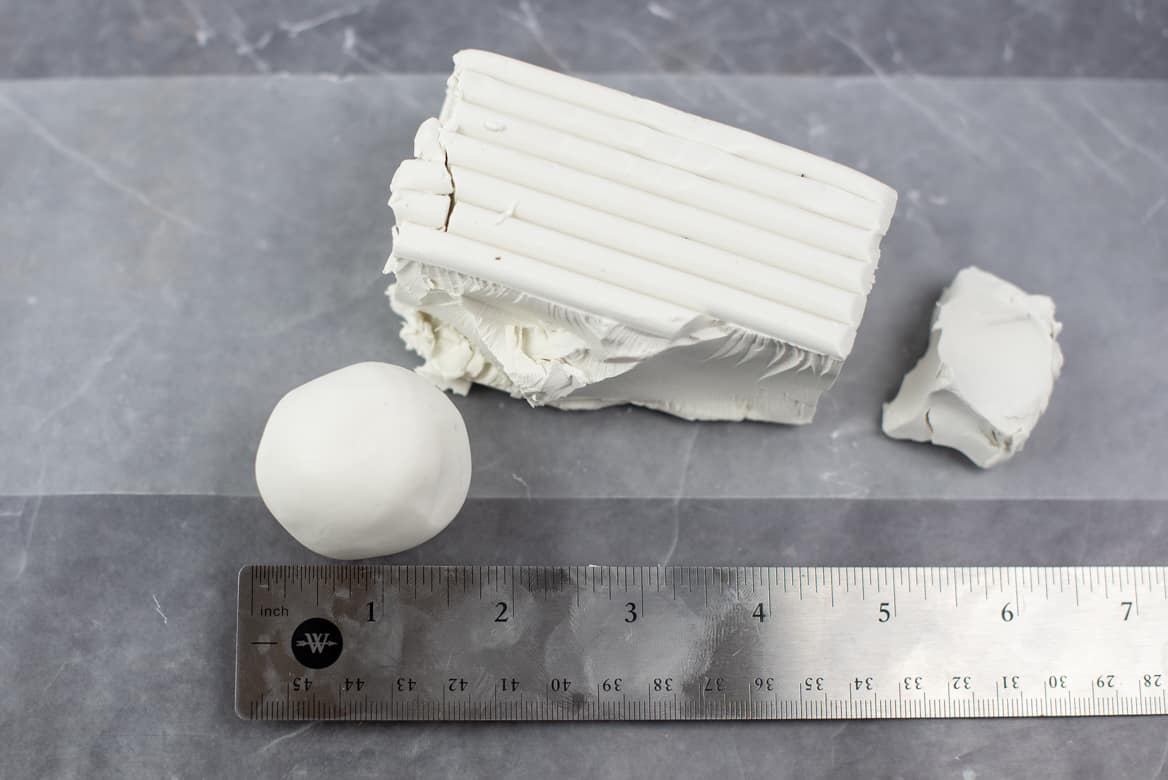
Dust the bottom of a taper candle with a light coat of cornstarch to prevent the clay from sticking. Then, gently form the ball of clay around the bottom of the candle.
I measured to make sure each of my holders was about the same height. I made mine higher than the inspiration photo because I was worried the candles might fall over if the holders were too short.
Do your best to keep the clay as smooth and even as possible.
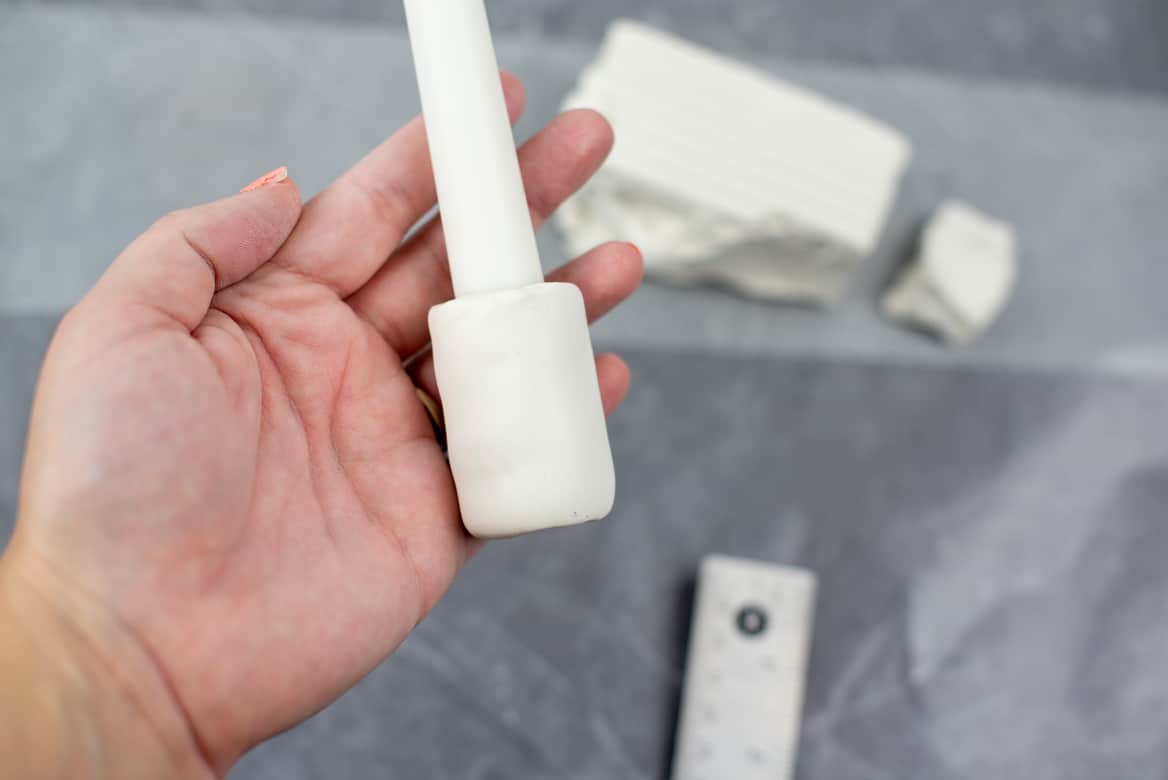
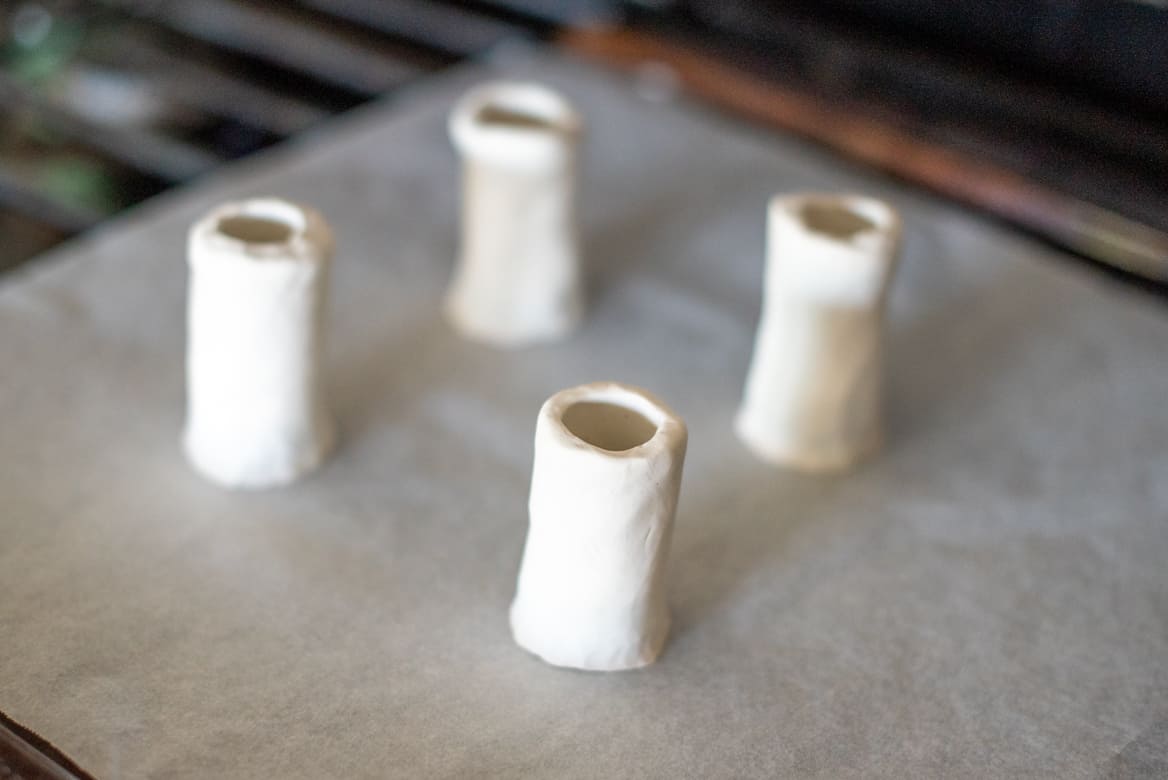
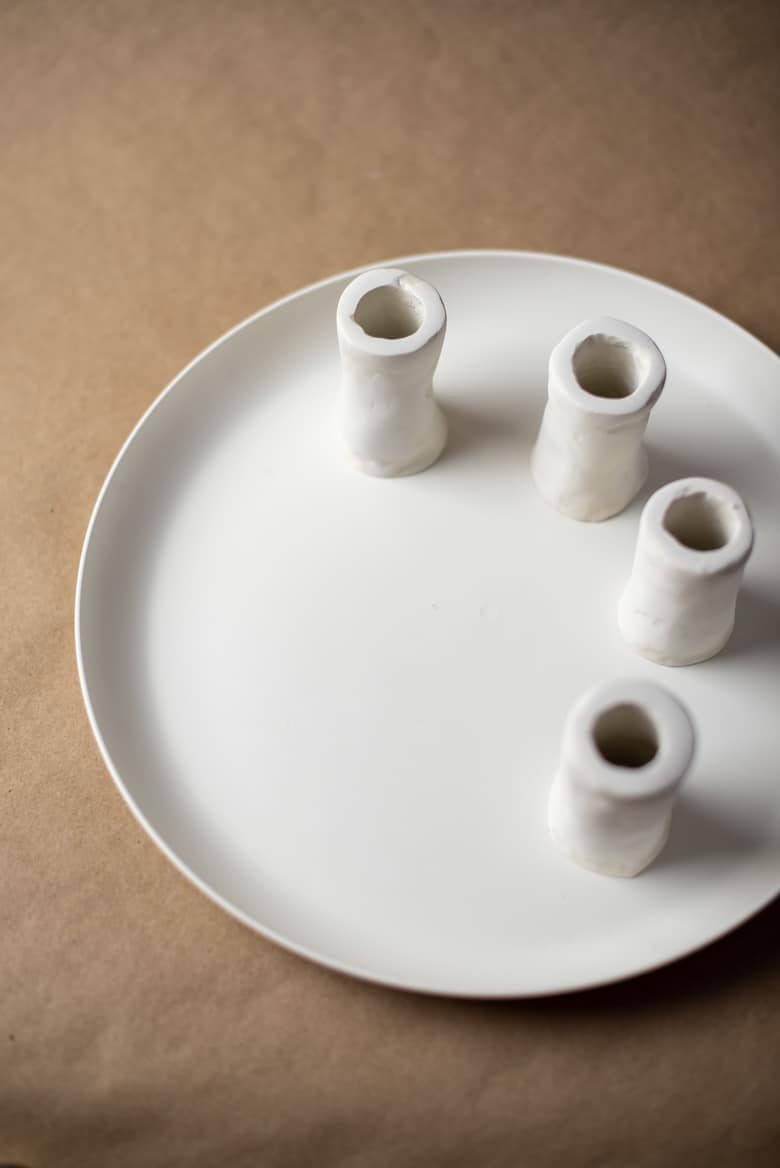
Once you have shaped around the candle, press into the dish or plate it will go in to flatten the bottom.
Then, use a plastic knife to cross hatch the bottom. This will help it adhere to the dish later on.
CAREFULLY twist the taper candle out to remove it before the next step.
Step 3: Bake
Bake the candle holders at 275 for 15 minutes per 1/4″ thick. I ended up baking mine for exactly 15 minutes.
Once your timer goes off, take them out and let them cool on the baking sheet so they stay flat on the bottom.
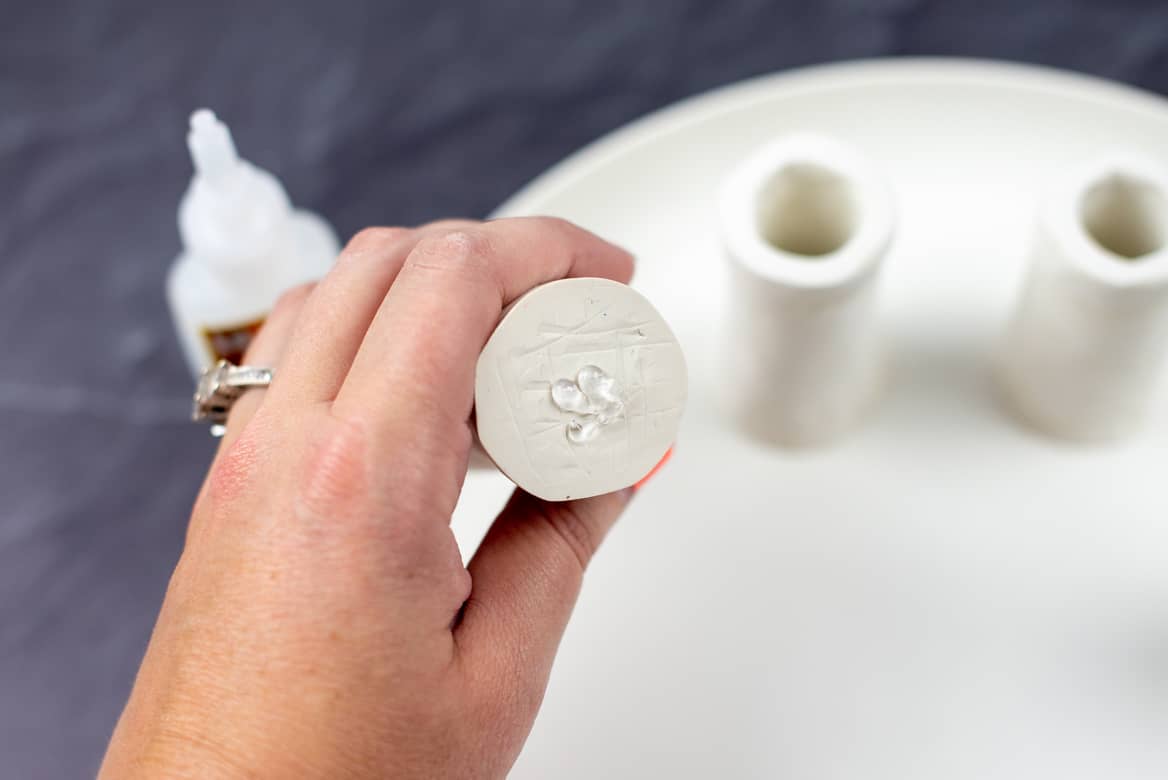
Step 4: Sand for a Polished Finish
Sand first with a coarse grit sandpaper and finish with a fine grit sandpaper. I used a simple multi-grit sandpaper pack (80 grit to shape, 220 grit to smooth).
Don’t skip sanding, this is what makes it look store-bought instead of handmade!

I tried to make the holders as smooth as possible when I was forming them, but a little sanding helped give them a more polished finish.
Step 5: Attach to Tray
Prepare the holders by wiping down the bottom of the holders and the dish with rubbing alcohol to remove any oils that might be on the surface.
Using gel super glue, attach the holders to your dish in any formation that you want. I replicated the look of the Anthropologie one.
If your dish was a different color, you could paint the holders with water-based acrylic paint to color match before you attach. I had no idea you could paint Sculpey before doing this project!
Note: if you choose to light your candles, make sure you do not leave them unattended!
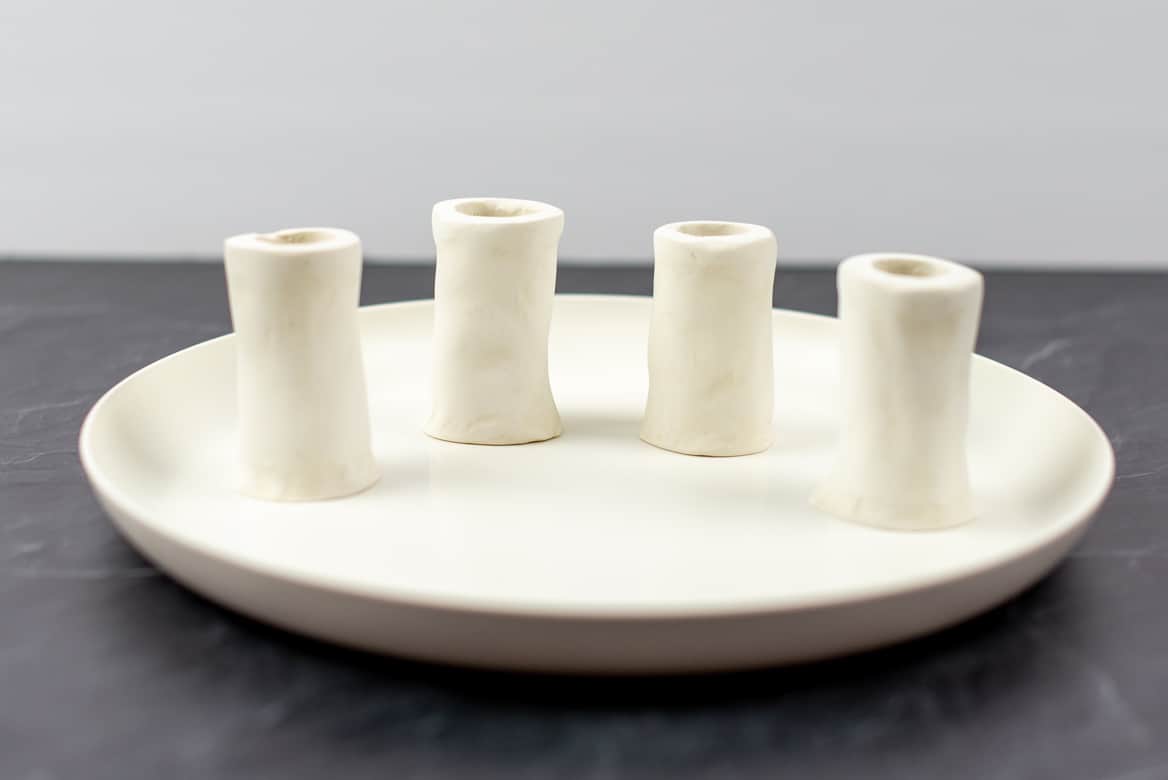
Cost Breakdown:
Anthropologie Version: $38
My Version: ~$7
Savings: ~$31
Common Mistakes When Using Polymer Clay for Decor
Underbaking: If it feels slightly soft, it’s not done. Bake the full recommended time based on thickness.
Skipping Sanding: Even light sanding makes it look store-bought instead of handmade.
Not Protecting White Clay: Work light to dark to avoid color transfer.
Making Pieces Too Thin: For functional items like coasters or candle holders, thickness = durability.
Forgetting Surface Prep Before Gluing: Always wipe with rubbing alcohol before attaching pieces.
Final Thoughts
Once I realized polymer clay could be drilled, sanded, and shaped into sculptural decor, it completely changed how I see it.
It’s no longer just a craft material. It’s a medium for creating nostalgic, sculptural pieces that feel collected, not mass-produced.
If you love high-end looks for less, you might also enjoy:
• [Painted Upholstery Chair Tutorial]
• [DIY Disco Ball Globe]
• [Ice Dye Tutorial]
• [Thrifted Lamp Makeover]
This DIY Anthropologie Inspired Home Decor Projects post was sponsored by Sculpey, all thoughts and opinions are 100% my own.
These are so cute!!!
Oh wow, this is such a fun decor project! They’re quite stunning. I so need to try!
I’m loving this post! Those coasters are the CUTEST!! So creative making these on your own! Love it!
these are incredible! Do not look homemade at all – totally look like something expensive from Anthro. I love how you marbled the sculpey (Which Ive never heard of!)
These DIY’s came out so well. Thank you for sharing your process!
Oh nice, I like these. I will show my daughter. She is craftier than I am.
Great ideas & easy instructions. Thank you!