If you love that messy, unpredictable, slightly grungy tie dye look… this is going to feel like a throwback in the best way.
But instead of adding color, this technique pulls color out using bleach and the results look like something straight out of a vintage band tee rack!
It’s called reverse ice dye, and it’s one of the easiest ways to transform a dark thrifted piece into something completely custom.
No squeeze bottles.
No liquid dye mess.
No complicated folding patterns.
Just ice… and a simple bleach trick most people don’t even realize exists.
I originally tested this on a thrifted hoodie I grabbed for a couple dollars. One of those “this could be something cool” finds.
And honestly?
It turned out better than I expected!
But there’s one thing I learned the hard way (especially with thicker fabrics)… and if you skip it, your results won’t look nearly as good.
I’ll show you exactly how to do this step-by-step, what to expect with color changes, and how to get that perfectly worn-in, vintage-style finish.
Quick note before we start:
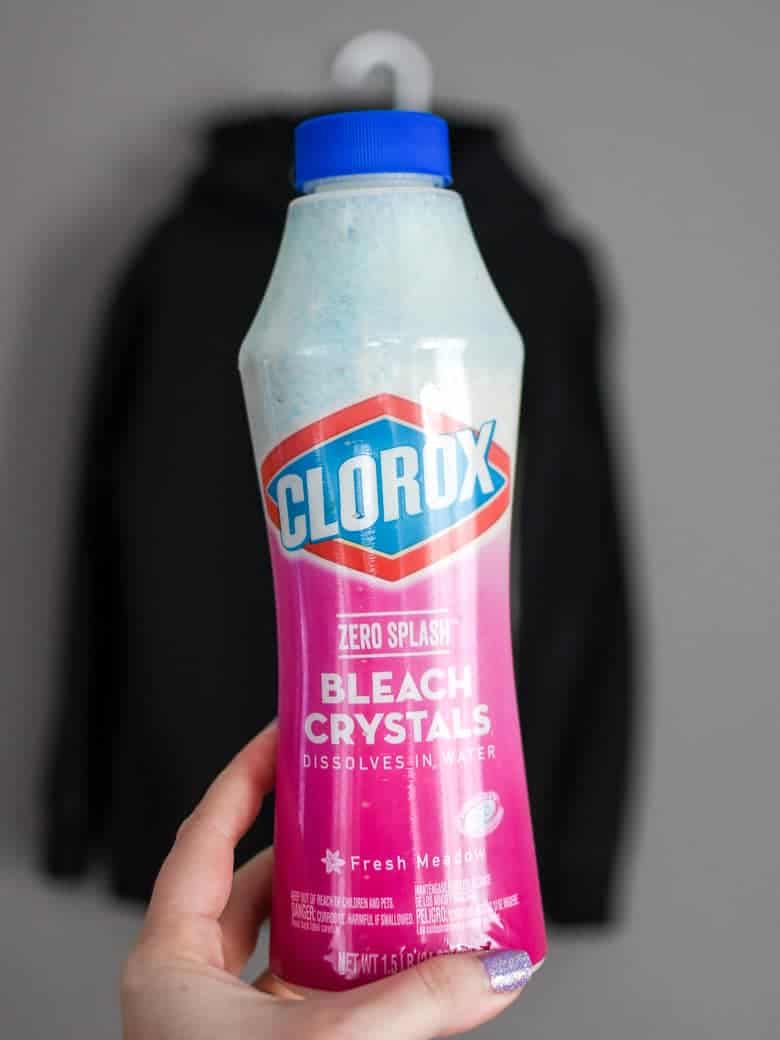
Clorox Bleach Crystals have been discontinued, but I found a similar alternative that works the same way:
→ GuardH Bleach Crystals
Before and After Reverse Ice Dye Results
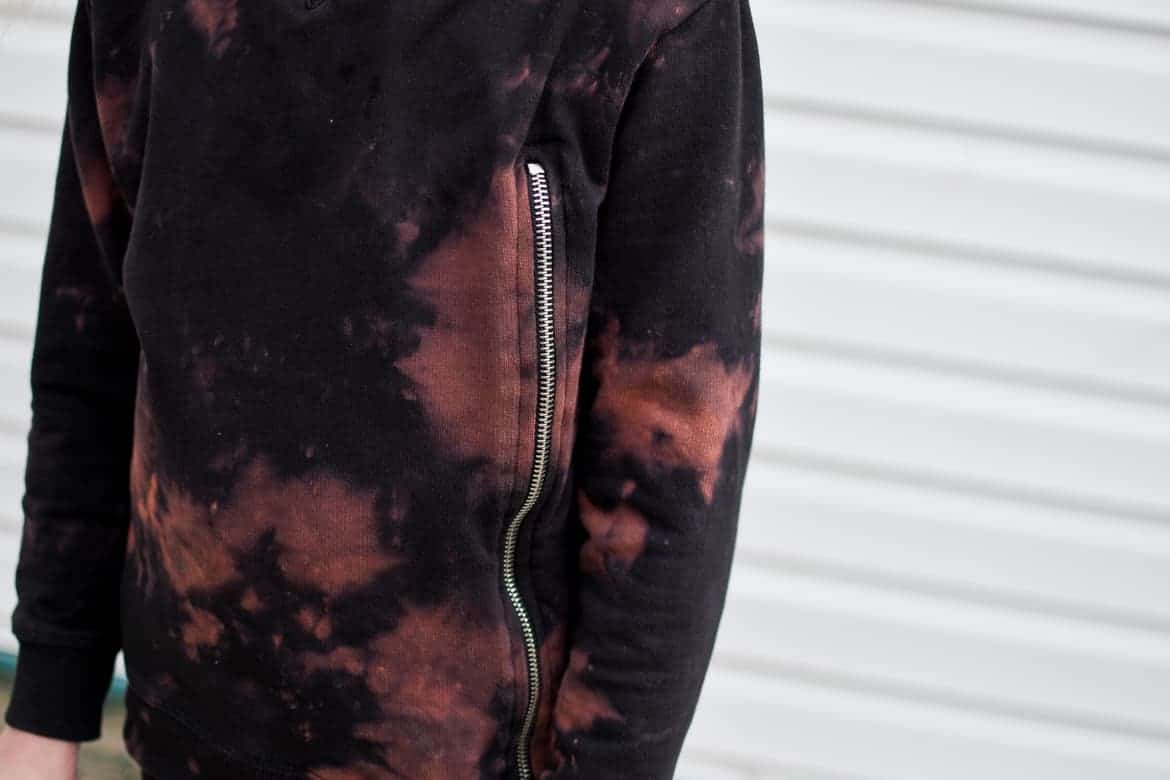
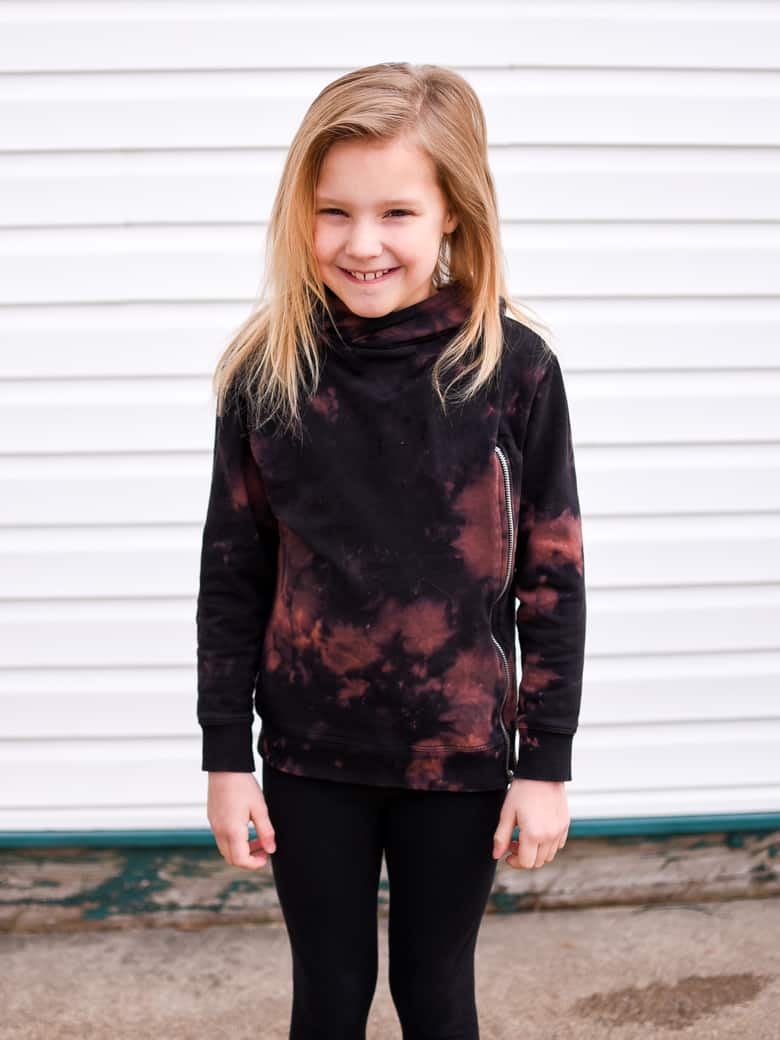
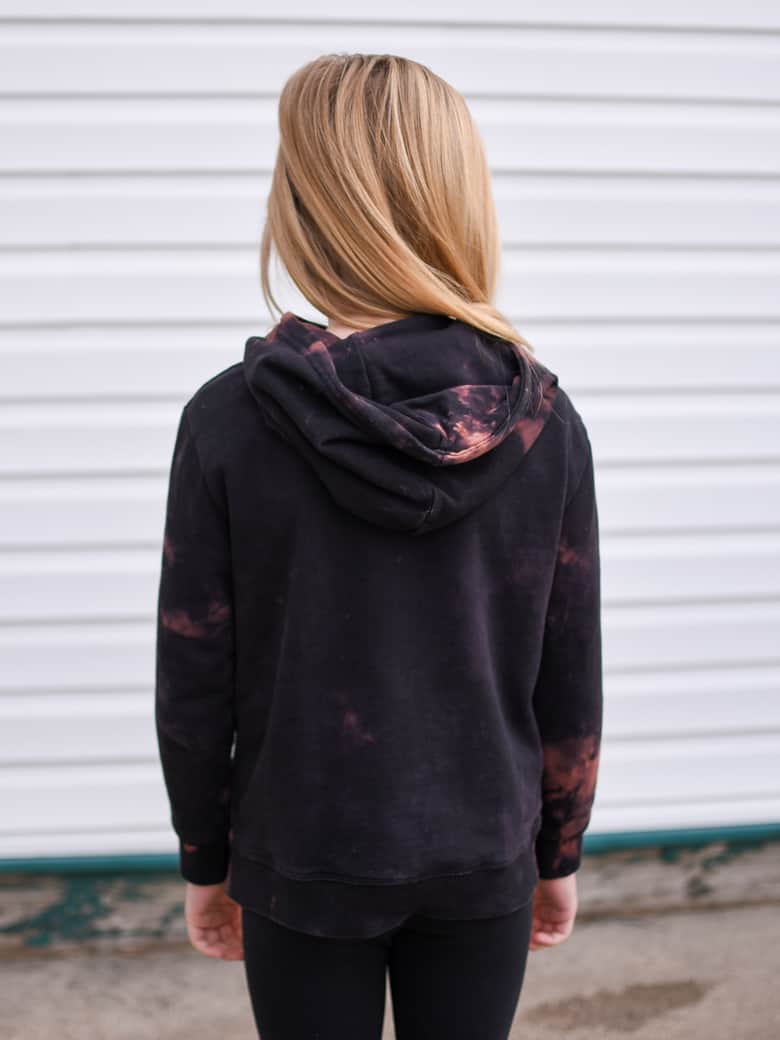
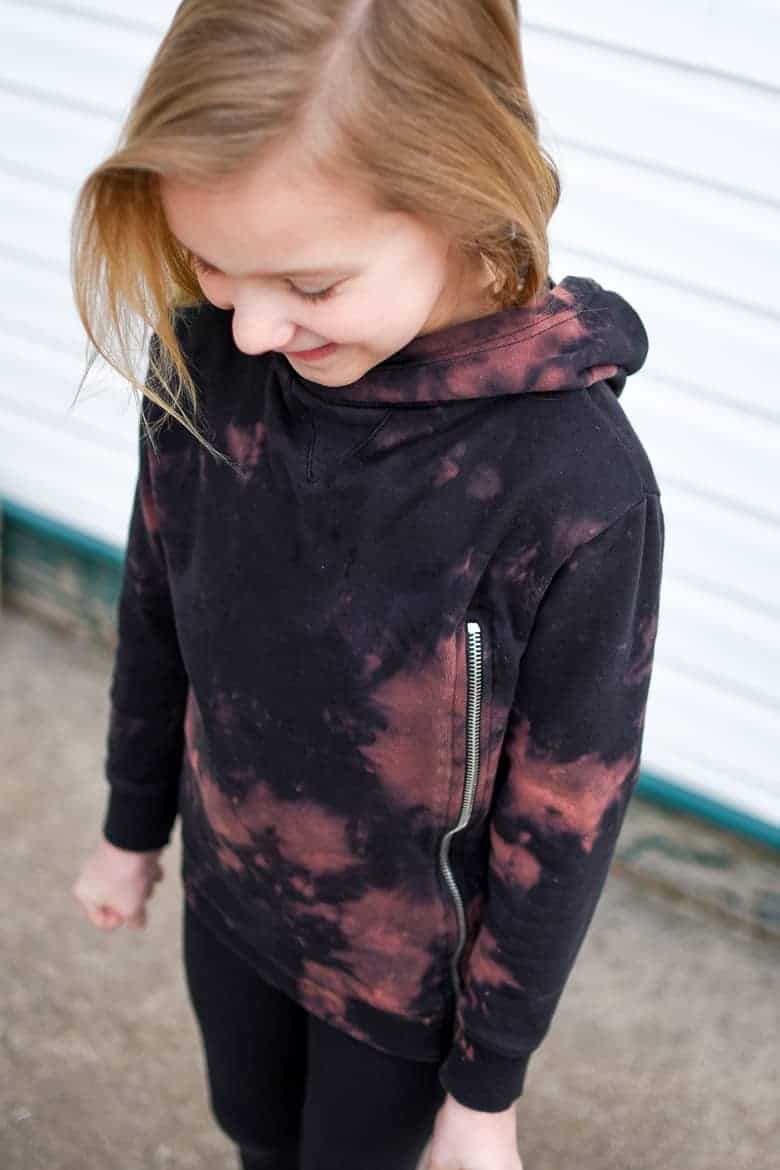
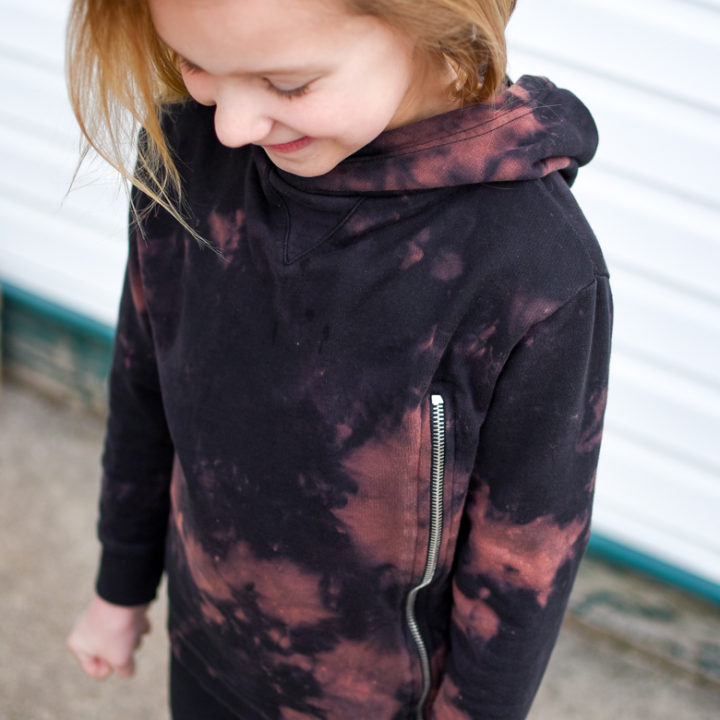
This technique works especially well on black and dark-colored clothing because bleach lifts the original color in uneven, smoky-looking patterns. On this thrifted hoodie, the black fabric lightened into warm rust and copper tones that gave it a worn-in, vintage look.

What Color Does Bleach Turn Black Fabric?
Most black fabrics do not turn white when bleached. Instead, they usually lighten to shades of rust, copper, orange, or reddish brown.
That warm, faded effect is exactly what makes reverse ice dye look so good on dark thrifted clothing. Other colors will usually lighten into softer versions of their original tone.
How to Reverse Ice Tie Dye with Bleach
This reverse ice dye tutorial shows you how to create a soft, vintage-style bleach effect on dark clothing using ice and bleach crystals.
SUPPLIES NEEDED:
- Dark colored item of clothing
- Bleach crystals like GuardH Bleach Crystals
- Ice
Update: The original Clorox bleach crystals I used for this project are no longer the easiest option to find. I’ve switched to a similar bleach crystal alternative that works in the same way for this technique: GuardH Bleach Crystals.
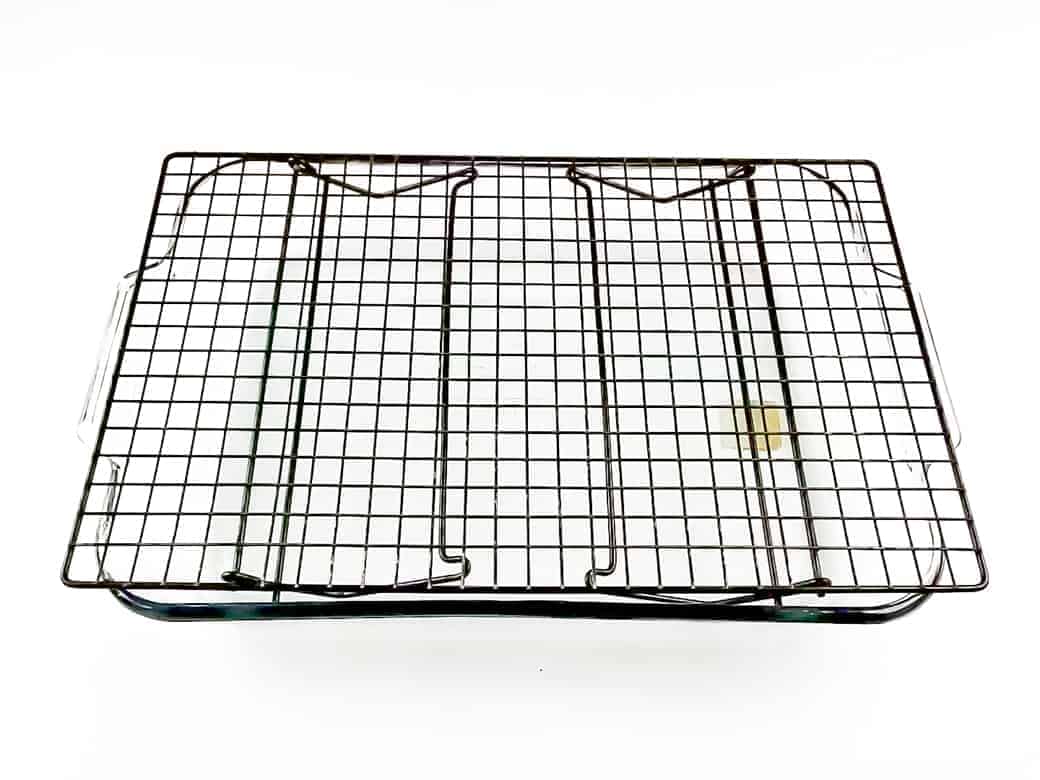
TOOLS NEEDED:
- Rack
- Large glass container
Voila! These Clorox bleach crystals are going to replace the dye powder previously used in typical ice tie dye techniques.
I had found this hoodie at the thrift store for a couple bucks and knew it would look even cooler with a grungy bleach effect.
Turns out, I was right 😉
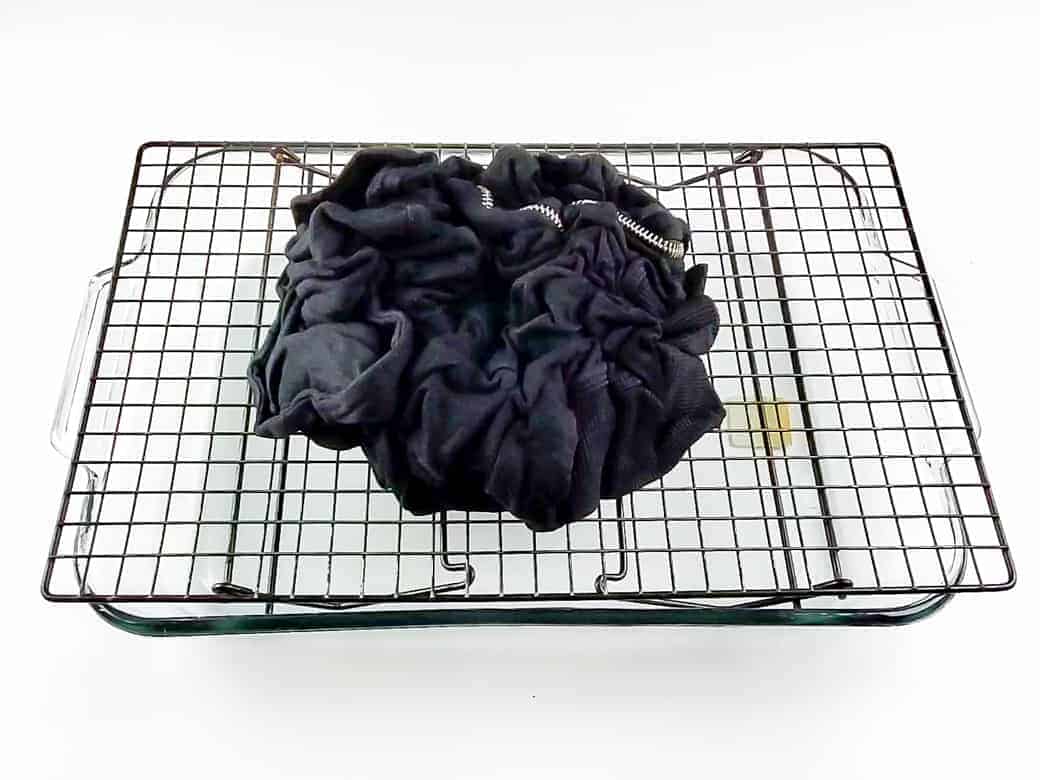
Step One: Prepare your textile
Run your textile under water to get it completely wet. Wring out the excess water so it’s no longer dripping wet.
Step Two: Arrange the textile on a rack
Place a rack over a large glass dish or other container to collect the drippings.
Remember, this water is going to be bleach water so you don’t want it dripping on anything porous!
The flatter your item is before scrunching, the more places the bleach can reach as the ice melts.
Then, scrunch your textile up on top of the rack.
This is important to note:
Make sure the textile is as flat as possible before you begin to scrunch so that you can allow the bleach to penetrate as much of the textile as possible.
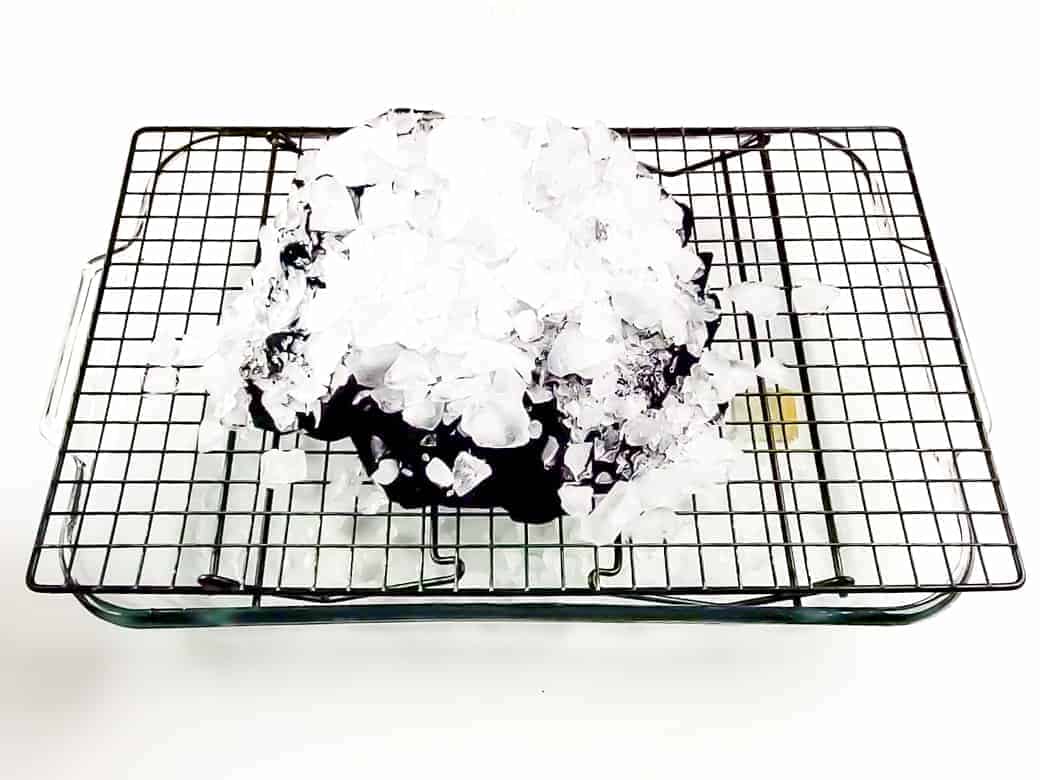
Step Three: Place ice on top
Place a layer of ice on top of the scrunched up textile.
PRO TIP: Crushed ice works best because it covers more surface area and helps distribute the bleach more evenly.
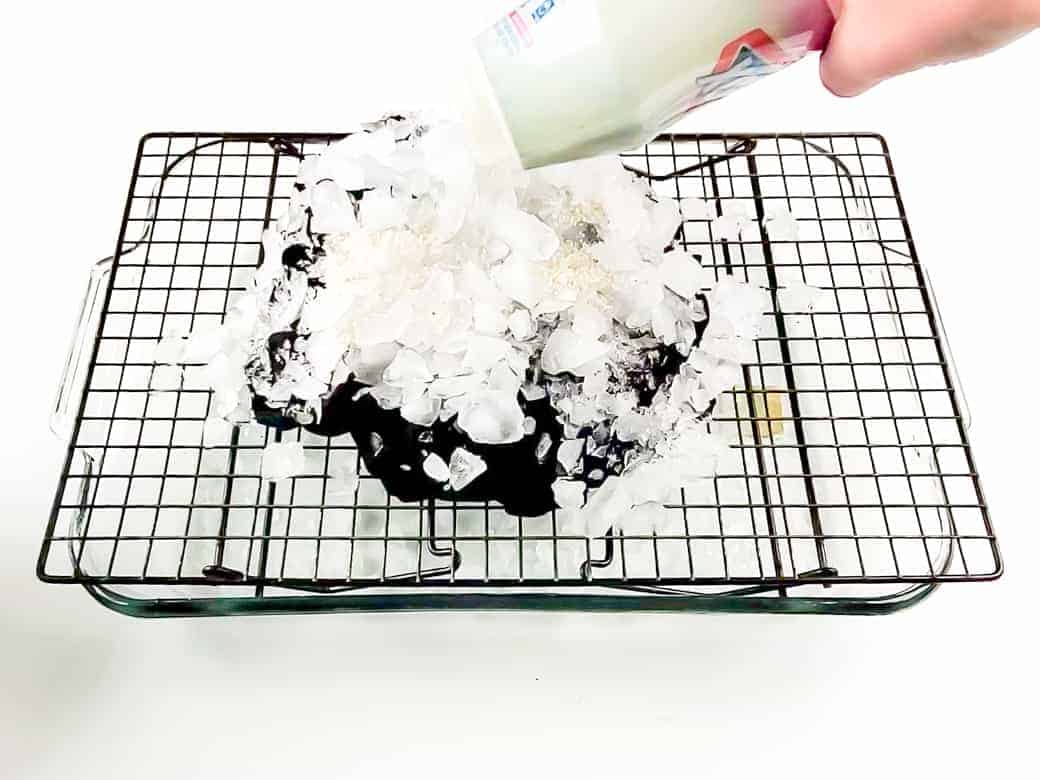
Step Four: Apply the bleach crystals
Generously sprinkle the bleach crystals all over the ice, making sure you cover the highest points and exposed folds.
For thicker items like hoodies and sweatshirts, you may need a little more product than you would for a t-shirt.
You will probably want to use more than you think, especially if you’re reverse dying clothing as thick as a hoodie like I am.
Allow the bleach to work until all of the ice is completely melted. Mine took approximately 2 hours.
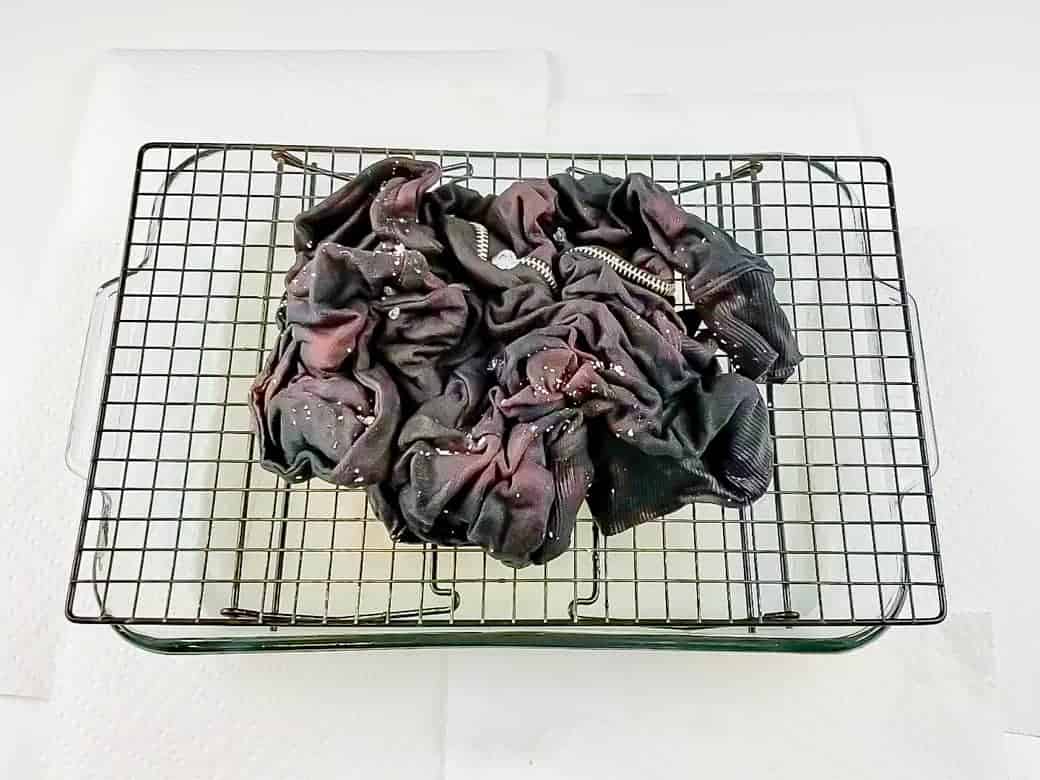
Step Five: Wash and dry the textile
CAREFULLY dump the bleach water out of your container.
Rinse as much of the bleach out of the item as possible under running water in a sink.
Then, wash the textile in your washing machine using hot water and laundry detergent.
Once it’s washed and dried, you’ll be able to see the final contrast much more clearly.
Make sure you wash it on it’s own because it’s full of bleach!
Common Reverse Ice Dye Mistakes to Avoid
Using too little bleach crystal product: Thick fabrics need more coverage than you might think.
Skipping the back side on sweatshirts or hoodies: Bulkier items often need the process repeated on the other side for a more even result.
Letting the fabric bunch up too tightly: If the garment is too compact, the bleach won’t travel through enough of the fabric.
Expecting bright white results on black clothing: Most black fabrics bleach into warm orange or rust tones instead.
Not protecting your workspace: The melted runoff is still bleach water and can damage nearby surfaces.
What I’d Do Differently Next Time
If you’re reverse ice dyeing a bulky item like a hoodie, I’d recommend repeating the process on the back side too.
Because the fabric is thicker and layered, the bleach effect may not fully reach through to the back with just one round. That softer penetration can still look cool, but if you want a more all-over result, flipping it and repeating the process is worth it.
What Color Does Bleach Turn Black?
Most black textiles will turn shades of deep orange, rust, or red instead of white.
Can You Bleach Tie Dye a White Shirt?
Since bleach removes pigment and white fabric has no pigment to remove, bleach won’t create the same reverse dye effect on a white shirt.
A more interesting option would be tie dyeing a white shirt first, then experimenting with bleach on top for a layered effect!
If you like tie dye techniques that feel a little more unexpected, reverse ice dye is a really fun one to try, especially on thrifted sweatshirts, tees, and other dark basics.
The finished look has that soft, worn-in, vintage-style effect that makes even a simple black hoodie feel more custom.
If you want to keep experimenting, you might also like my regular ice tie dye tutorial or more creative tie dye ideas.
How to Reverse Ice Tie Dye
Materials
- Clorox Bleach Crystals
- Dark textile or article of clothing
- Ice
Tools
- Rack
- Large Glass Container
Instructions
Step One: Prepare your textile
- Get your article of clothing wet
- Wring it out so it is no longer dripping
Step Two: Arrange your textile on the rack
- Place your rack on top of your glass container
- Lay the textile flat on the rack and then scrunch it up into a flat pancake shape
Step Three: Place ice on top of your textile
- Take some crushed ice (the more crushed the better!) and carefully place it on top of the textile
- Make sure the entire textile is well covered with ice
Step Four: Apply the bleach crystals
- Sprinkle the Clorox bleach crystals on top of the ice generously
- Make sure the outside edges of the textile get covered
Step Five: Rinse and wash the textile
- Carefully rinse the textile under running water until the water runs clear
- Wash the textile on it's own in a washing machine using hot water and laundry detergent
Notes
The thicker your textile is, the harder it will be for the bleach to penetrate the material.

![Weekend Wanderlust [003]](https://www.brepea.com/wp-content/uploads/2015/09/c8f3c-img_7379-1-768x1151.jpg)

Make sure you deactivate the bleach by soaking the bleached item in a 9:1 water to hydrogen peroxide solution. Otherwise, you’ll start to get holes on your shirt after a few washes. If that’s the look you’re going for then disregard my comment!
Very cool! We want to give this a try! Where did you purchase the bleach crystals?
Where to buy bleach crystal?
Unfortunately I think they discontinued that product, BUT I have tried this with Ajax powder containing bleach and was able to get a similar result but it was definitely more subtle.