Freezer paper stenciling. AKA: the poor man’s screen printing. Or the lazy lady’s screen printing. You pick.
I love a good vinyl tutorial. But there’s just one thing…
Vinyl, more specifically HTV or heat transfer vinyl, tends to crack, lift, and rip over time and many washes. And if you don’t have a super fancy heat press, which I don’t, it takes FOREVER for it to adhere.
That’s where freezer paper stencils and fabric paint enter…
Father’s Day is approaching quickly, and we all know I only DIY gifts when I’m really under the gun to get it done 😉
I spotted a shirt on Zulily about a month ago and thought to myself,
“That would be the PERFECT Father’s Day gift. But do I really want to spend $30 on it?”
Nope. I didn’t. I wanted to make it myself. So I did.
And you can too! 😉
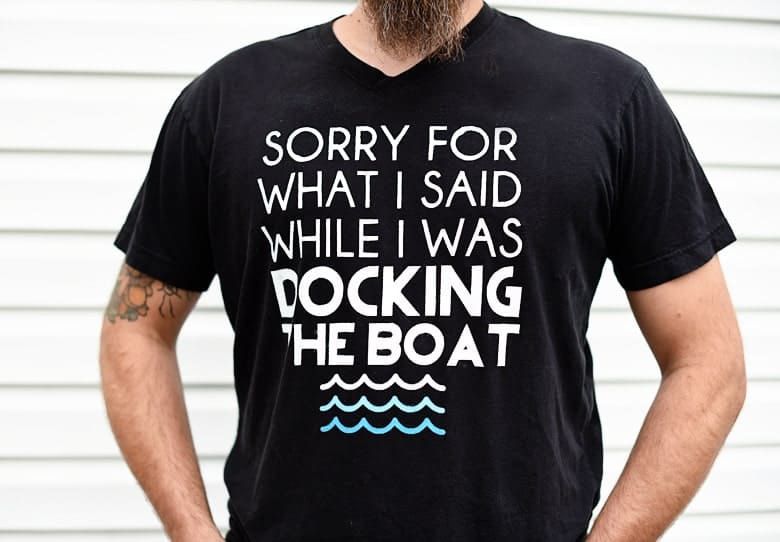
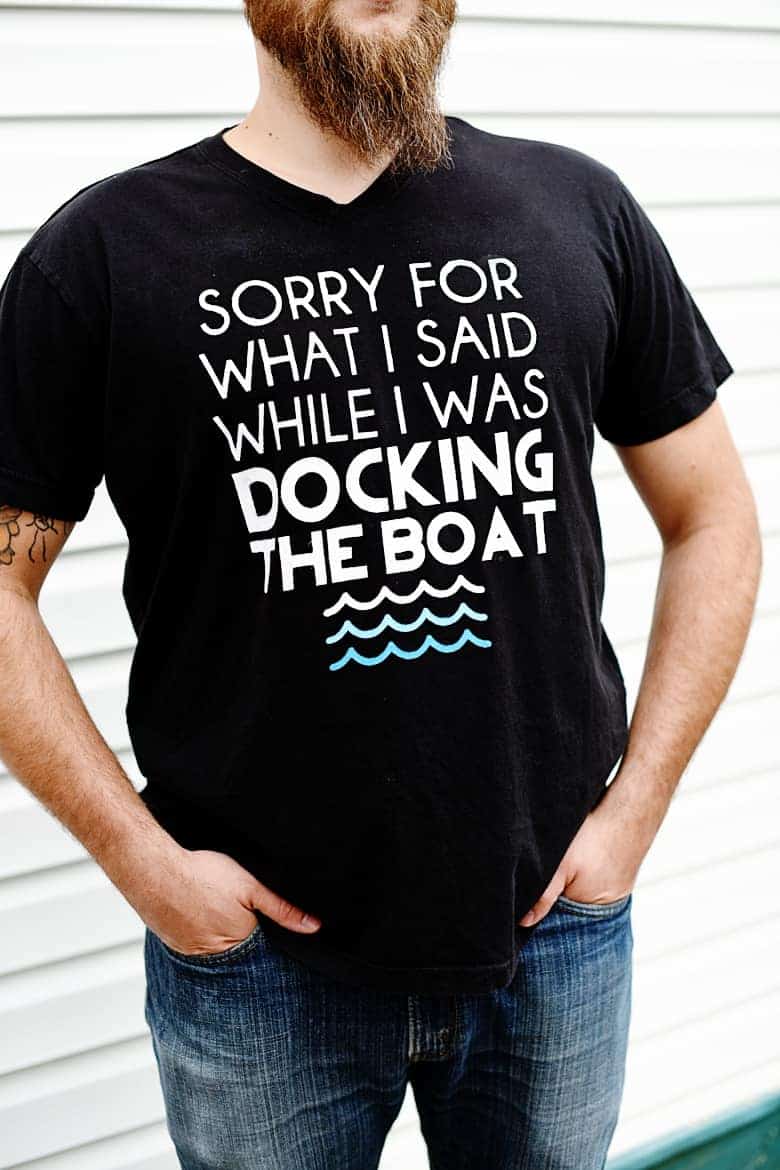
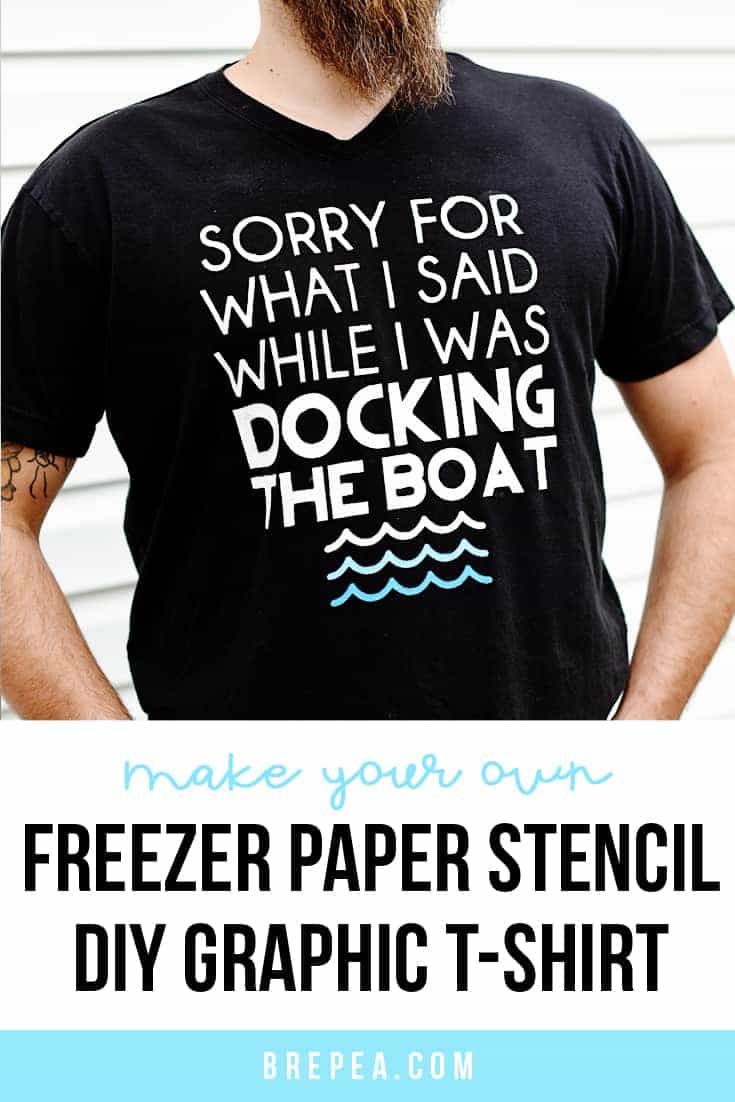
Funny Boating T-Shirt Freezer Paper Stencil DIY Gift for Dad
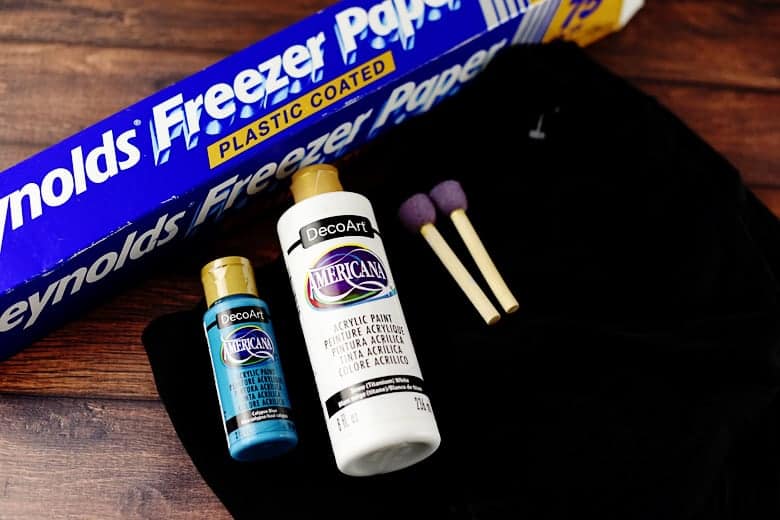
You will need:
- Freezer Paper
- Iron
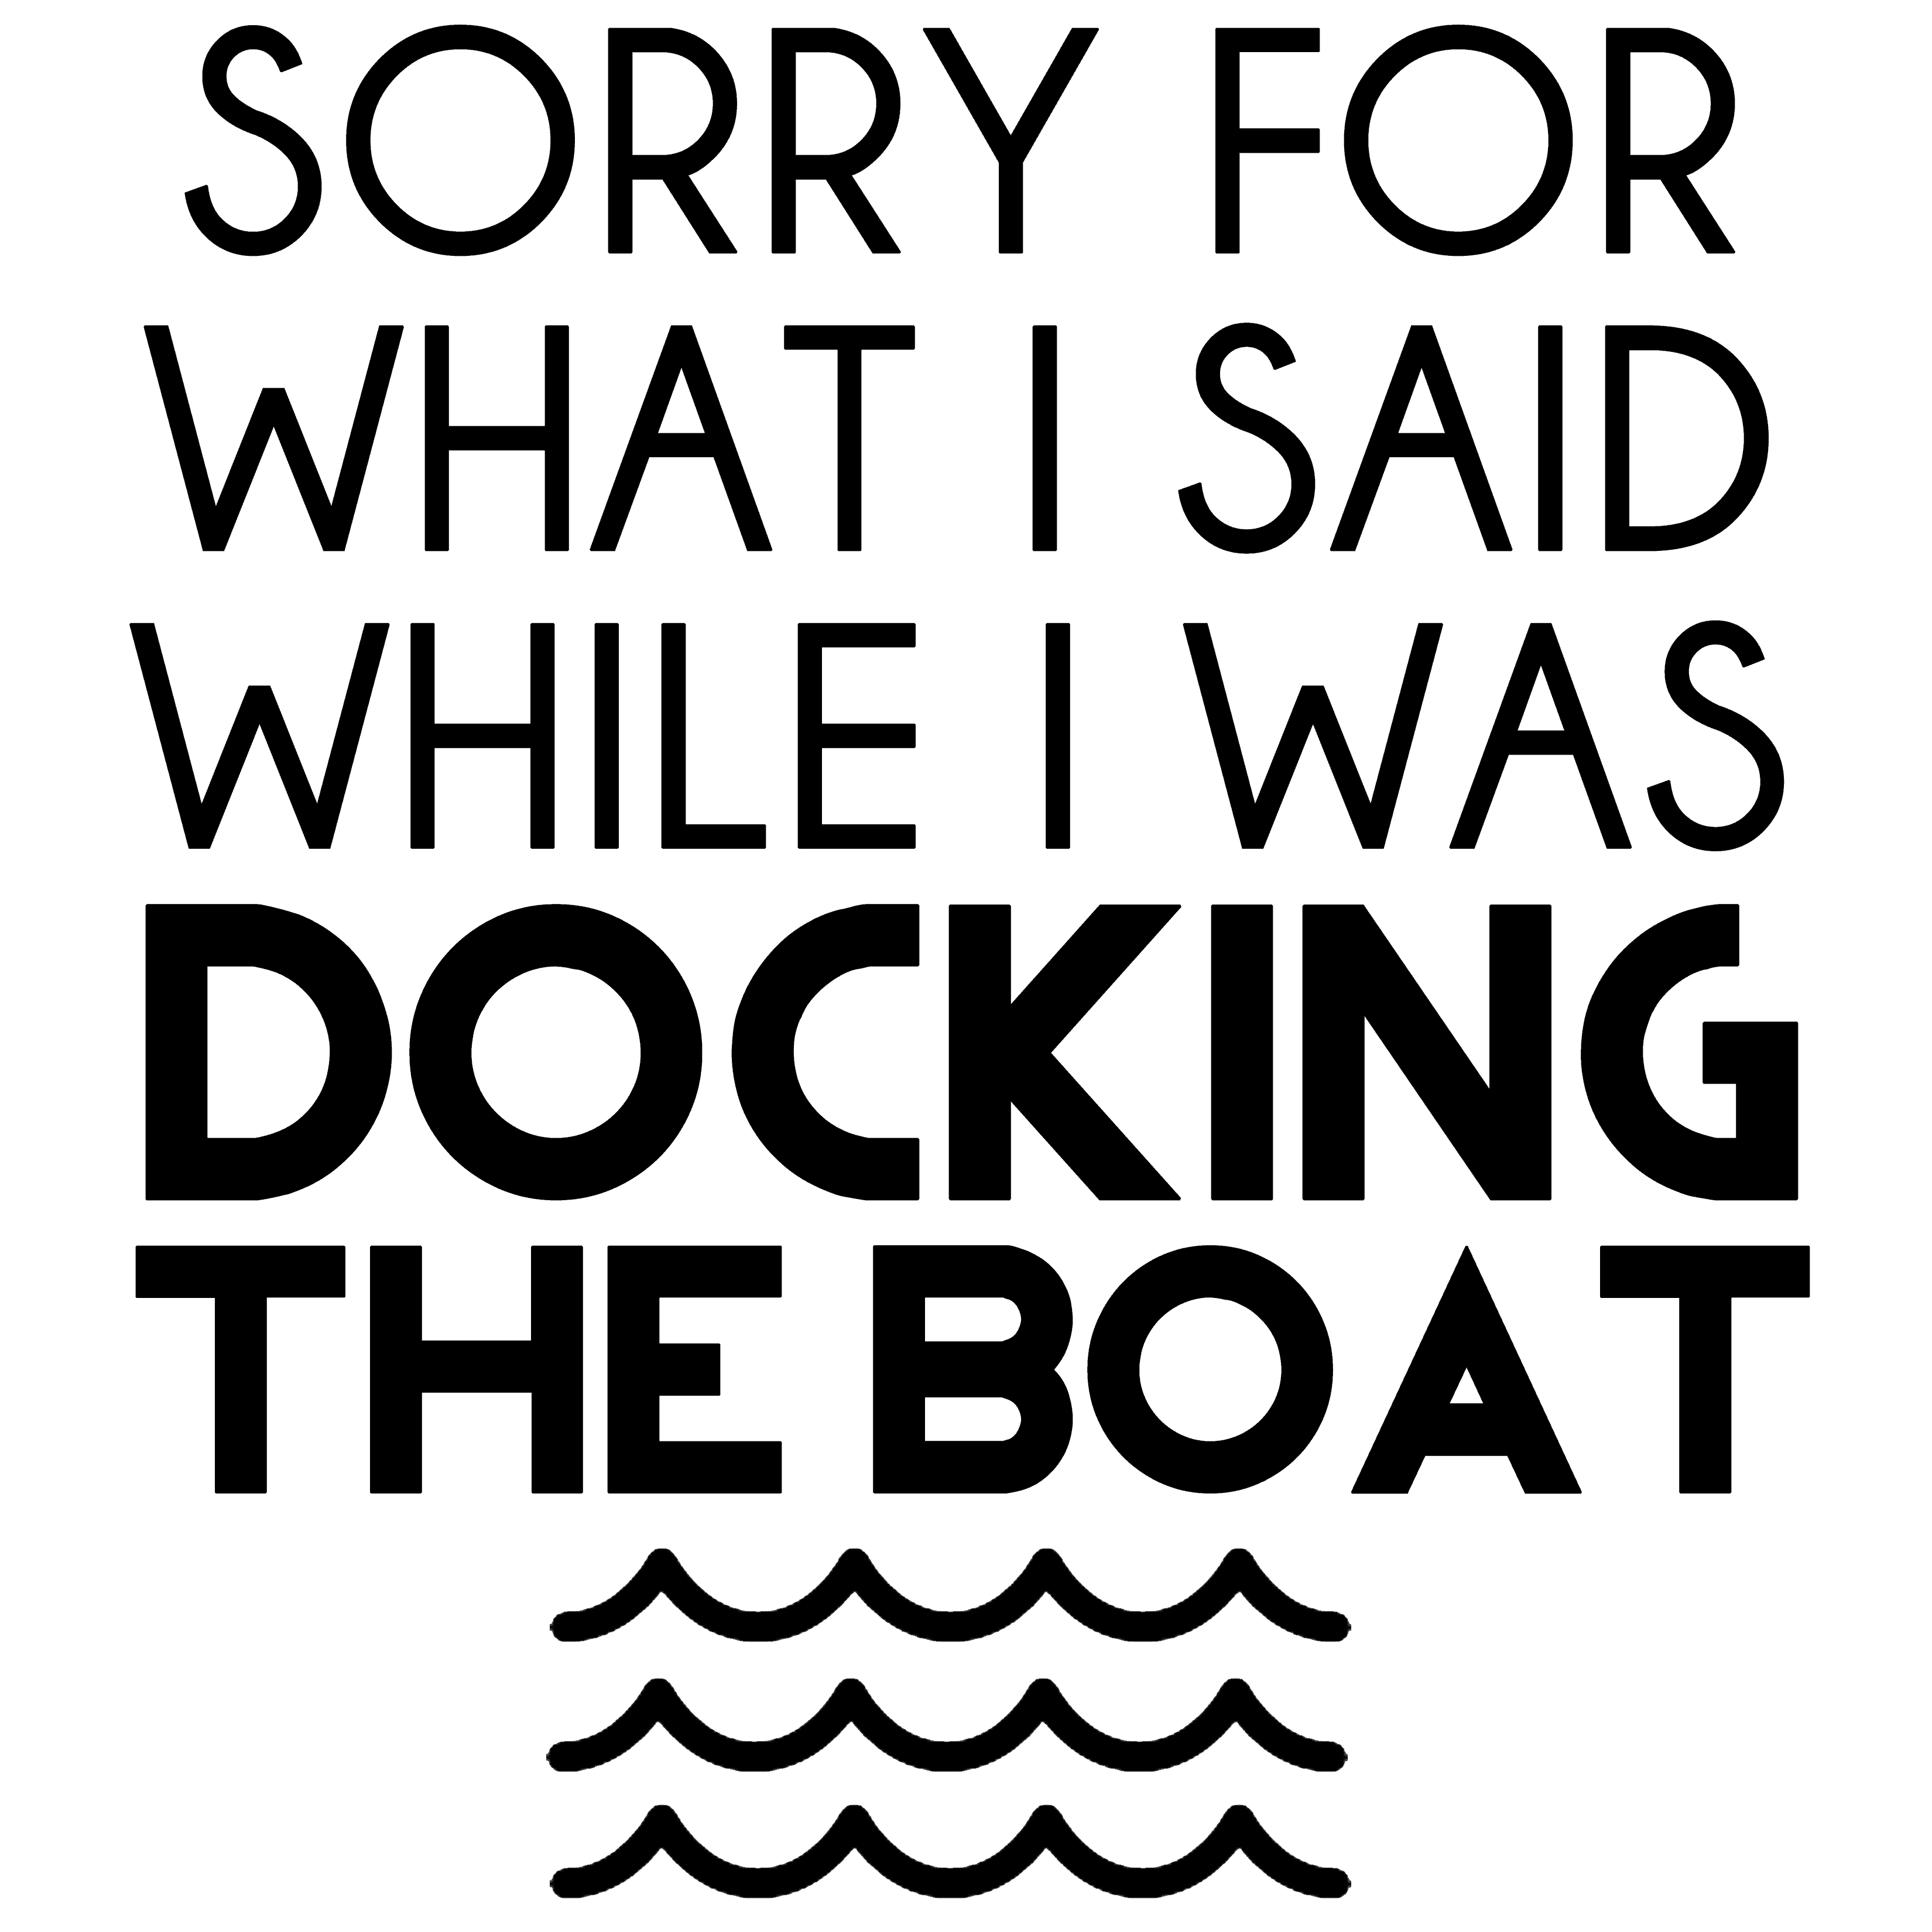
- “Sorry for what I said…” Graphic
- Cricut Explore Air 2 or Exacto Knife
- T-shirt (mine was a thrift store score for $1.99!)
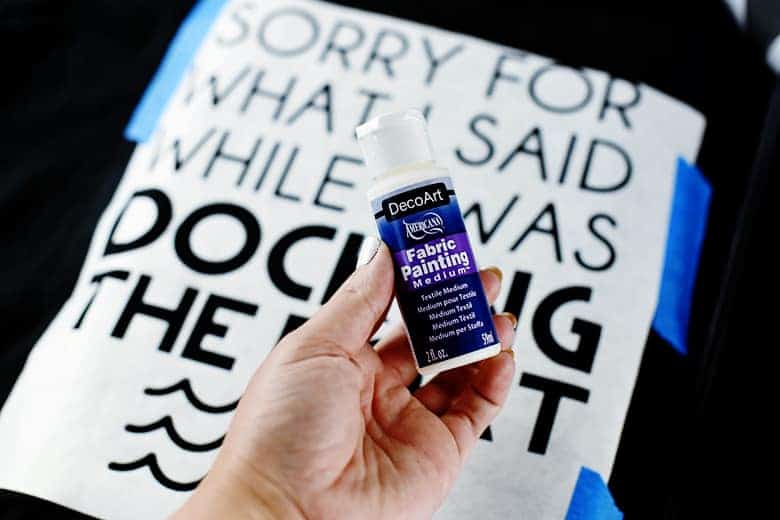
- DecoArt Americana Acrylic Paint
- DecoArt Fabric Painting Medium
- Spouncers and Small Paint Brushes
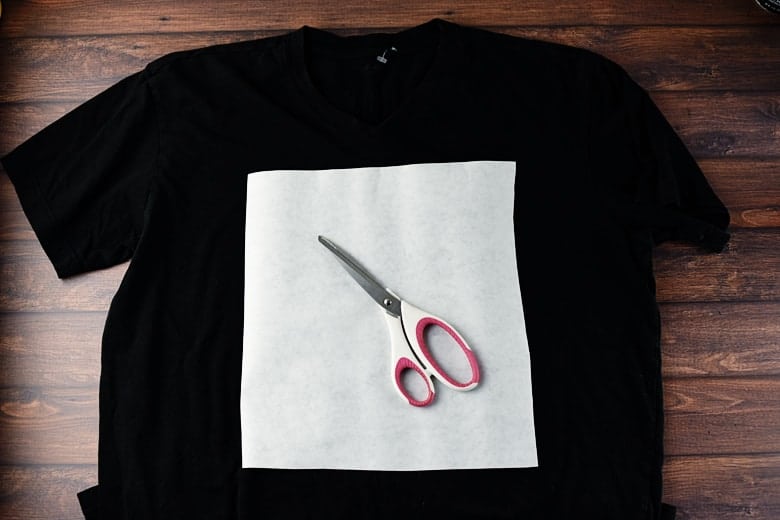
Step One: Cut out a sheet of freezer paper for your stencil.
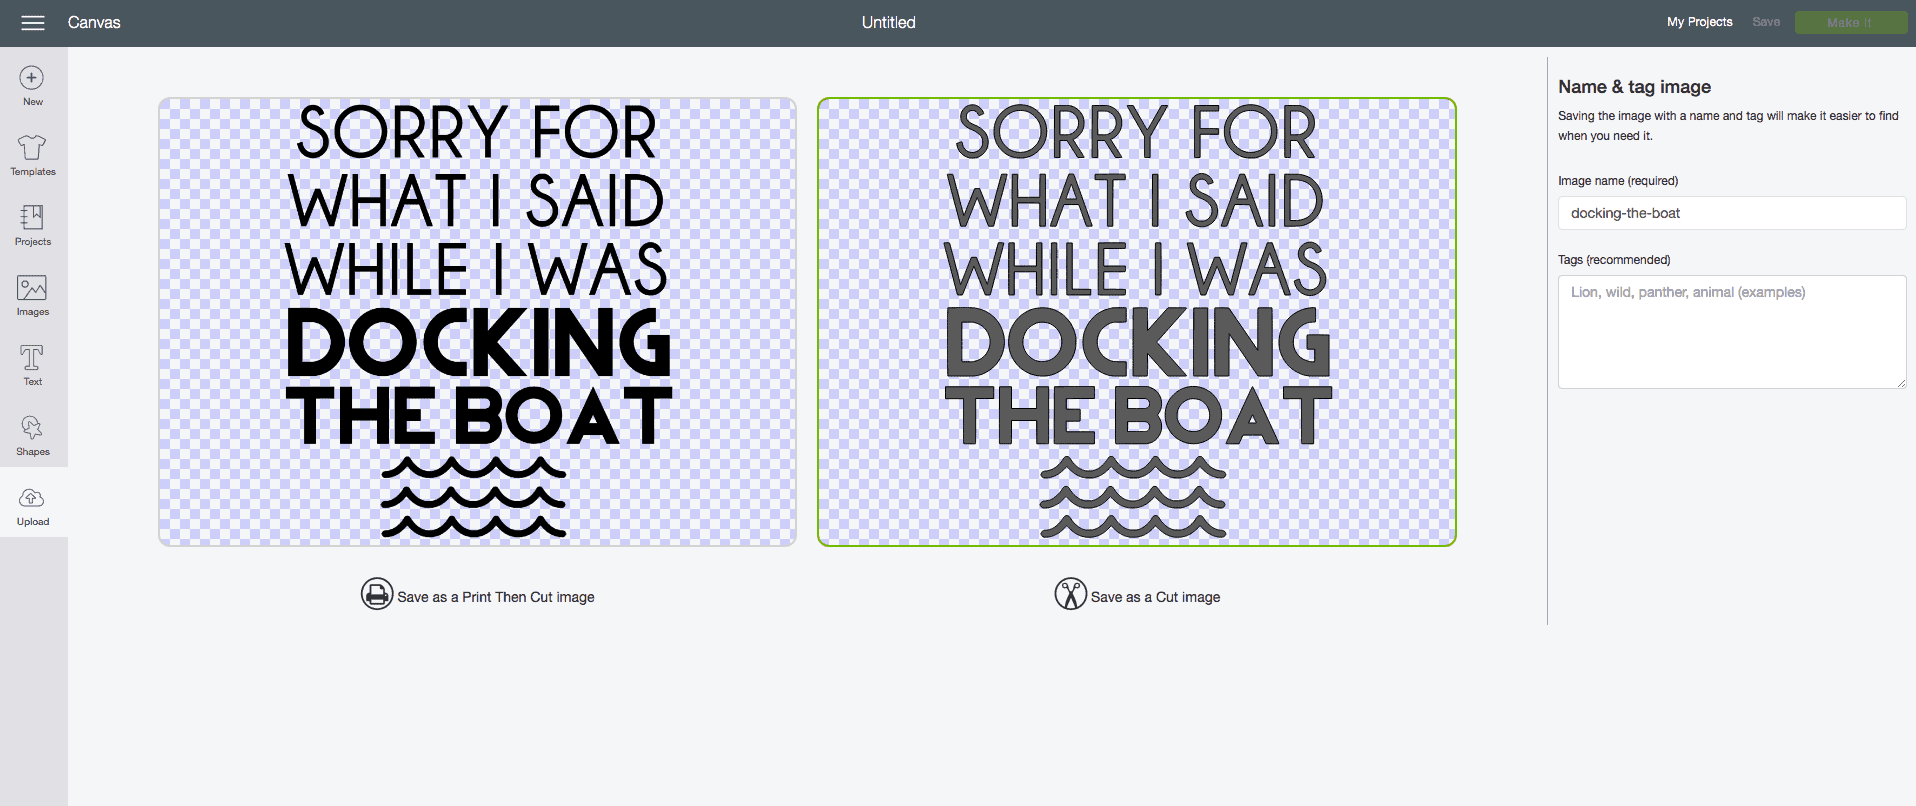
The standard adult graphic size is 11″ x 11″, which is what I wanted my graphic to be. So I cut out roughly a 12″ x 12″ size sheet of freezer paper.
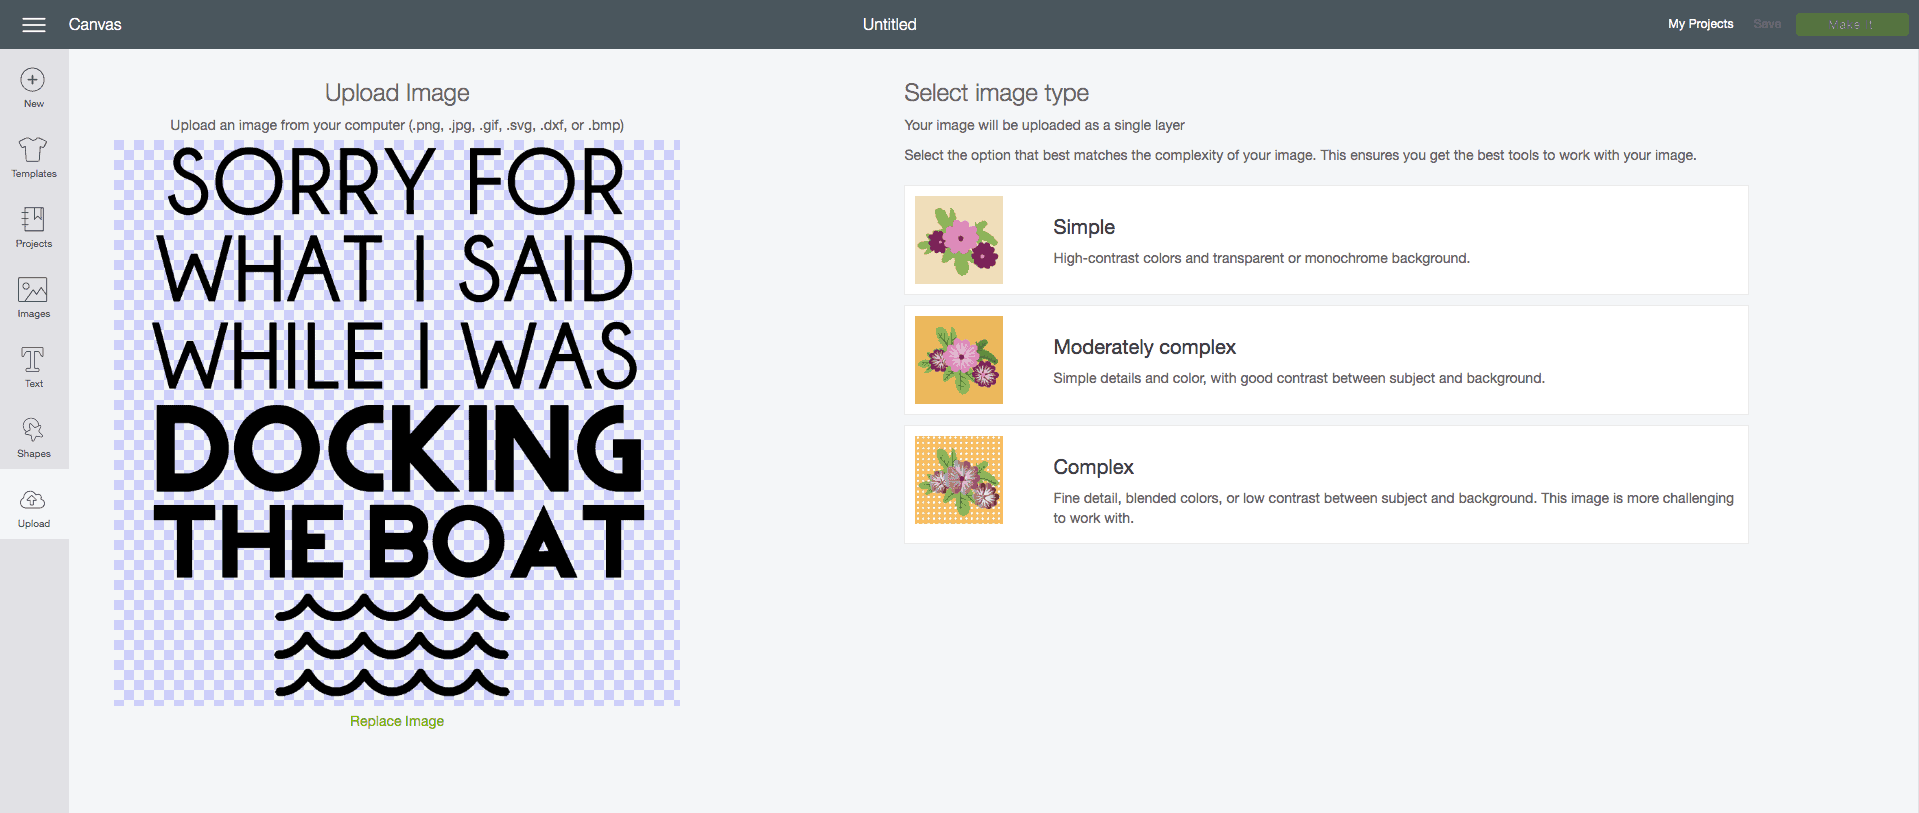
Step Two: Upload the “Sorry for what I said…” graphic to Cricut Design Space
Truth be told, I haven’t ever used SVGs with my Cricut. I just upload the PNG file and convert it into a cut file in Cricut Design Space. This is super easy to do when the design is only one color and not very detailed.
If you don’t own a Cricut or other electronic cutting machine, you can also do this project by cutting out the freezer paper stencil with an exacto knife. This is how I originally made my first freezer paper stencil shirt for a Christmas gift for my sister in law.
Does it take a heck of a lot longer? YES. And you’ll have to print out the design first. But it is possible!
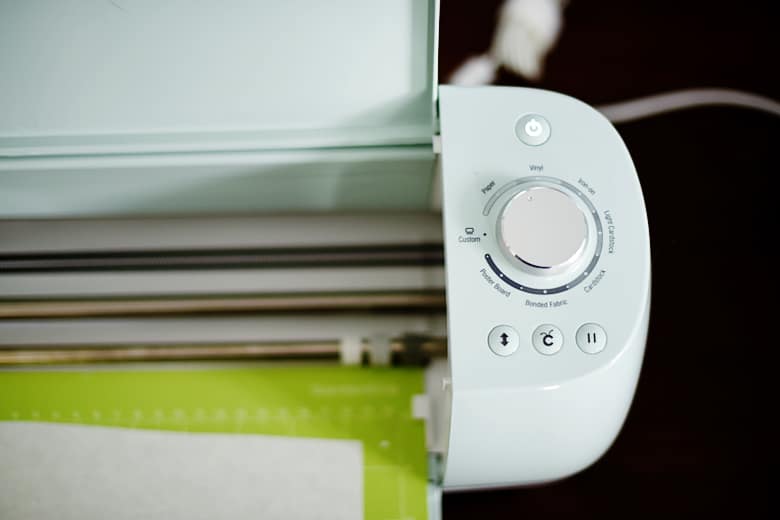
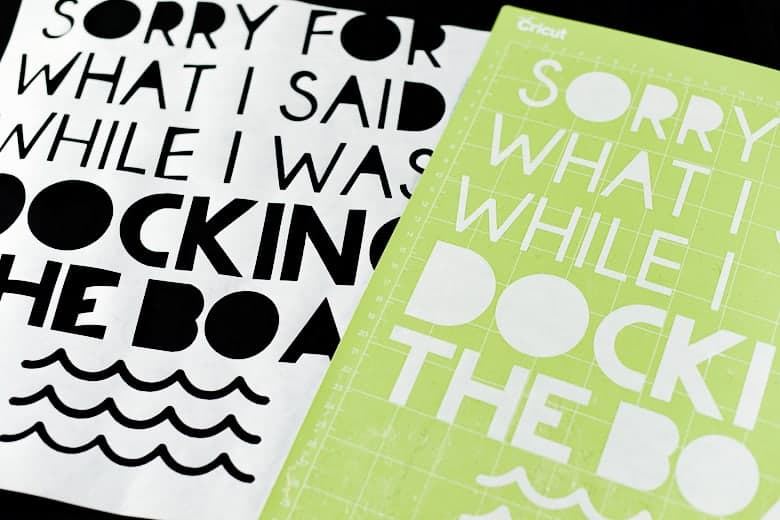
Step Three: Cut the freezer paper stencil design out.
Place your freezer paper sheet waxy side down on your Cricut cutting mat. I used my standard grip one.
Set your dial one notch above paper and let the Cricut do it’s work.
What I SHOULD have done is make sure the edges lined up better because, as you’ll soon see, I cut off a tiny bit of the design on top. I had a Tim Gunn moment and “made it work”, only because I was too lazy to cut out another design 😉
Step Four: Remove the freezer paper stencil from the mat carefully.
Some people say to use transfer tape to transfer the design to the shirt. I was confident in my ability to line up the small details for the letters by hand to save some time.
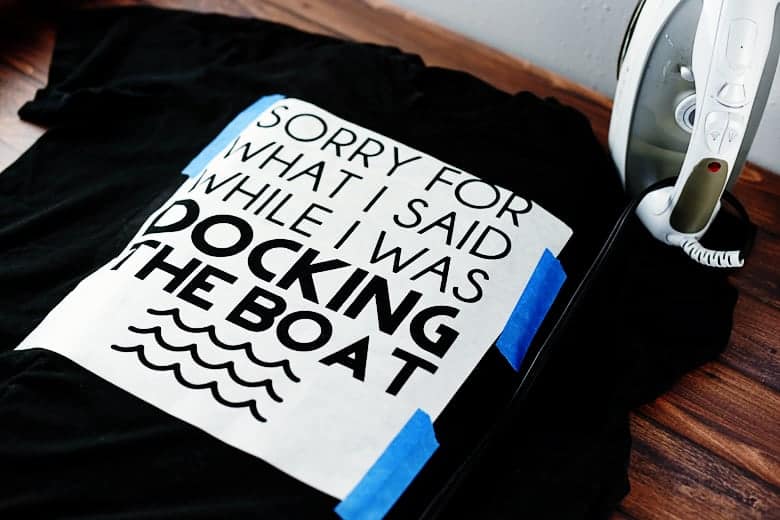
Step Five: Iron the freezer paper stencil onto your shirt.
Start by making sure your design is centered on your shirt. I used a few pieces of painters tape to hold it in place.
Place the iron directly onto the stencil towards the top and middle of the design and hold for a few seconds before moving to the next section. You’ll be able to feel when the stencil adheres to the shirt.
Once the stencil is securely ironed onto the shirt, repeat this process for the details of the letters one at a time.
Tip:
To make sure you don’t have bleeding issues, run your hand gently over the stencil to feel for any spots that lift. Re-iron until you don’t feel any areas that lift.
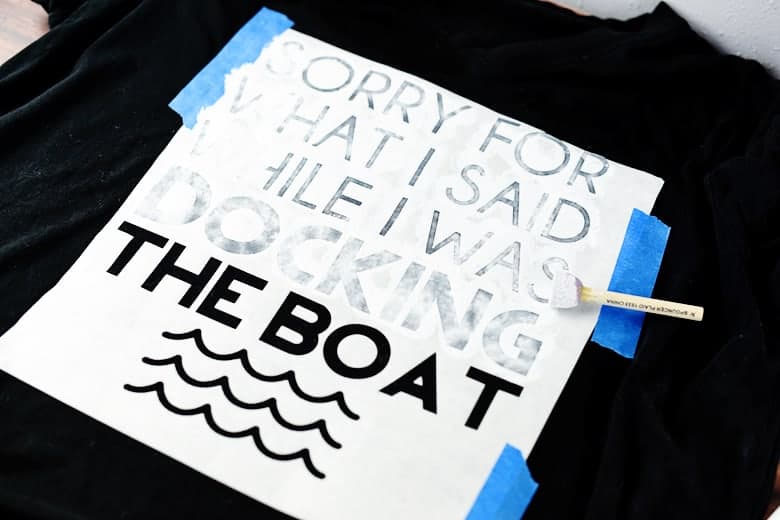
Step Six: Paint your shirt.
Mix your Americana acrylic paint with the fabric painting medium in a 2:1 ratio. Paint the shirt with the spouncer by using a dabbing motion.
Tip:
Be careful not to load too much paint on your spouncer or dab too aggressively or you will have splatter issues.
Because I’m a perfectionist and didn’t want any uneven spots, I ended up doing 4 coats of paint while letting it dry between each coat. This process actually went pretty fast because the paint dries quick!
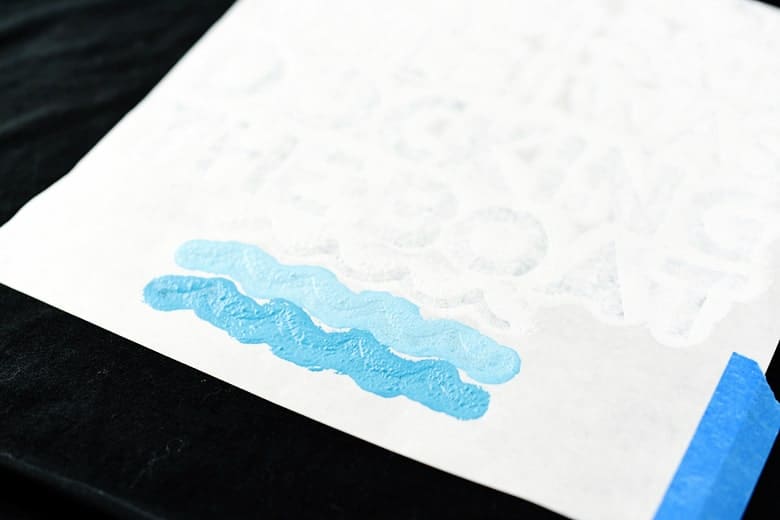
For the waves, I started with the bottom wave full-strength blue, mixed half white and half blue for the middle wave, and white for the top.
Step Seven: Remove the freezer paper stencil carefully.
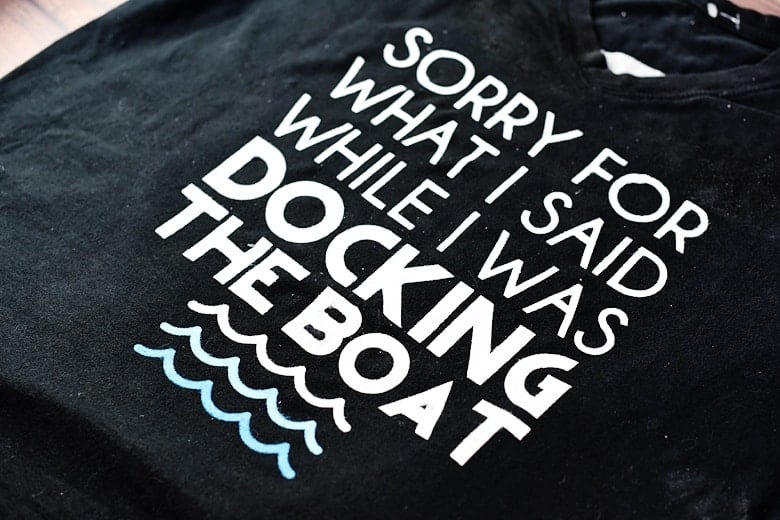
Once the design is completely dry to the touch, you can remove the stencil.
Start on either the top or bottom and peel away carefully. You’ll have to go back and also remove the detailed parts of the letters.
Tip:
If you have a few areas of imperfection, you can go back in and touch them up with a small paintbrush like I did.
Step Eight: Set the design with a little heat.
The instructions on the back of the fabric painting medium said to iron the design for 30 seconds, I just ran my blow dryer over the design on high heat for a few seconds.
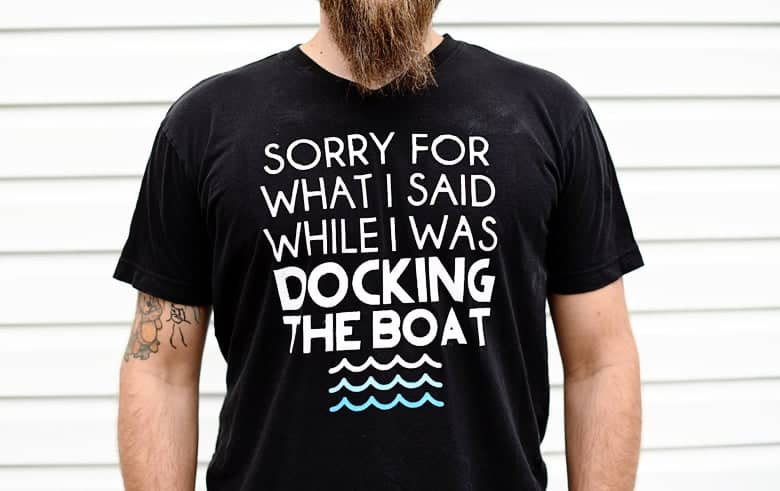
And there you have it! A screen print effect t-shirt that you can look at with pride every time your husband/boyfriend/boat driver in your life wears it because YOU MADE THAT YOURSELF 😀
Once you try a freezer paper stencil, you’ll never want to make your own graphic t-shirts any other way!
Related DIY Apparel Posts:
- Freezer Paper Stencil “Sweet Dreams are Made of Cheese” Shirt
- Sunday Funday Football T-Shirt Tutorial
- Kid’s Beyonce “I Woke Up Like This” Shirt Tutorial
- “Because She Can” Vinyl Tank Top Tutorial

This tee is hilarious. So perfect for a diy father’s day gift too!
I need to do this for my mom and her husband! this is awesome!
That’s hilarious! Looks like an easy project too. Those are the best!
I have had to say this a few times!!!
WHat a great idea!!! I love that this is doable!!! And of course, I love the words!!!
Love this!! Such an easy gift!!
This is really cool. I love this idea and I’m going to have to try it.
This would make a great gift.. Love it !
thats such an awesome DIY idea! perfect for gifts
Oh my goodness! This is the best! I need this, except I need it to read “… while I was backing up the RV.”