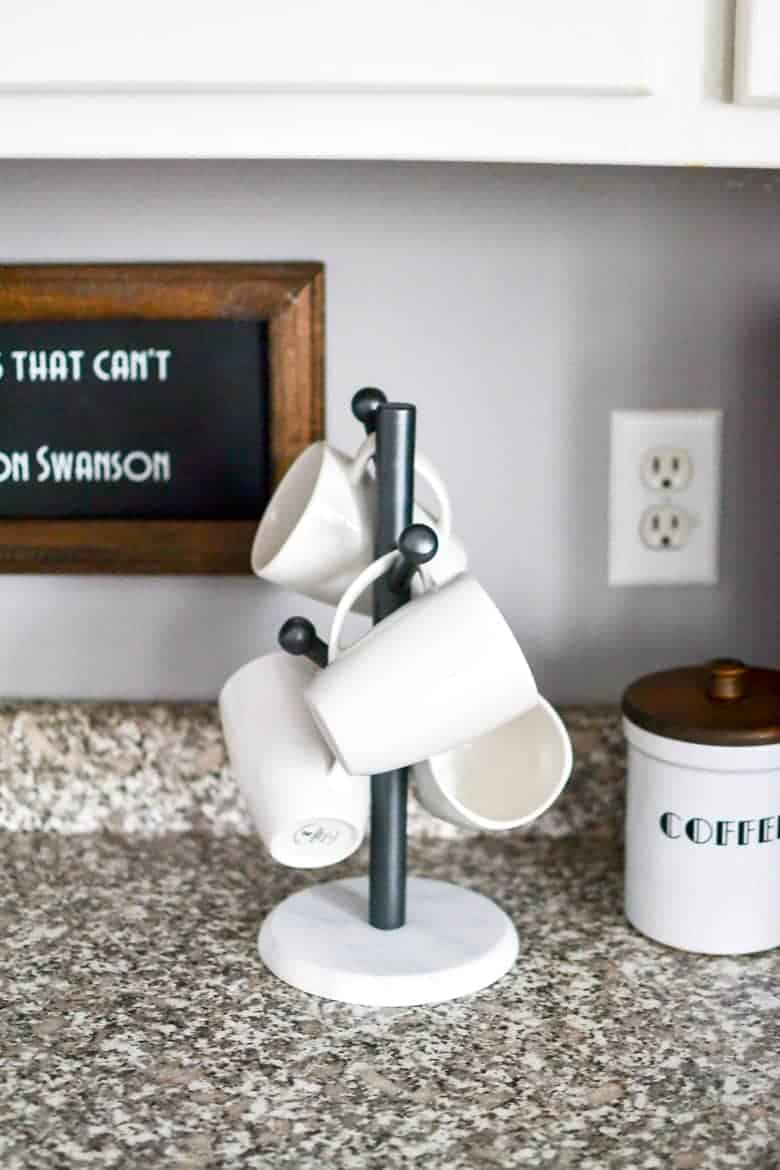
Transform a commonly found thrift store mug tree, the perfect addition to your at home coffee station!
If there’s one thing I continuously see at thrift stores, it’s wooden items.
From plates, to bowls, to leaf shaped platters (seriously, what is up with those?) I have yet to see a decline in their appearance over the past 10 years of my thrifting obsession.
The next time you’re at the thrift store just take a look. I guarantee you’ll see all sorts of wood pieces!
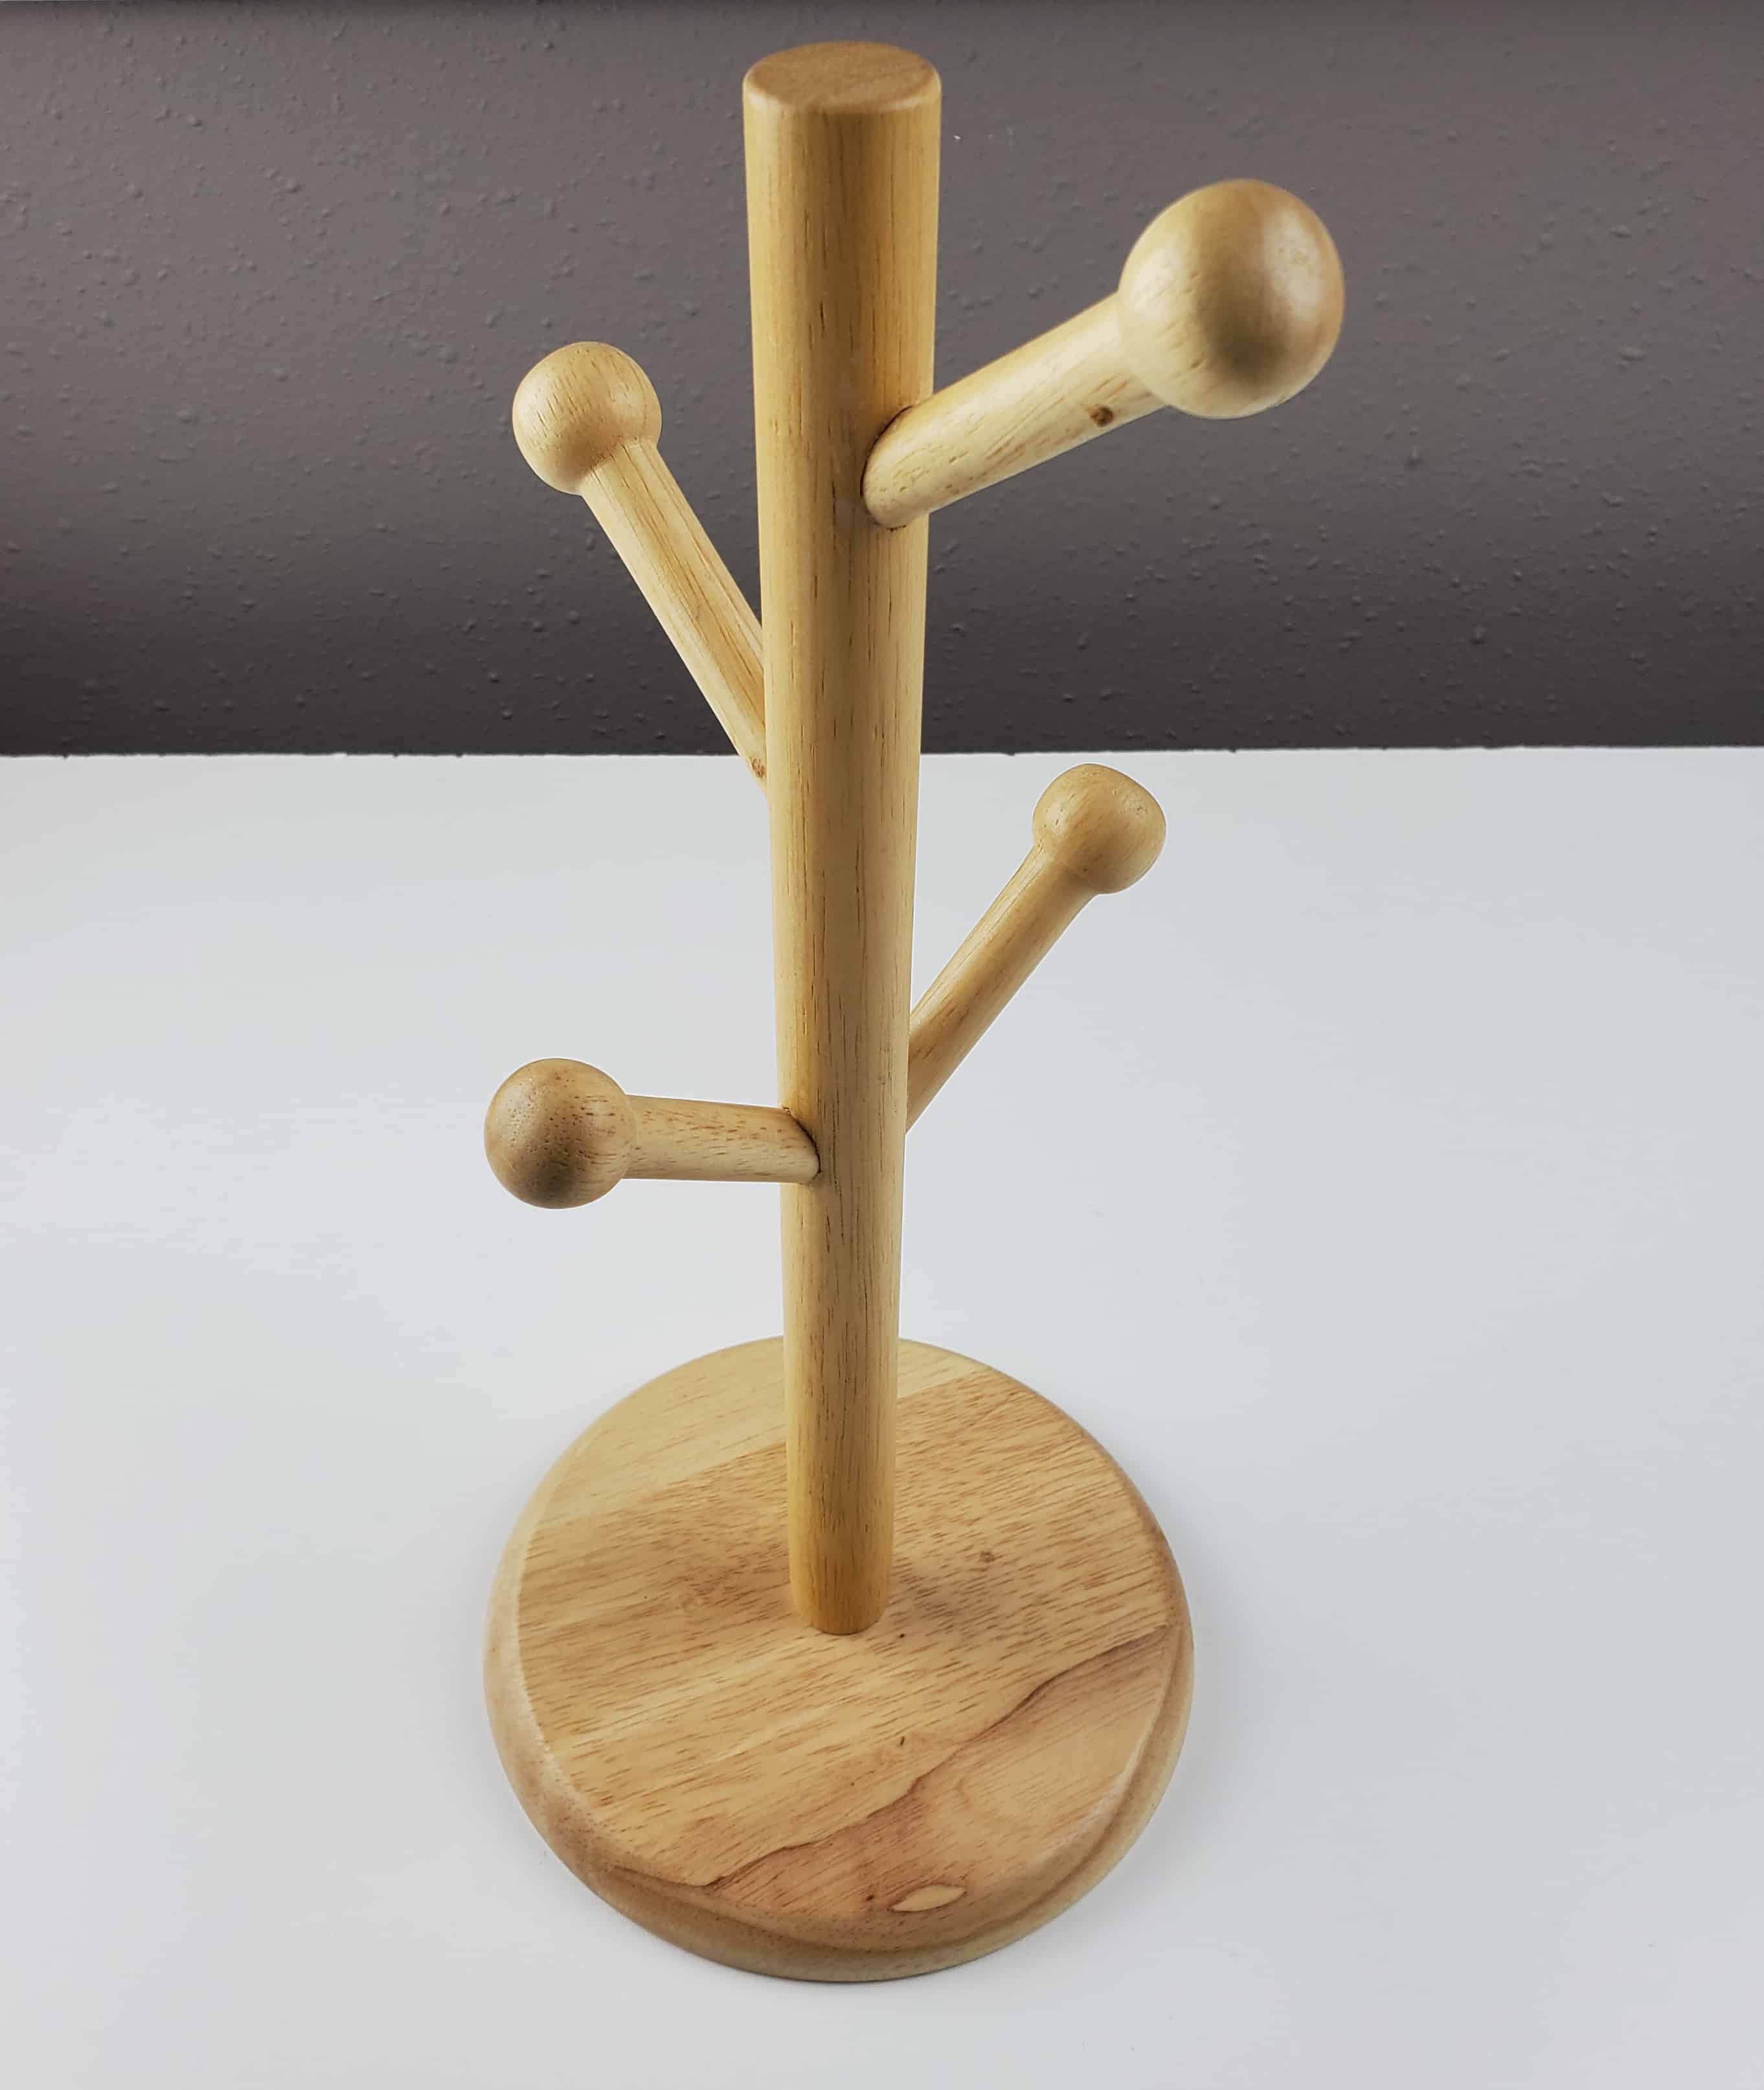
During one particular recent trip I spotted this mug tree just begging to be given a new life.
I was in luck, because I was also putting together a countertop coffee bar for my kitchen (check it out here).
To be completely honest, I had an epic fail moment with the first version.
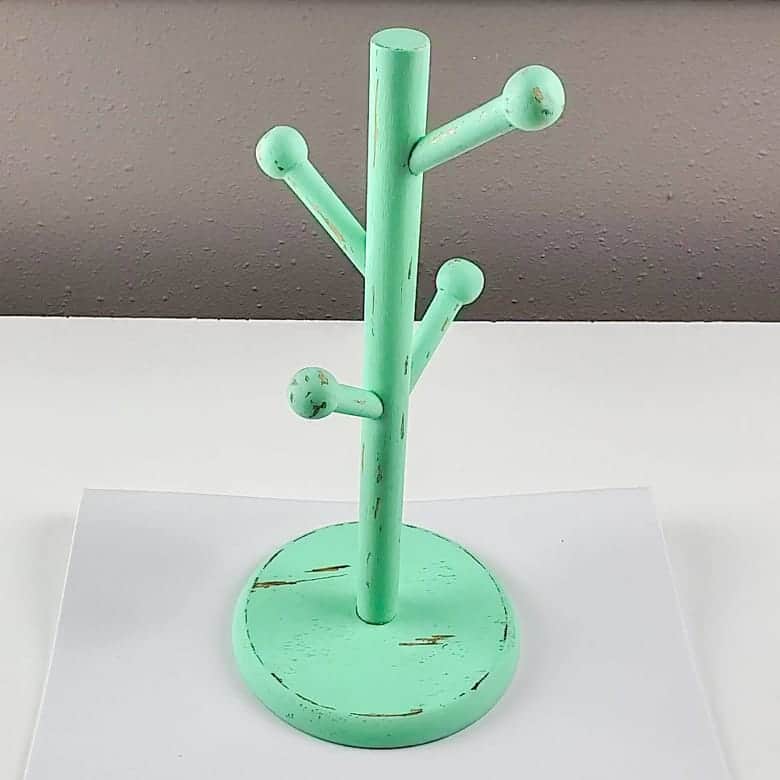
Even though I know it’s not my style, I tried to go for a farmhouse look. And I HATED it.
Luckily, after some advice from my Instagram friends, I was able to recover from that travesty and turn it into something I could be proud of.
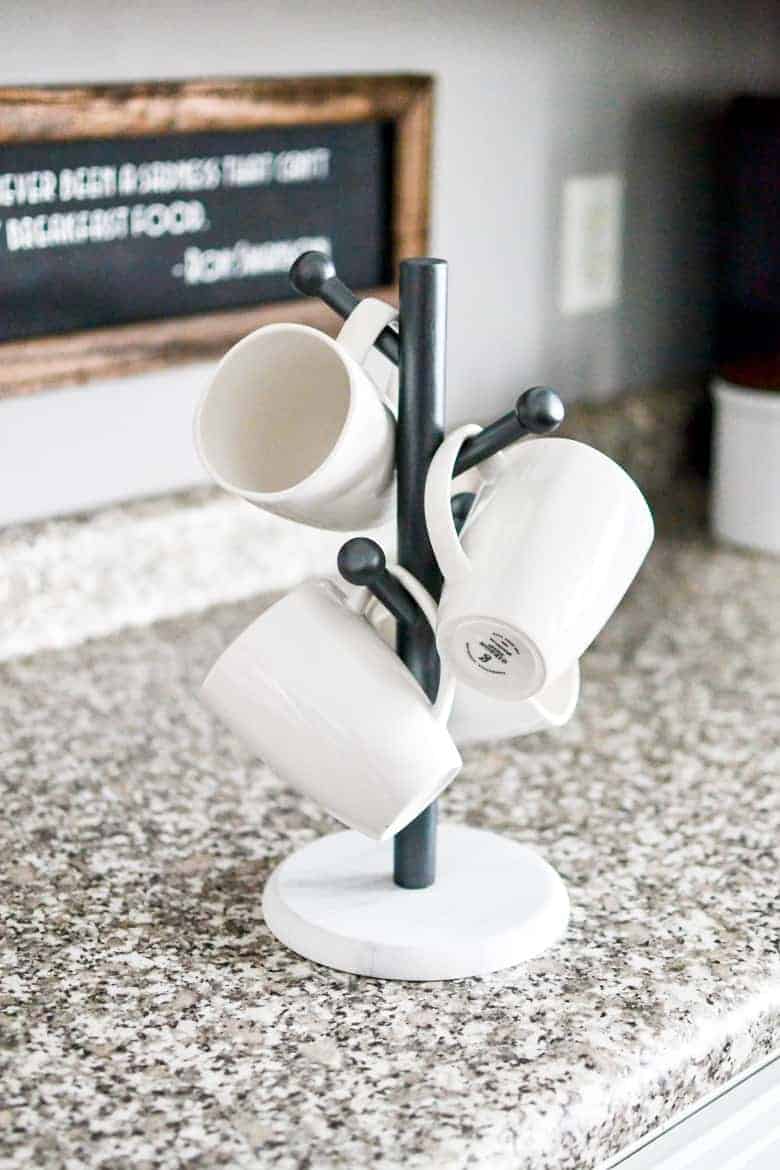
Here’s how you can create your own faux marble mug tree for yourself!
DIY Faux Marble Thrift Store Coffee Mug Rack Makeover
Materials you will need…
- Wooden Coffee Mug Tree
- DecoArt Americana Acrylic Paint in Snow White
- DecoArt Matte Metallics Paint in Charcoal
Tools you will need…
- Very Fine Grit Sandpaper
- Foam Paint Brush
- Paint Brushes
- Craft Sponge
- Rag
- Screwdriver
- Optional: Feather
Step 1: Prepare the mug rack
If you aren’t lucky enough to find a wooden coffee mug tree at a thrift store (chances are pretty high that you will, though) here is one from Amazon for under $15.
Prepare your mug rack by giving it a light sand with very fine grit sandpaper to remove any previous finish or grime. Wipe away the dust from the sanding with a damp rag.
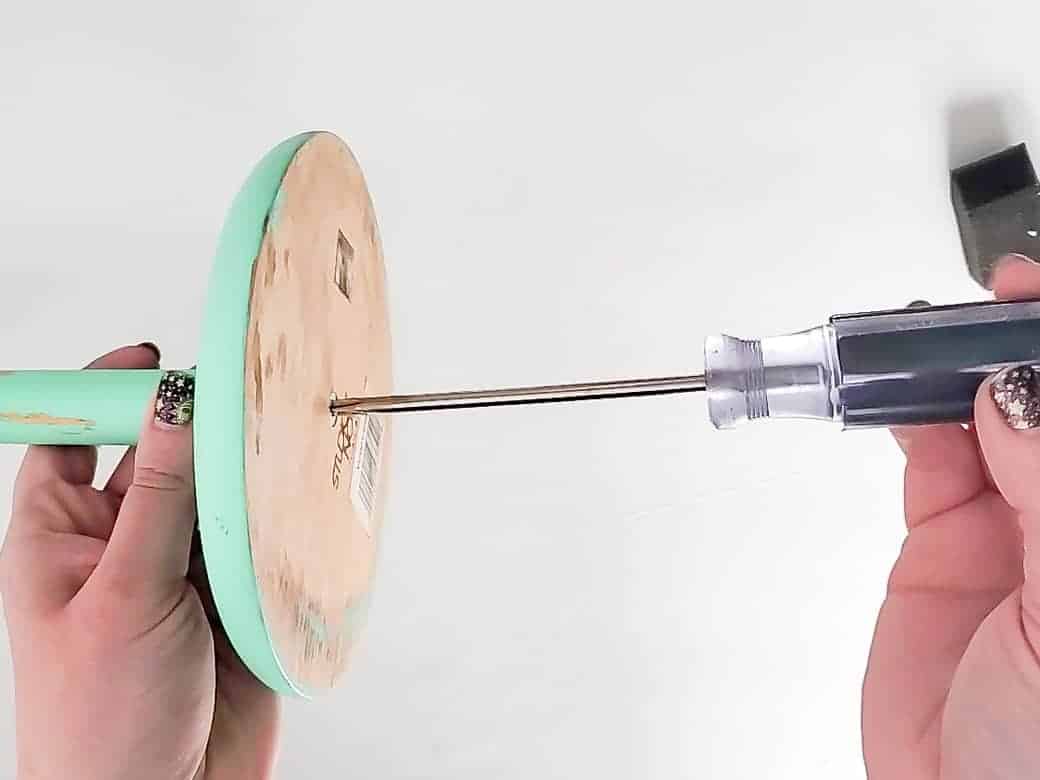
Then, separate the base of the rack from the tree using a screwdriver. Could you do this before sanding? Yes. I just happened to do it backwards 😉
If your base doesn’t easily separate:
You’ll need to work on one part of the mug tree at a time, covering the section that you aren’t working on in painters tape to protect it. I recommend starting with the tree portion first if this is the case.
Luckily most mug trees are held together with a simple screw, so you should be able to disassemble yours.
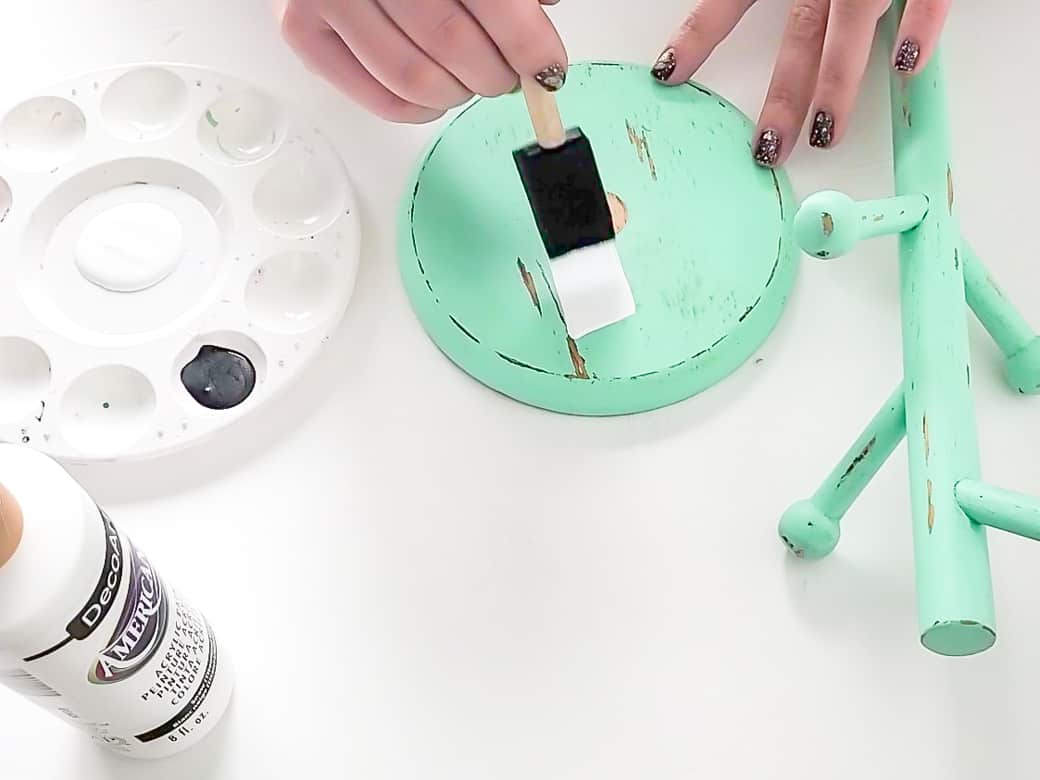
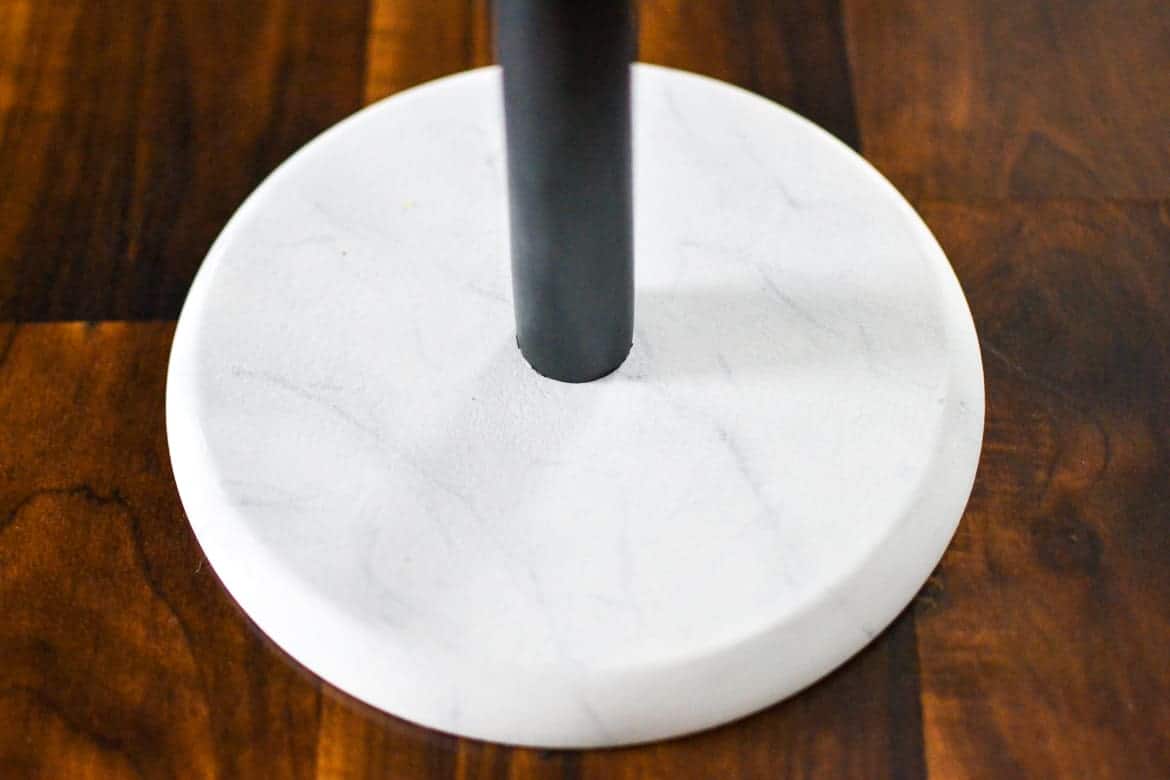
Step 2: Paint the base of the mug tree white
Using a foam paint brush and white acrylic paint, paint the base of the rack.
Work in strokes going the same direction with coats that aren’t too thick, otherwise you’ll end up with lots of raised brush strokes once it dries. Let each coat dry thoroughly.
You might need to repeat this step a few times until the base is well covered. Mine took about 4 coats to fully cover the atrocity that I had created before 😉
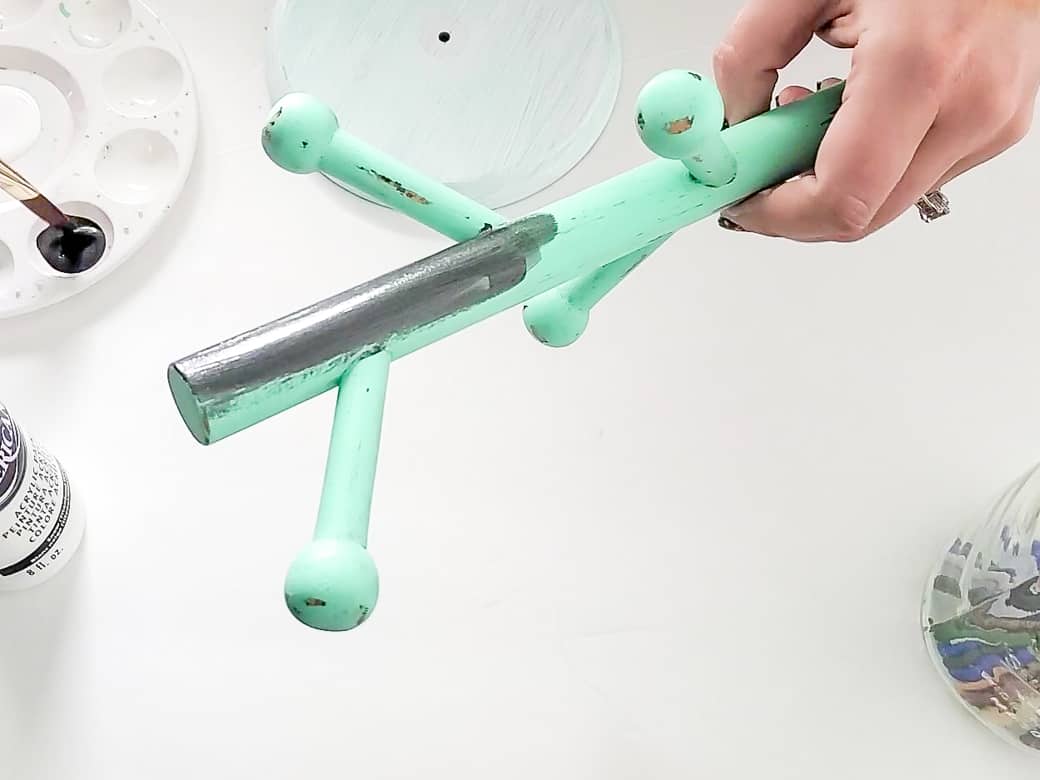
Step 3: Paint the mug tree
Using the Matte Metallics paint and a traditional paint brush, give the mug tree a coat of paint. Let dry thoroughly and repeat this step until the tree is well covered.
I found that it took just 2 thick coats of paint to fully cover my mug tree. This could be because I was covering my previous terrible paint job.
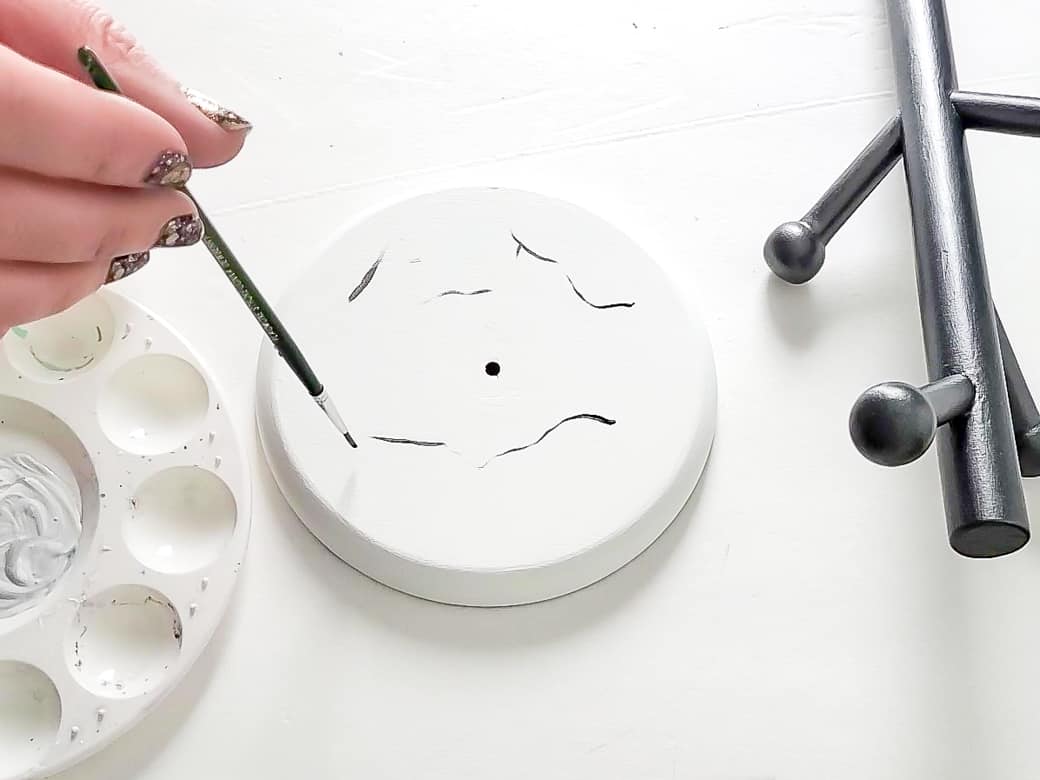
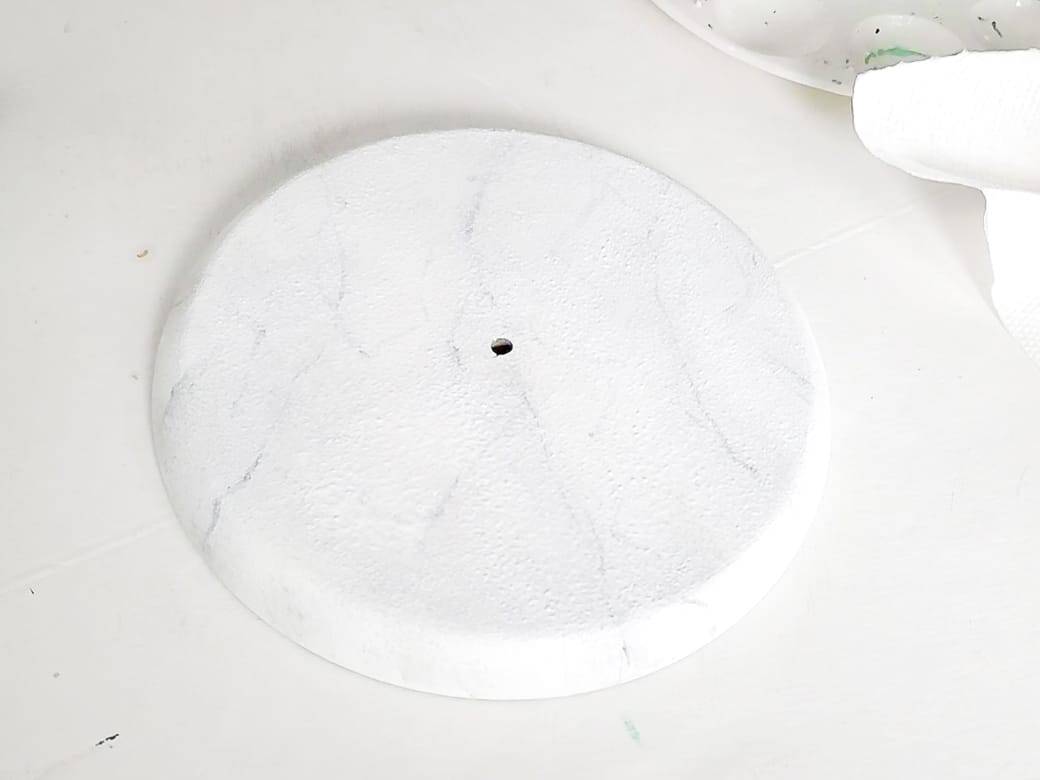
Step 4: Give the base a faux marble finish with acrylic paint
I looked up a few video tutorials on creating a faux marble finish with acrylic paint, and in the end I ended up using a mishmosh of techniques to get the effect I was looking for.
Here is one of the videos on creating a faux marble effect that helped me:
To create the marble effect, I started by using the same charcoal Matte Metallic paint and a tiny paintbrush that I held very loosely to create the veining. I think if you have a feather for this step, you will definitely get better results than I did.
Tip: look up photos of real marble for inspiration. I found that really helped guide me for how to do the abstract veining!
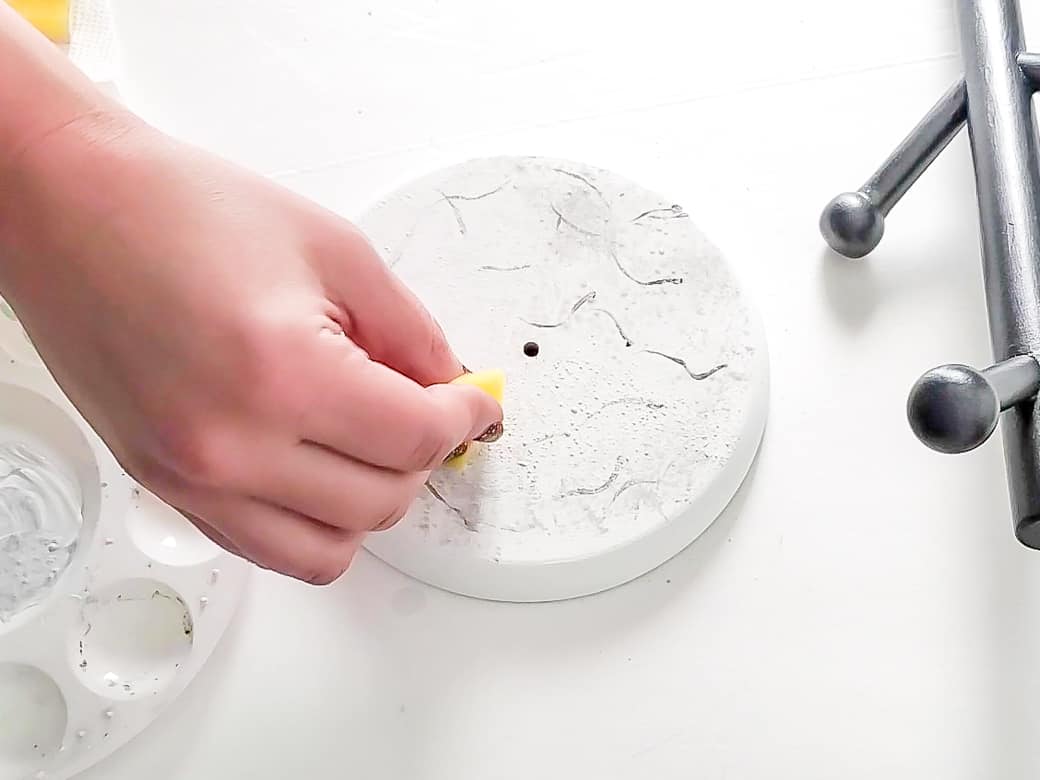
Then, create a light grey color by mixing the white and gray paint. Dab it over the veins with a sponge and blend into the white.
Play around with various shades of grey and different blending techniques until you get the results that look the best to you. I think creating a faux marble look really is subjective to your tastes!
Step 5: Sand the base lightly
Once the faux marble effect is totally dry (I let mine sit for about an hour), sand away any bumps using fine grit sandpaper.
Reattach the base to the tree, and you’re done!

If I learned anything from this DIY, it’s not to give in when you don’t get the immediate results you want.
I could have accepted the mint farmhouse disaster for what it was, but I would not be defeated! 😉
And I sure am glad I persisted, because I ended up learning how to paint faux marble and I would love to explore more uses for this fun technique.
Want More Thrift Store Makeovers and DIYs?


Faux Marble Thrift Store Mug Tree Makeover
Materials
- Thrift Store Wooden Coffee Mug Tree
- DecoArt Matte Metallics in Charcoal
- DecoArt Americana Acrylic in White
Tools
- Fine Grit Sandpaper
- Foam Paint Brush
- Paint Brushes
- Sponge
- Rag
Instructions
Step 1: Prepare the mug rack
- Give the mug rack a light sanding to help the paint adhere.
- Remove the dust with a damp rag or cleaning wipe.
- If you are able to, separate the top of the mug rack from the base.
Step 2: Paint the base of the mug rack
- Paint the base of the rack with a few coats of white acrylic paint.
Step 3: Paint the mug hooks
- Paint the top of the mug rack with a few coats of Matte Metallics. Let each coat dry thoroughly between coats.
Step 4: Give the base a faux marble finish with acrylic paint
- To create the faux marble effect, using a thin paint brush, paint a few veins of the grey metallic paint going in the same direction. Use a photo of marble as inspiration if you're feeling unsure.
- Using a sponge and some watered down white acrylic paint, blend in the veins of the grey paint until it begins to resemble marble.
Step 5: Sand the base lightly
- Once the base is completely dry, sand it down until smooth using fine grit sand paper.


This turned out so good! I need to make one for our home!
Paige
http://thehappyflammily.com
Thanks so much, Paige! Keep your eye out when you’re out thrifting, I just saw another one like this today!