This is a sponsored post written by me on behalf of Cricut. All opinions are 100% mine.
What do you do when you need graduation gifts for 5 seniors? You whip out your Cricut Joy and DIY!
Maybe you’re a coach or teacher. Or maybe you’ve got a ton of grad parties to attend this summer. Now’s the time where you have to come up with a senior gift for a bunch of seniors without breaking the bank!
You may or may not know that on top of running this blog, I’m also a competition dance teacher. Some years we have one or two seniors, this year we have 5.
I needed to come up with a senior gift for all of our seniors, but I also had to keep budget in mind.
The average going rate for a high school graduation gift in cash is around $25, not to mention buying a card to put the cash in. Multiply that for every senior in your life and it adds up quickly.
Enter the Cricut Joy!
Not only can the Cricut Joy make some super cool gifts, it has literally changed the card making game.
How do you make graduation cards with Cricut Joy?
You might be thinking, yeah yeah. A typical homemade card.
No seriously. Not only do these cards look super classy, I can pump out a card in less than 5 minutes. I timed myself.
It’s an incredibly simple process, keep scrolling to see how I made these graduation cards for the baskets.

If you want to read more in depth about card making with the Cricut Joy, I will be publishing a post all about it in the near future.
What do you put in a graduation gift basket for a teenage girl?
I did a little market research by polling my other teenage dancers who weren’t yet seniors about what was “cool”, and with their help this is what I came up with.
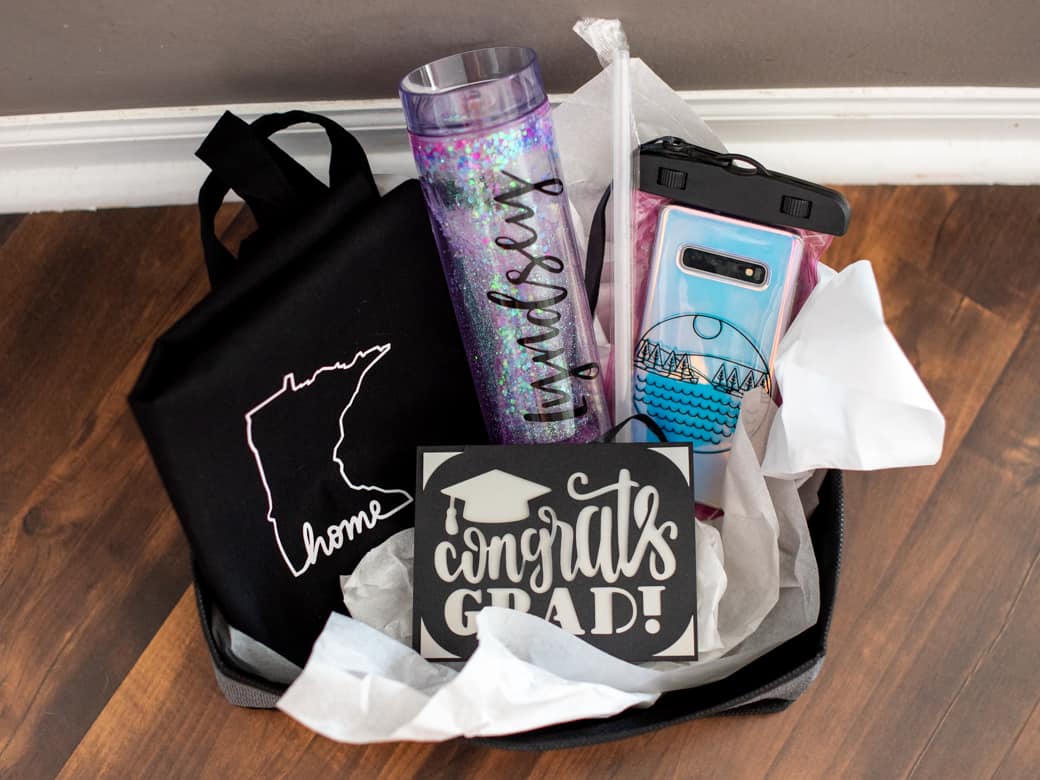
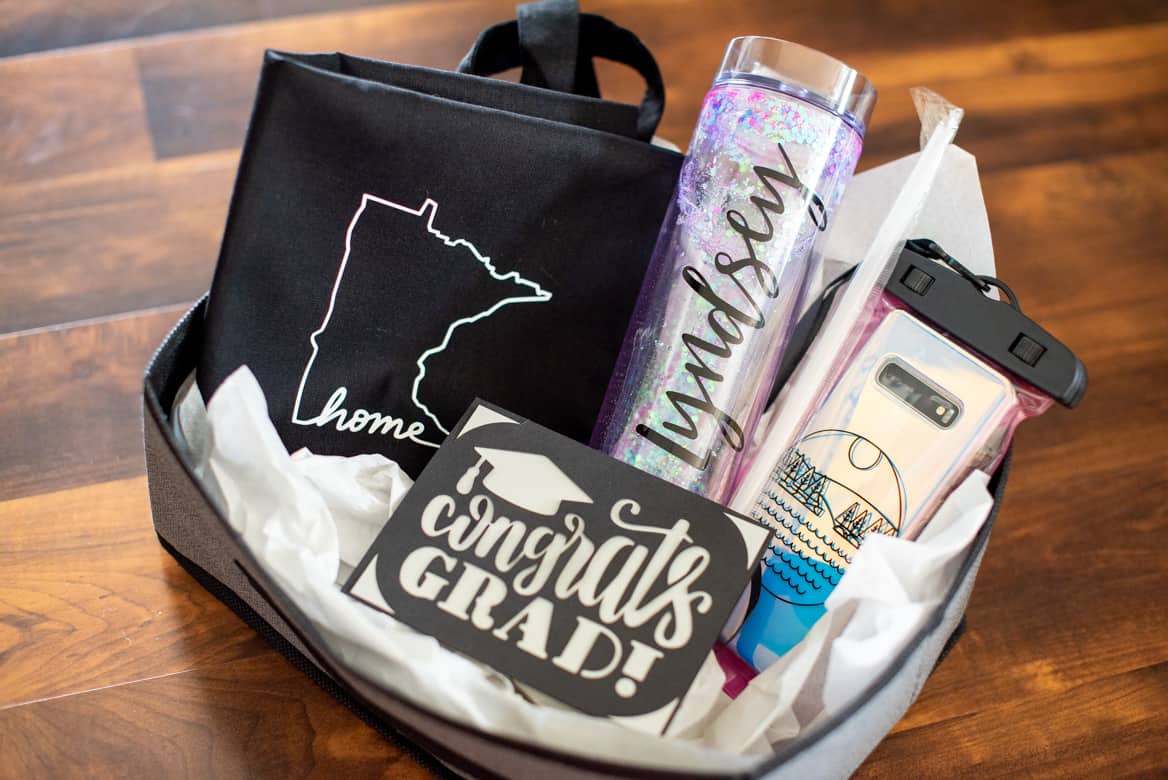
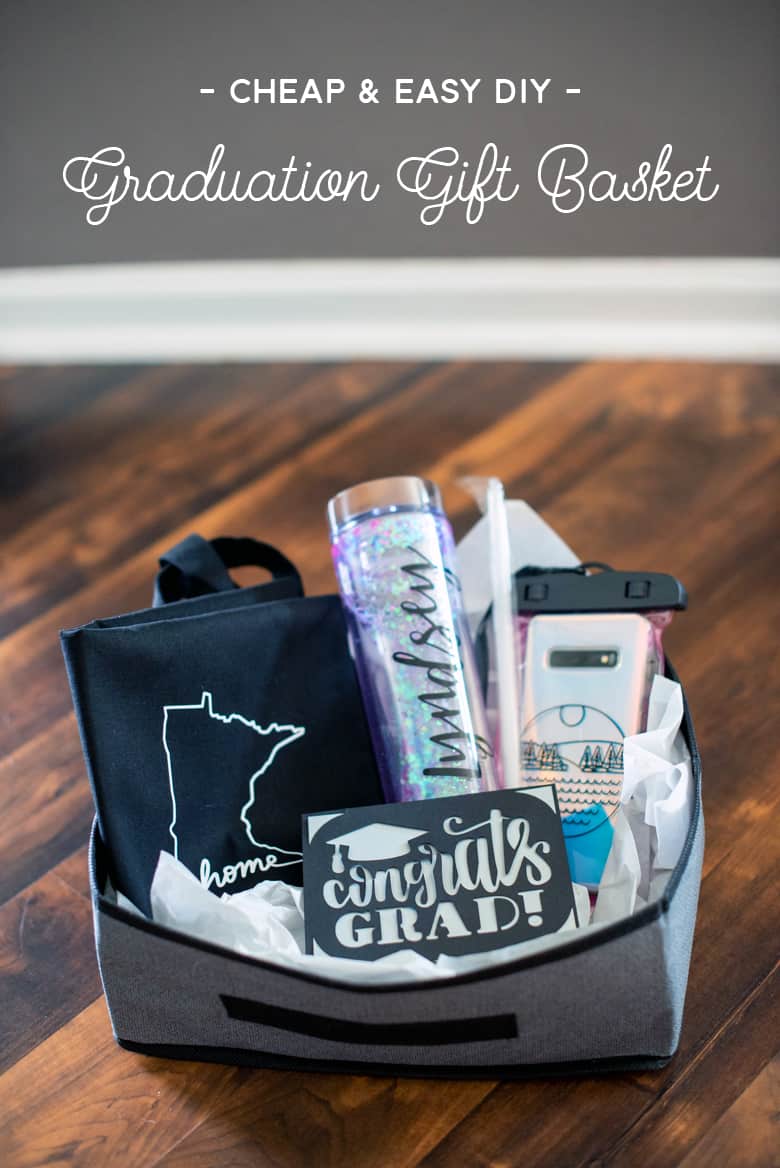
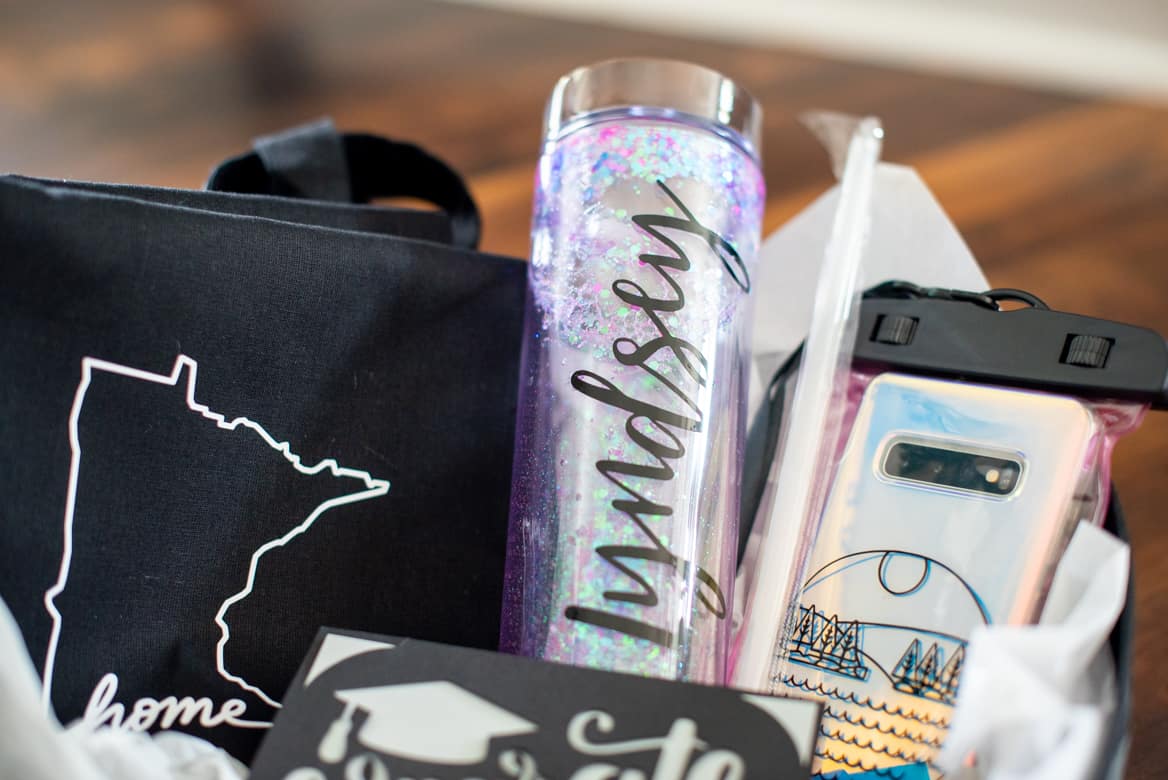
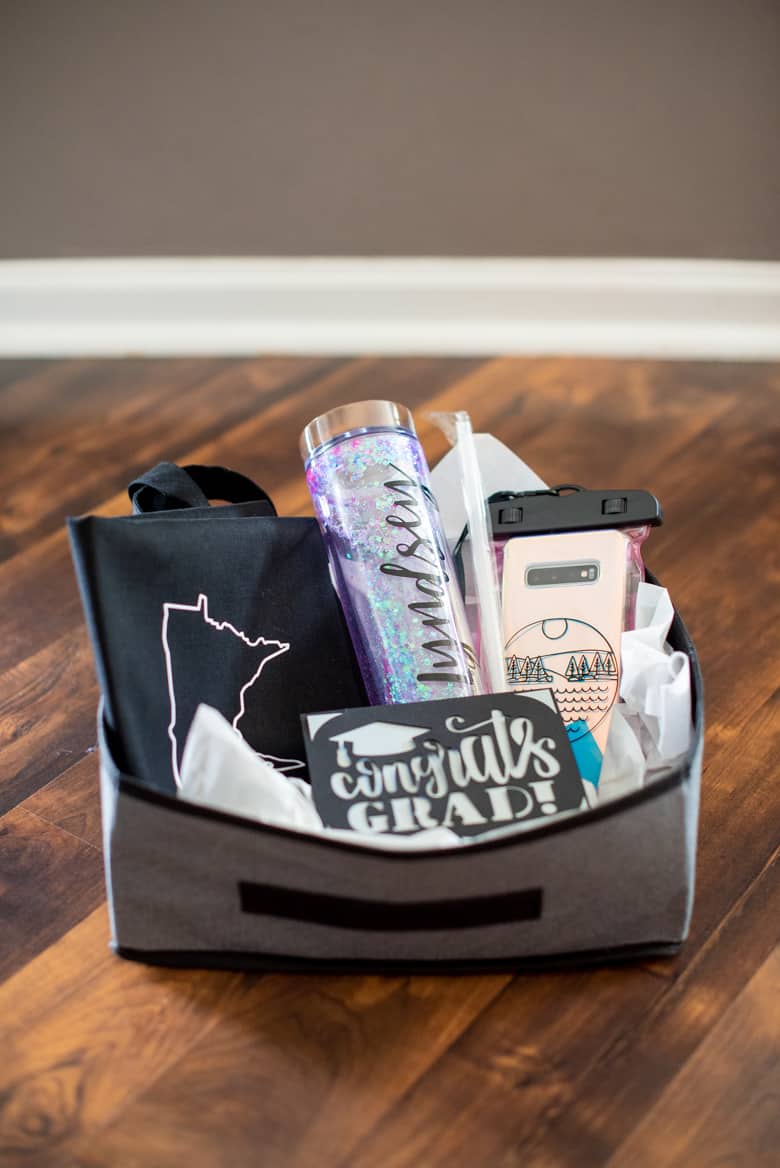
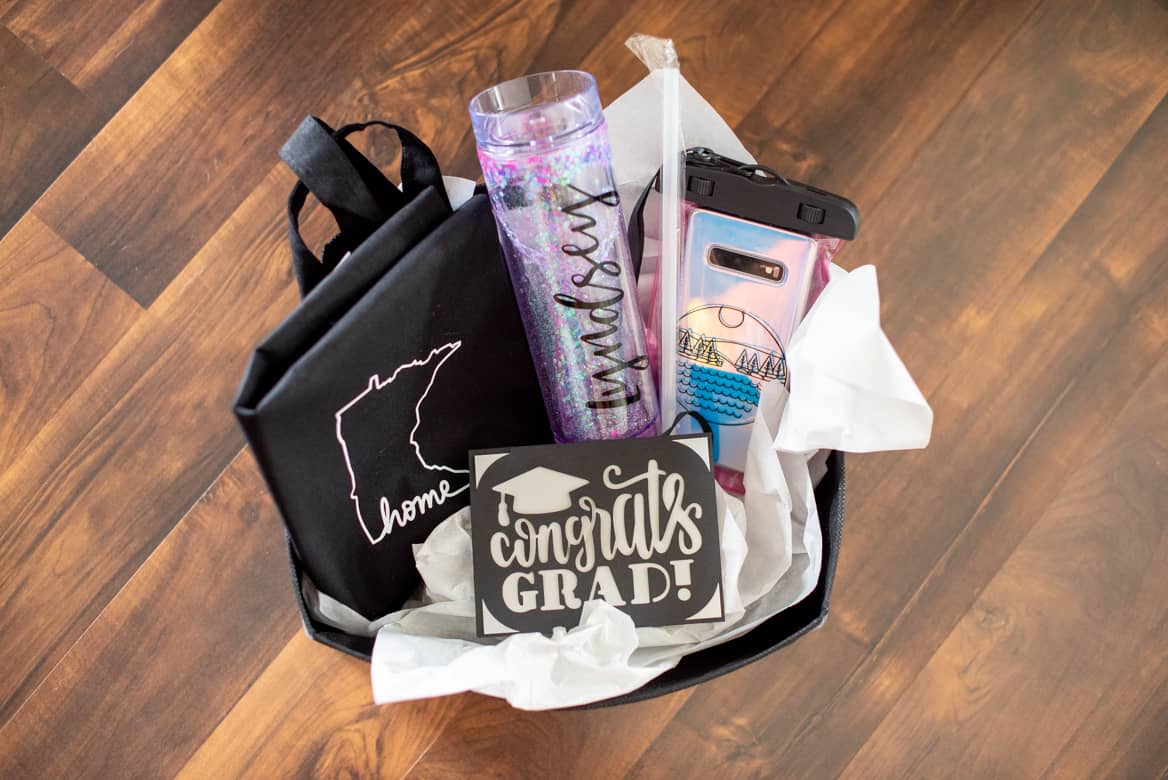
I put together summer themed baskets complete with a stay dry phone pouch, a tote perfect for the beach, and a glitter tumbler for staying hydrated. Summers are always an important time of year for teenagers, and especially seniors who are about to go off to college.
And the best part… total cost for blank items for each basket was under $10!
DIY Graduation Gift Ideas for Teenage Girls
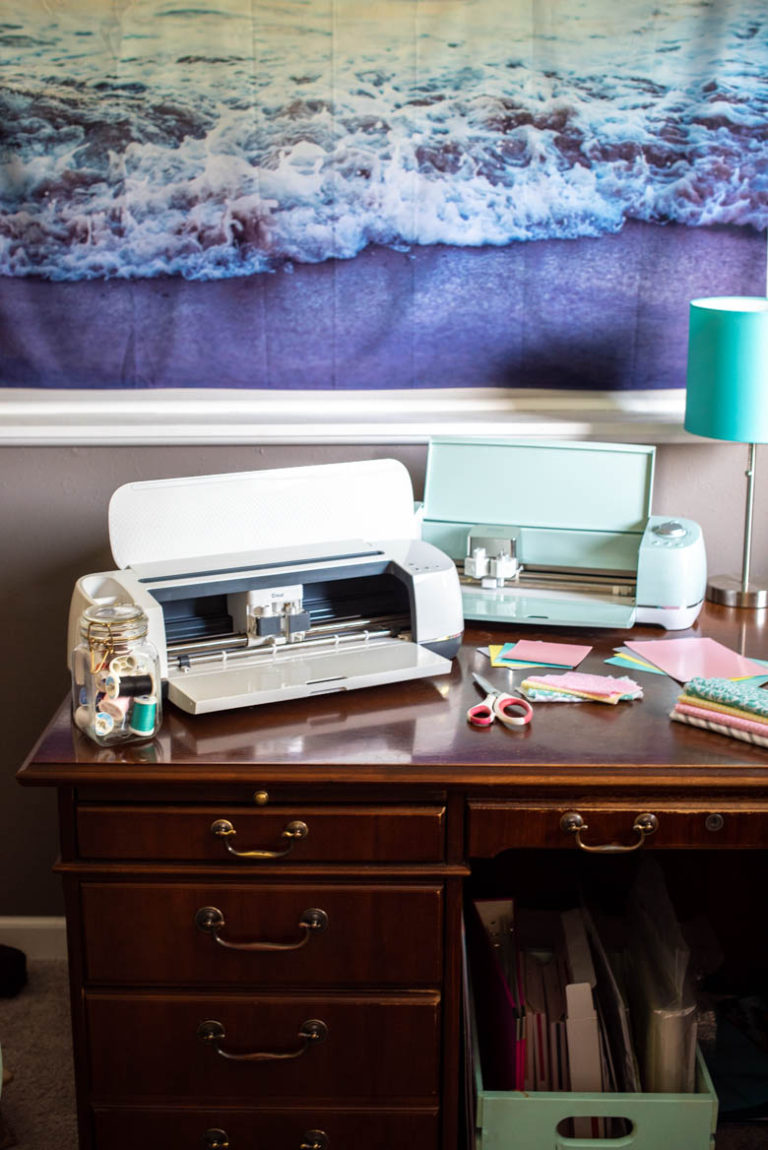
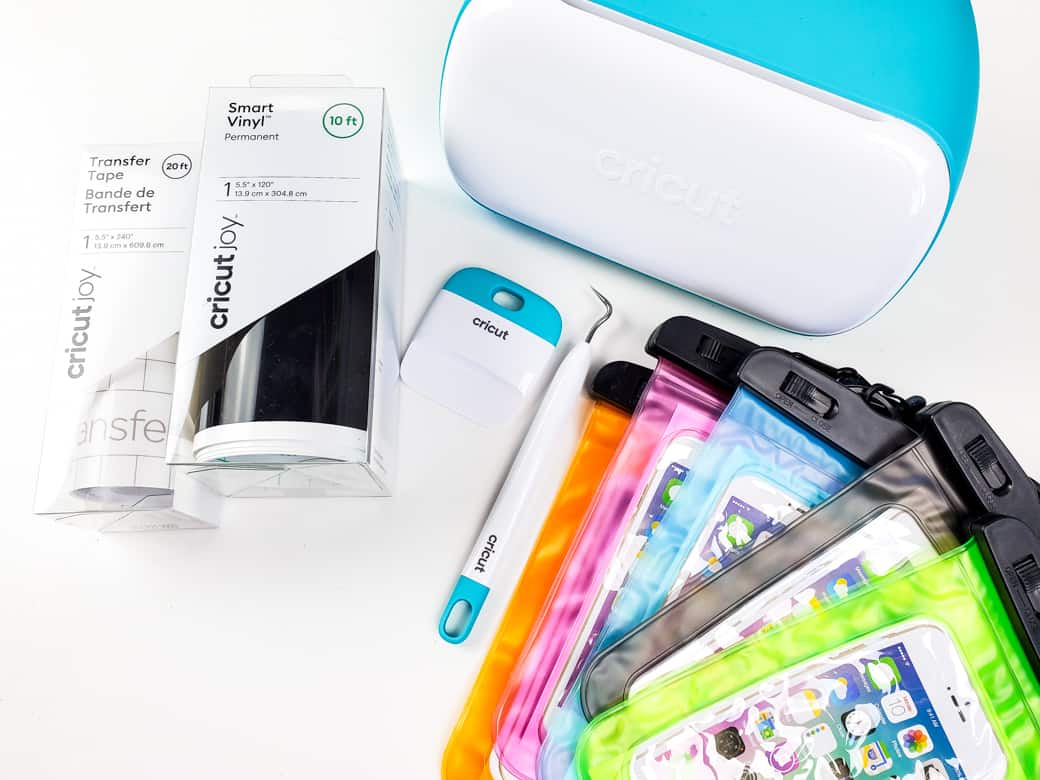
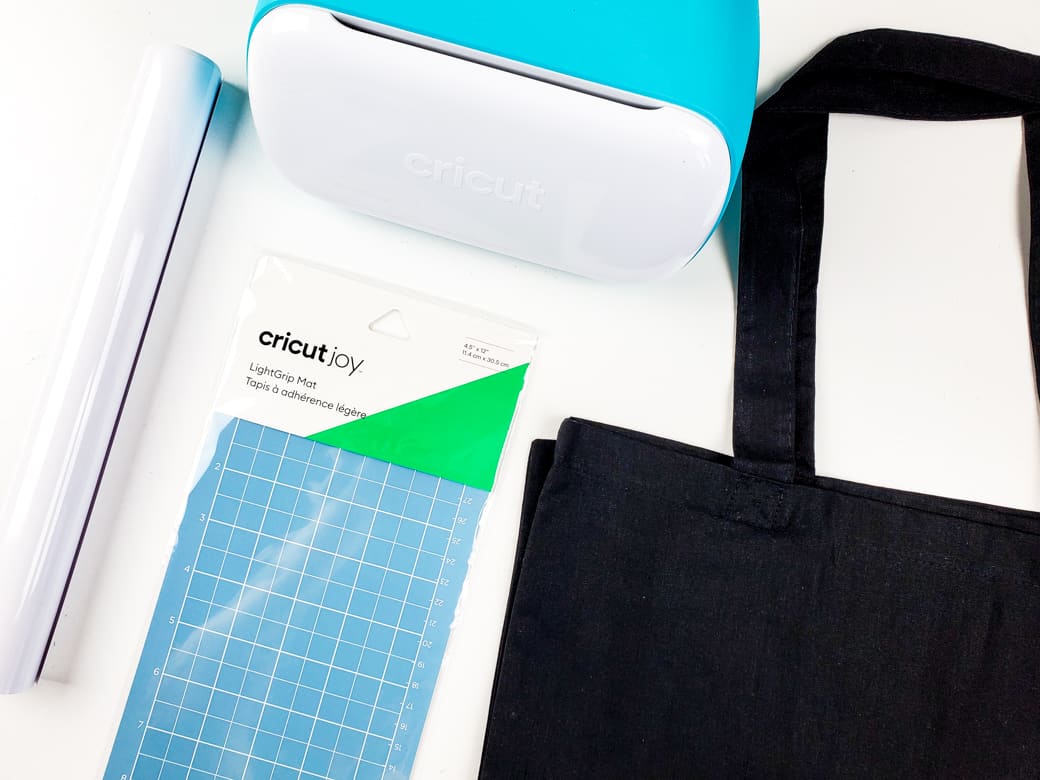
Supplies Needed
- Cricut Joy
- Cricut Joy Insert Cards- Black/Silver Matte Holographic
- Cricut Joy Card Mat
- Cricut Joy Permanent Smart Vinyl- Black
- Cricut Everyday Iron-On Vinyl
- Cricut Joy Light Grip Mat
- Cricut Joy Transfer Tape
- Painters Tape
- Cricut Easypress 2
- Cricut Joy Starter Tool Set
Blanks Needed
- Keep Dry Pouches
- Black 100% Cotton Totes
- Clear Skinny Tumblers (or you can purchase already glittered ones)
Note: this post is full of helpful tutorials! If you want to skip ahead, you can access each project by clicking here…
First I’ll show you how to perfectly apply permanent smart vinyl using the keep dry pouches as an example.
You will use the same technique to repeat the process for the skinny tumblers, or any other item you might want to apply permanent vinyl to!
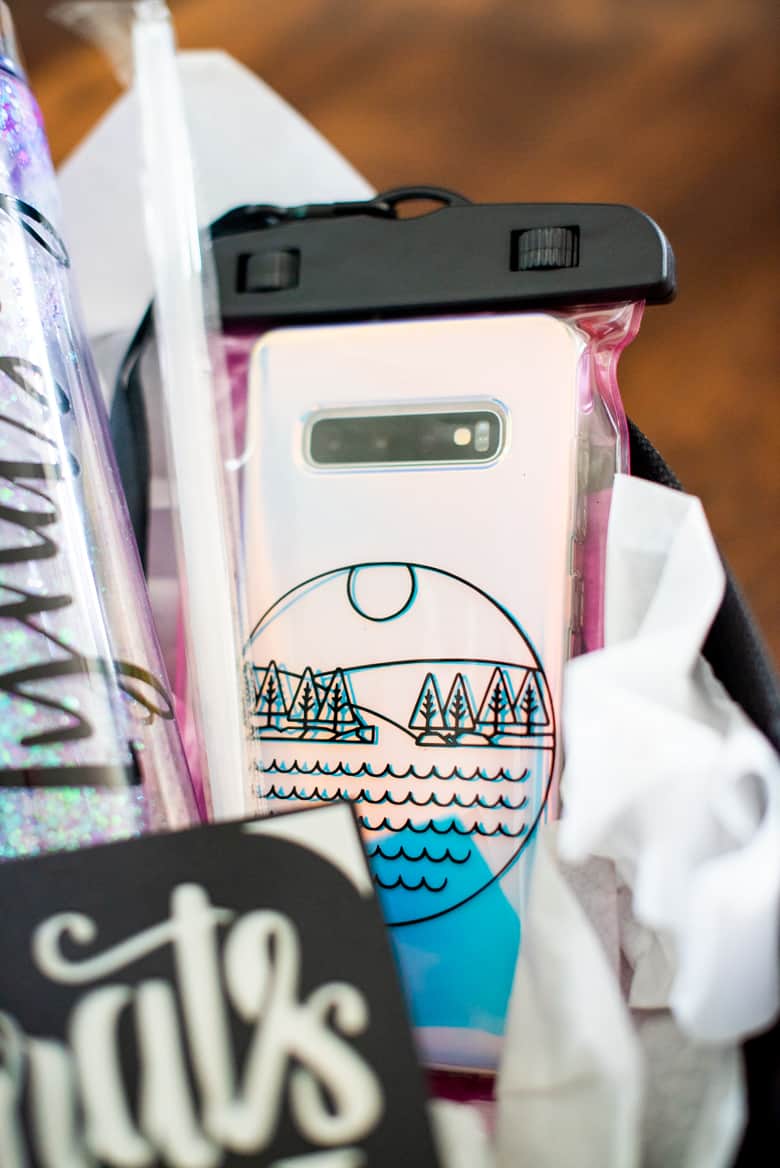
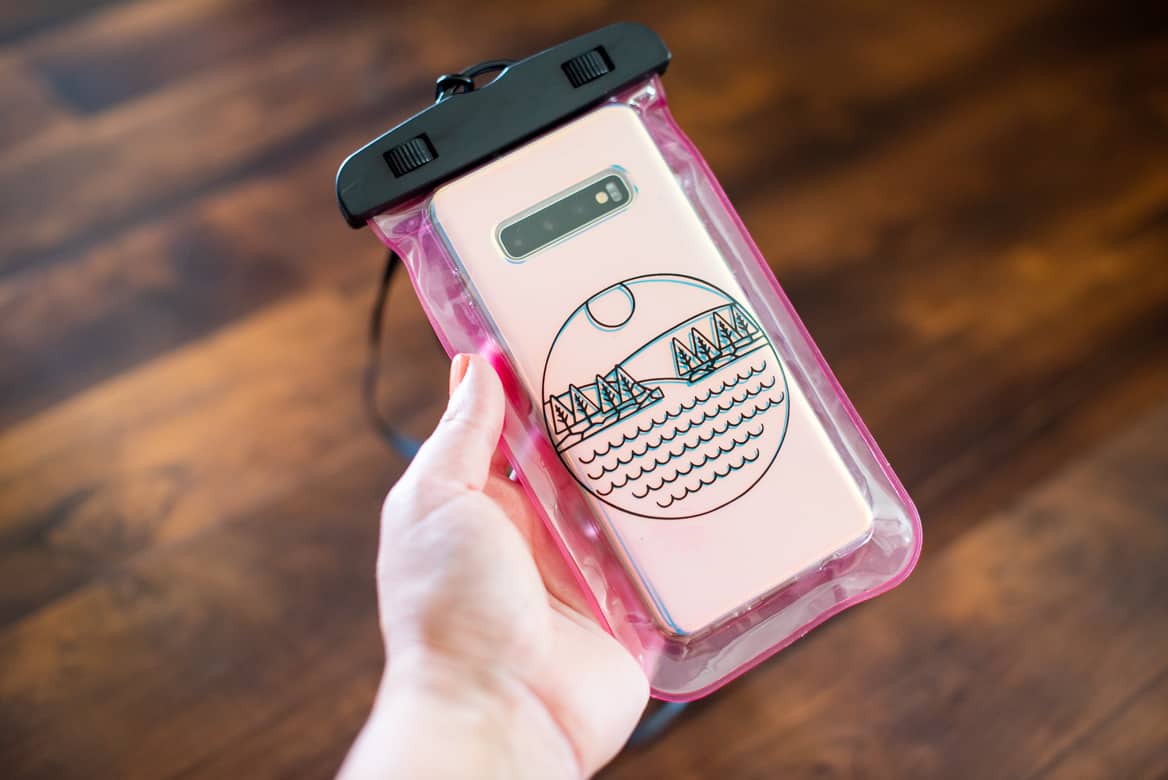
DIY Custom Stay Dry Phone Pouch
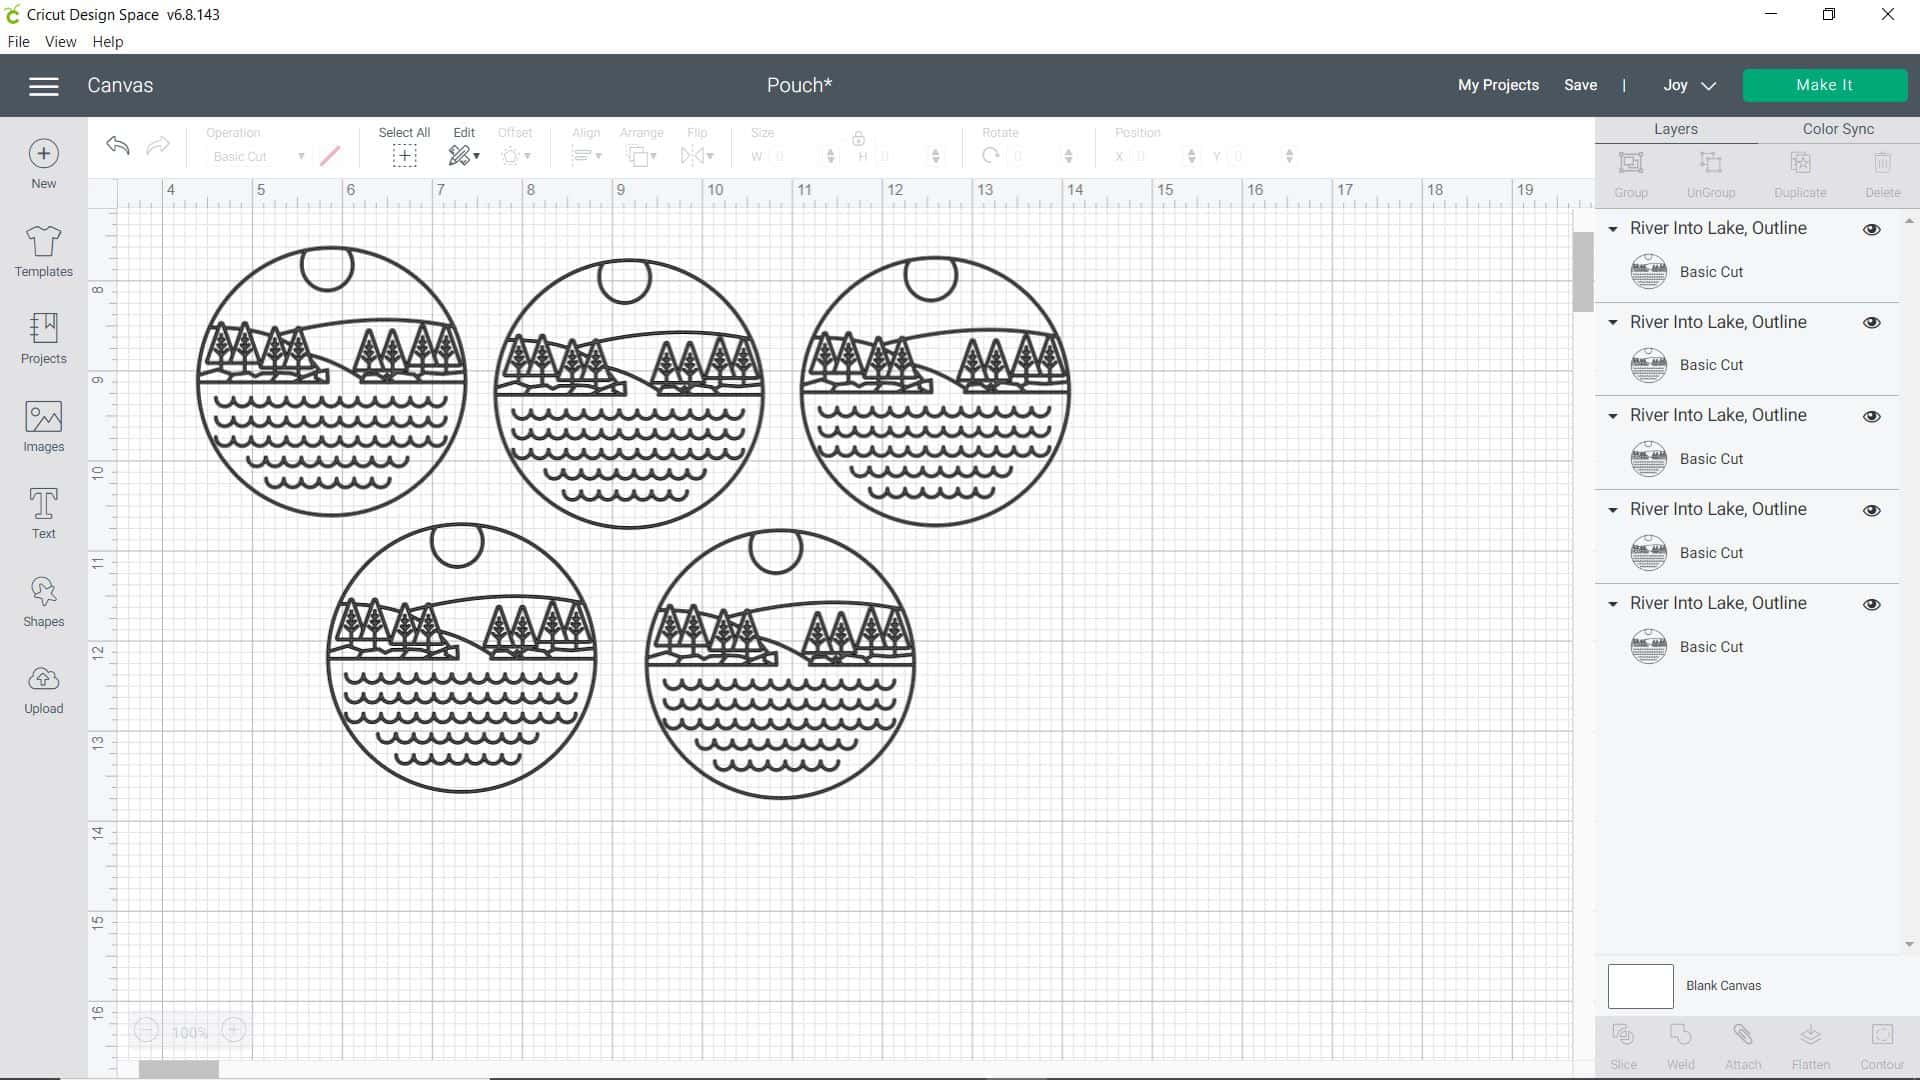
Step 1: Use Cricut Design Space to create your design
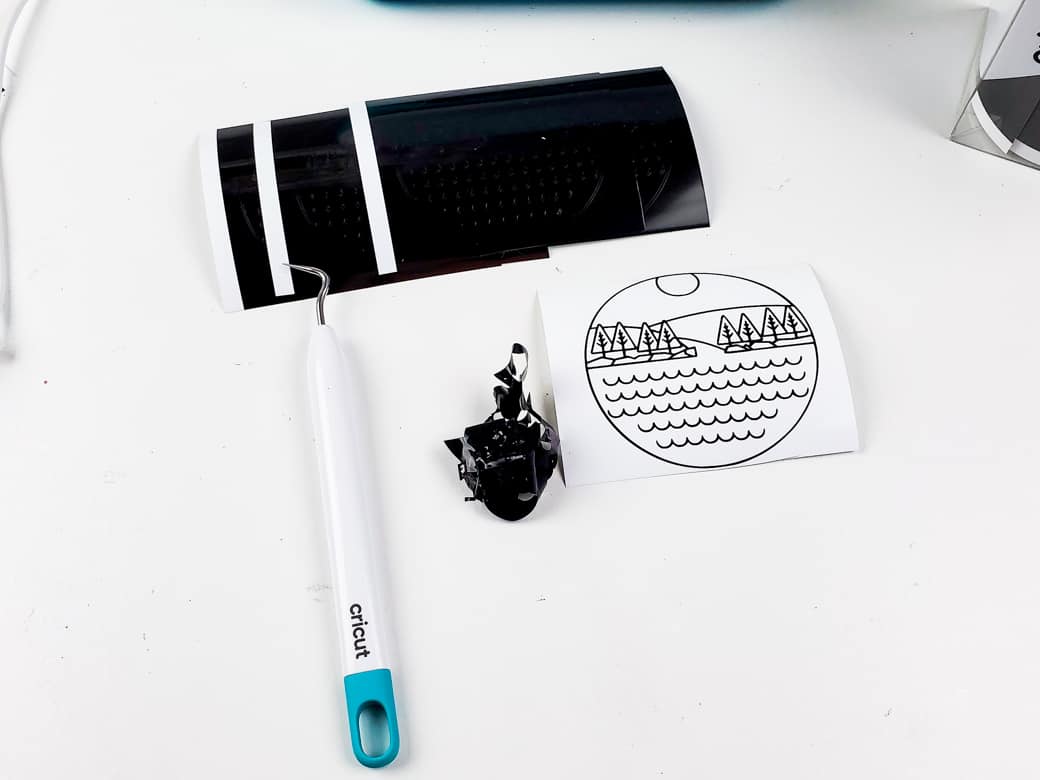
I found these cool lake scene badges that I thought would be perfect for the summer outdoorsy theme.
These are a part of the Monoline Scenic Badges set that I was able to use with my Cricut Access membership.
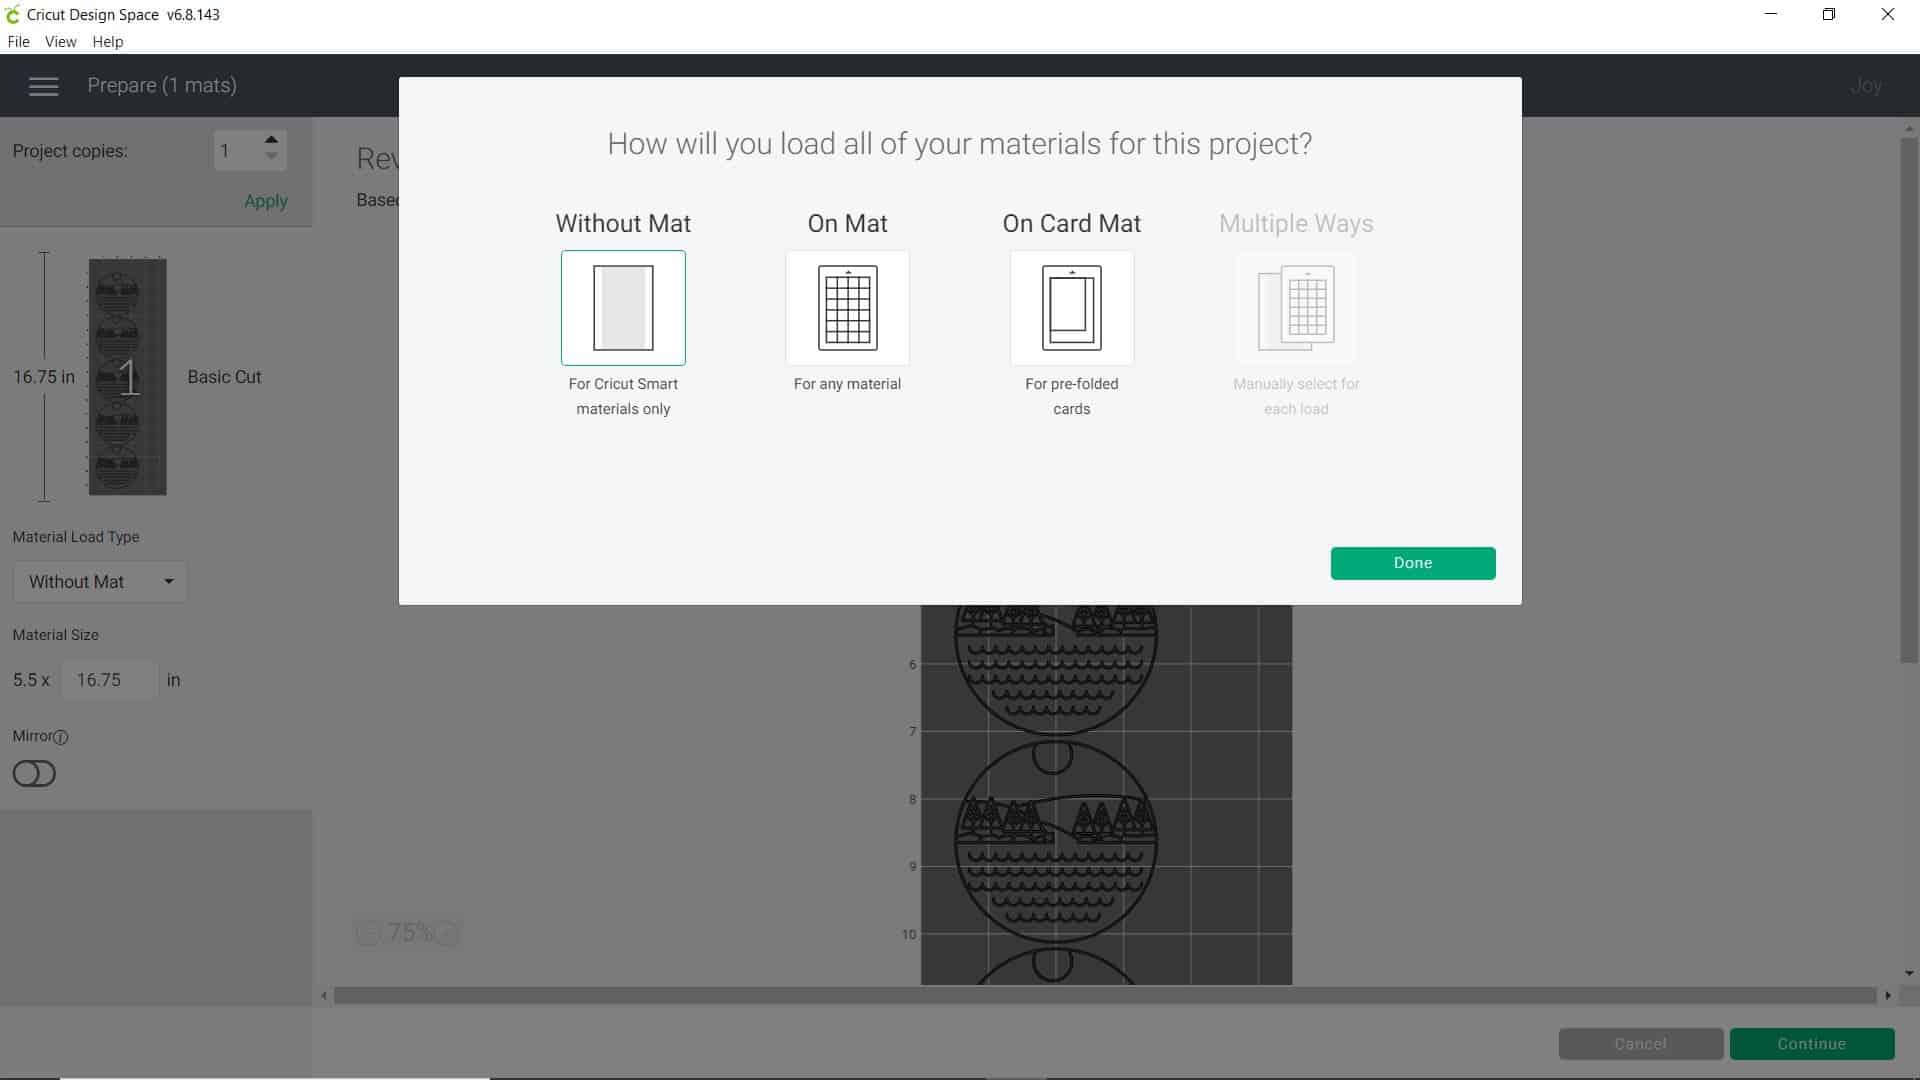
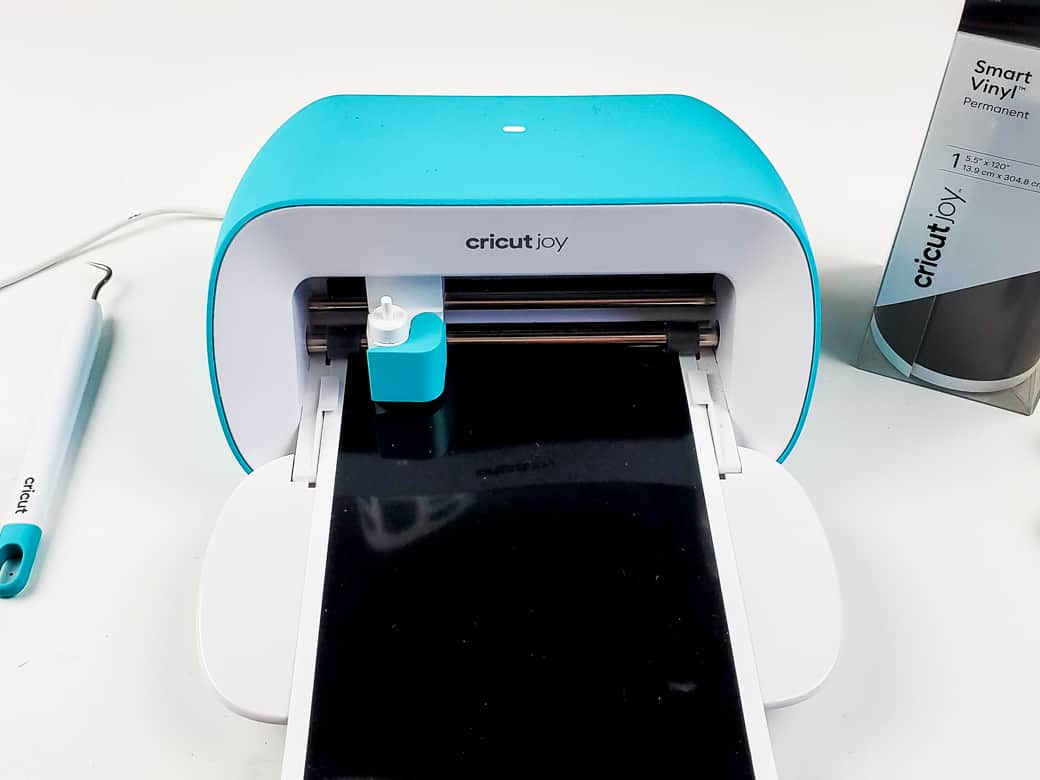
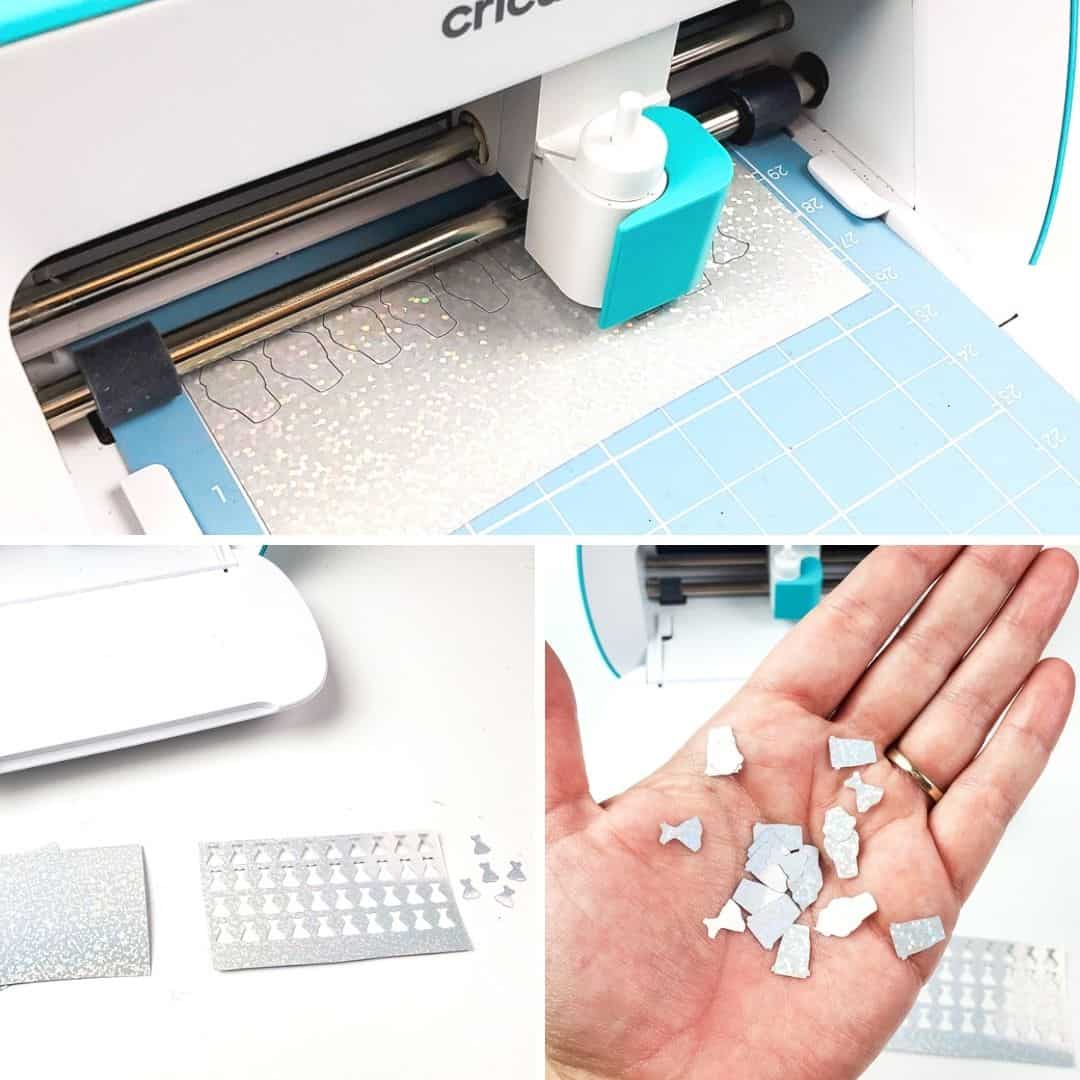
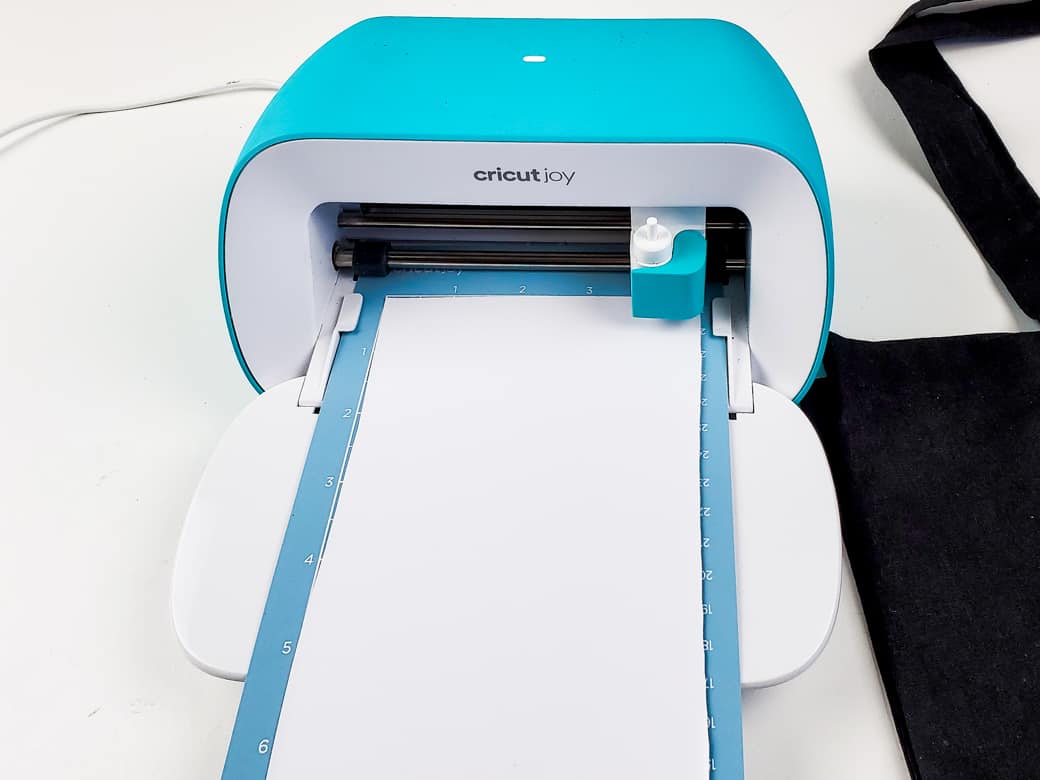
Step 2: Cut using your Cricut Joy and Smart Vinyl
The coolest thing about Smart Vinyl, no mat!
All you have to do is cut a piece as long as the software tells you to for your cut, insert the piece of vinyl, and it will do the rest for you.
Just make sure that you select “Without Mat” when you’re ready to cut.
Once cut, remove the vinyl from the machine and weed away the excess vinyl leaving the design behind.
You might be wondering…
Do I really need to use a weeding tool for vinyl? No. Does it make the job 100% easier? Yes. Especially when weeding a design as intricate as these.
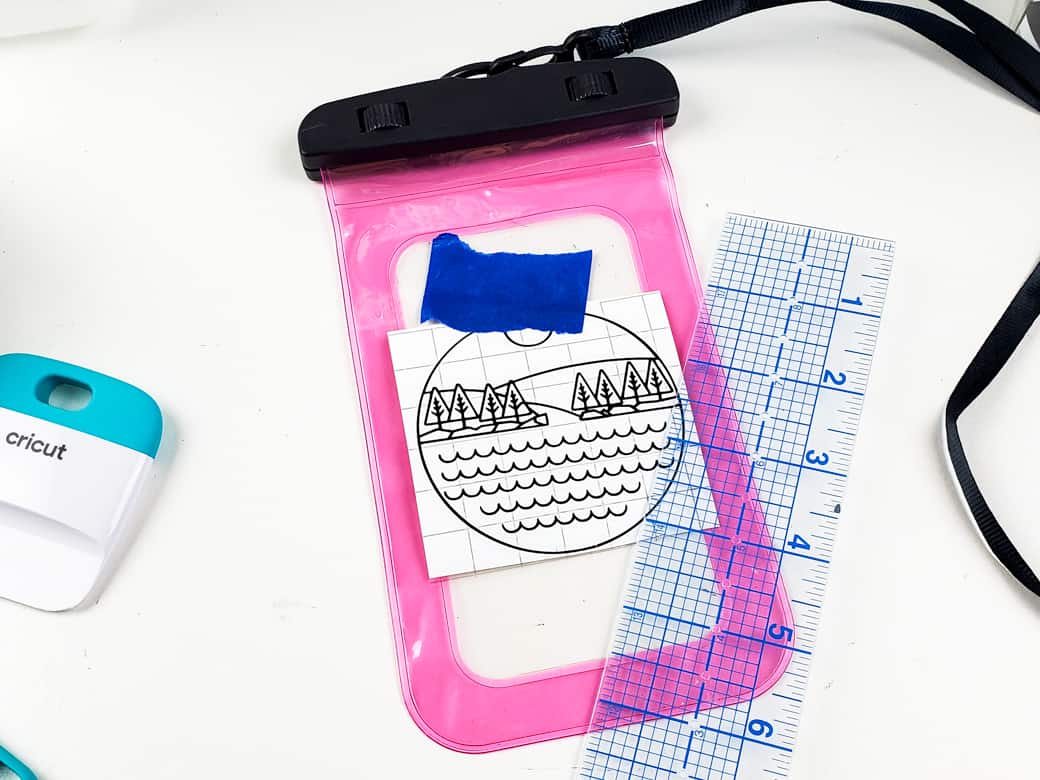
Step 3: Use painter’s tape to line up your design
Apply a piece of Cricut transfer tape over the design. The next step is the secret to perfectly placed vinyl every time.
Take a piece of painter’s tape and apply the design to the pouch until you’re satisfied that it’s even.
Working from the backside, lift the design up and remove the backing being careful that the transfer tape isn’t touching the item you’re applying to.
Then, slowly apply the design using the transfer tape working from the side closest to the tape.
Step 4: Remove transfer tape
Burnish the design using the scraper tool to remove any air bubbles. Then. peel the transfer tape away using a harsh angle. This will ensure that the design stays put.
I used the exact same process to cut and apply permanent vinyl to a clear plastic tumbler.
I actually made these glitter tumblers myself using chunky glitter and Cricut Party Foil, keep your eyes out for that tutorial coming soon!
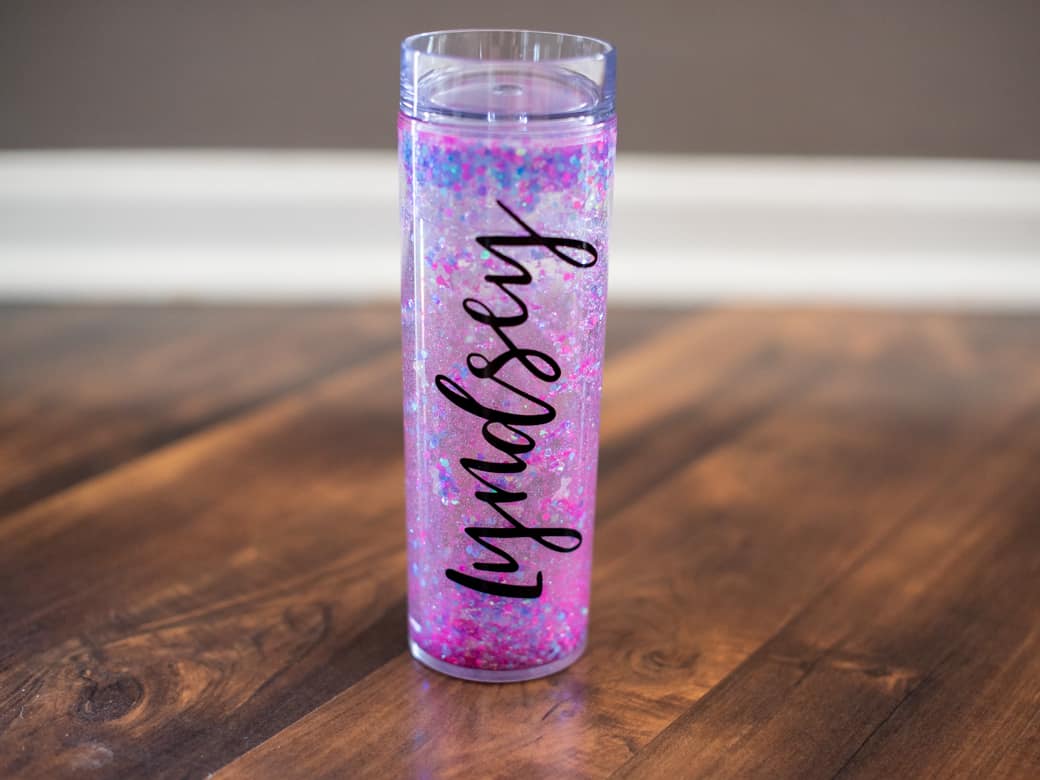
I asked each girl one thing they were obsessed with and made custom confetti to put in each tumbler. The Cricut Joy can cut precisely with even super small cuts!
Next, I repeated a similar process for cutting designs for the totes using iron-on vinyl.
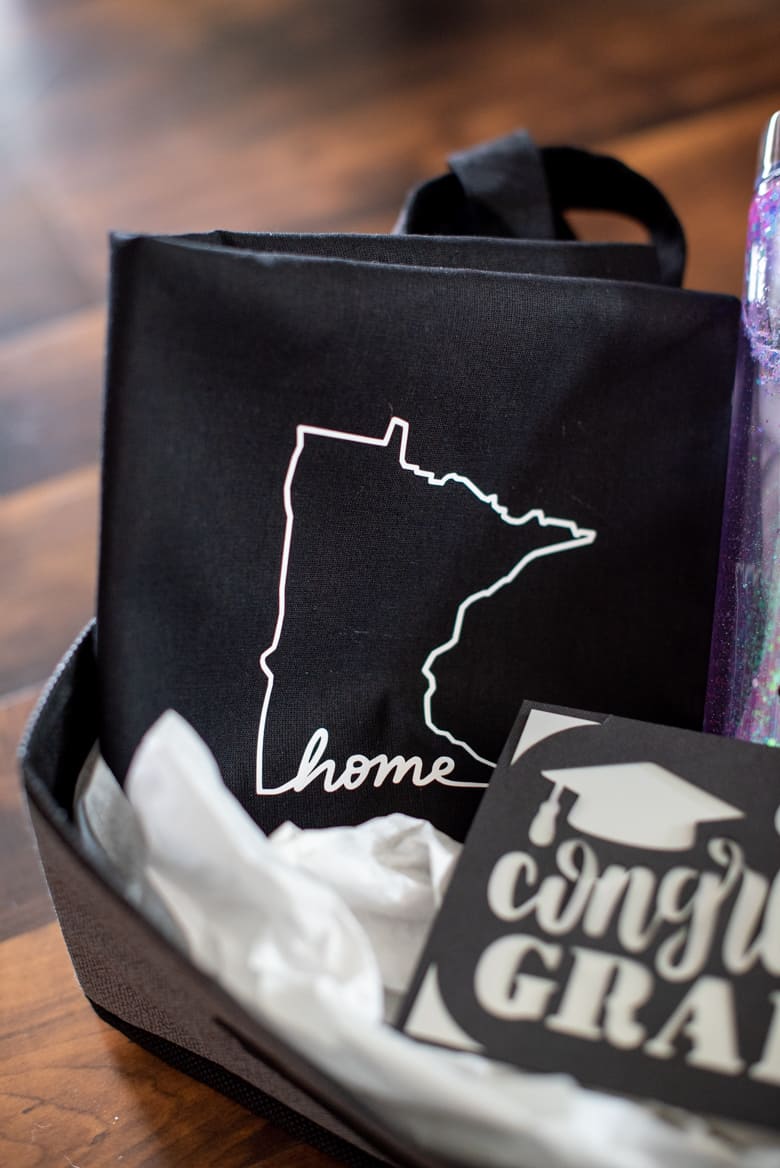
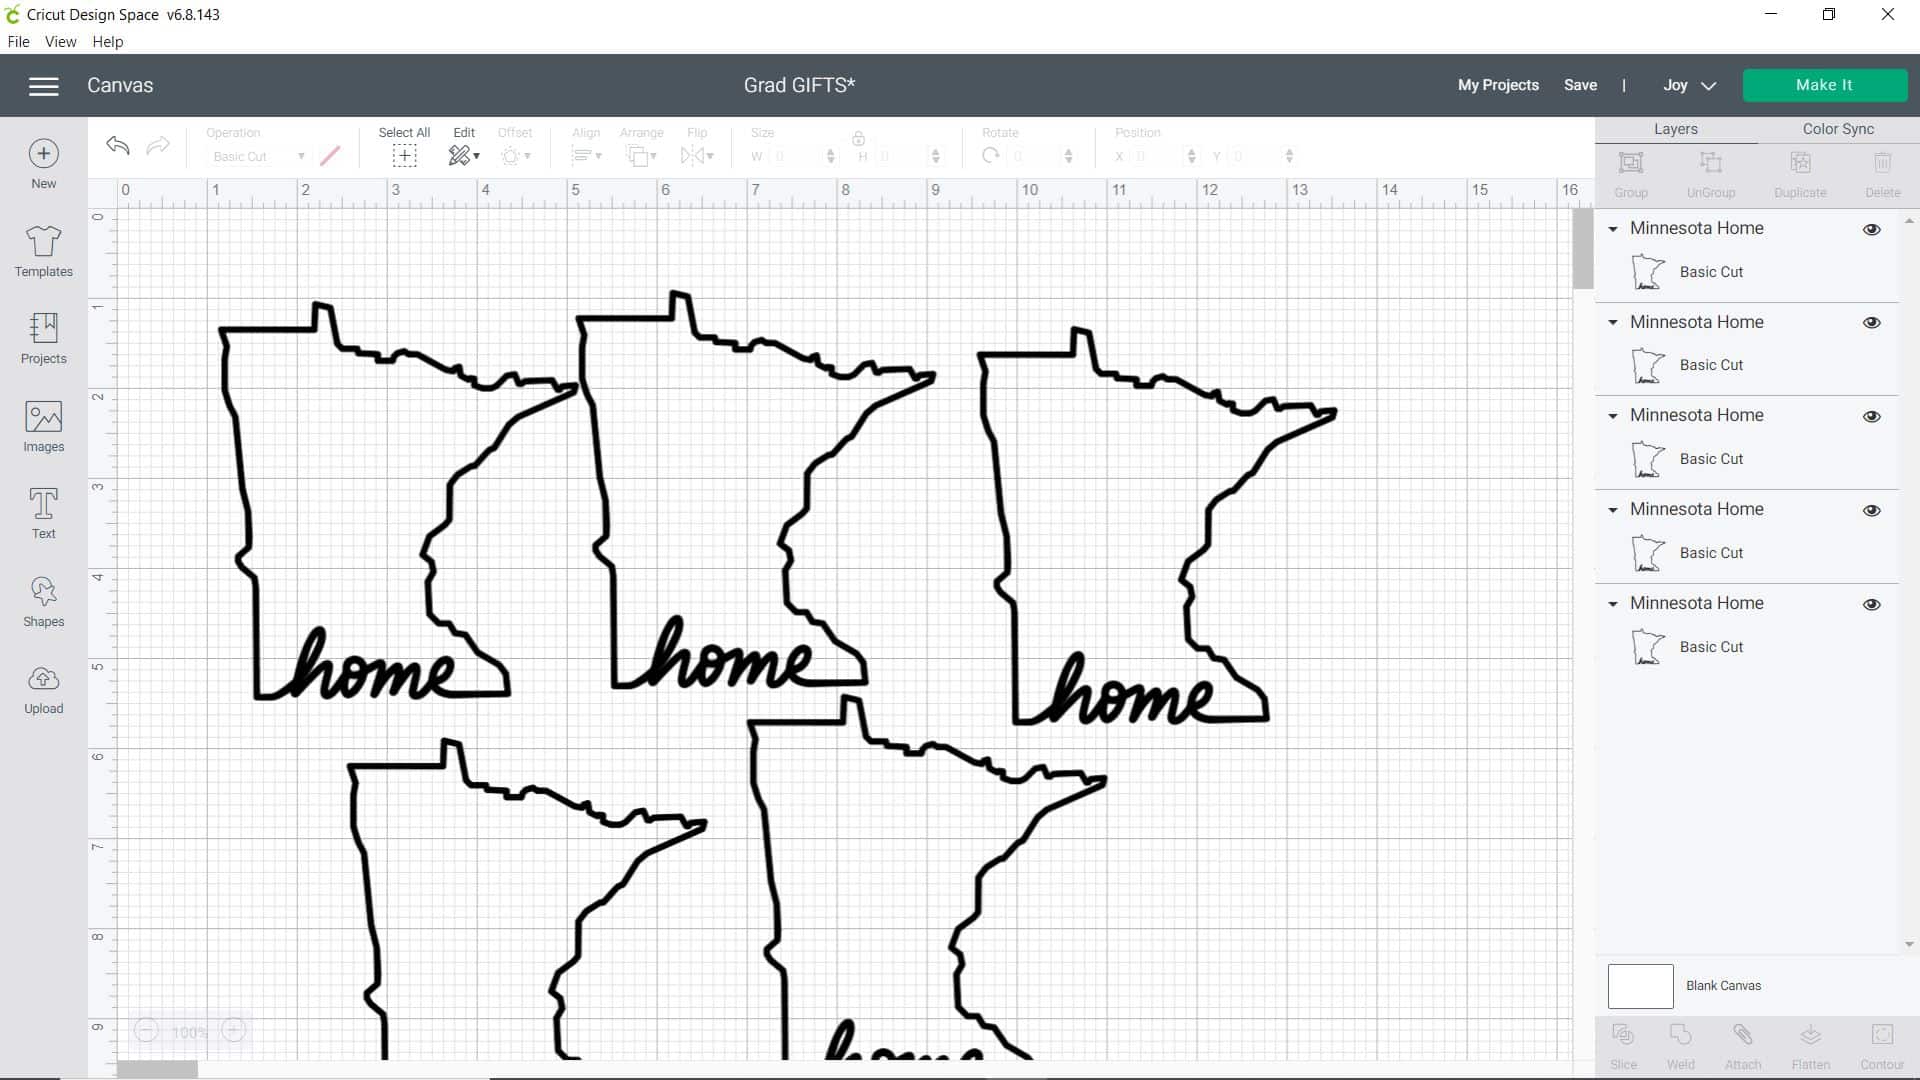
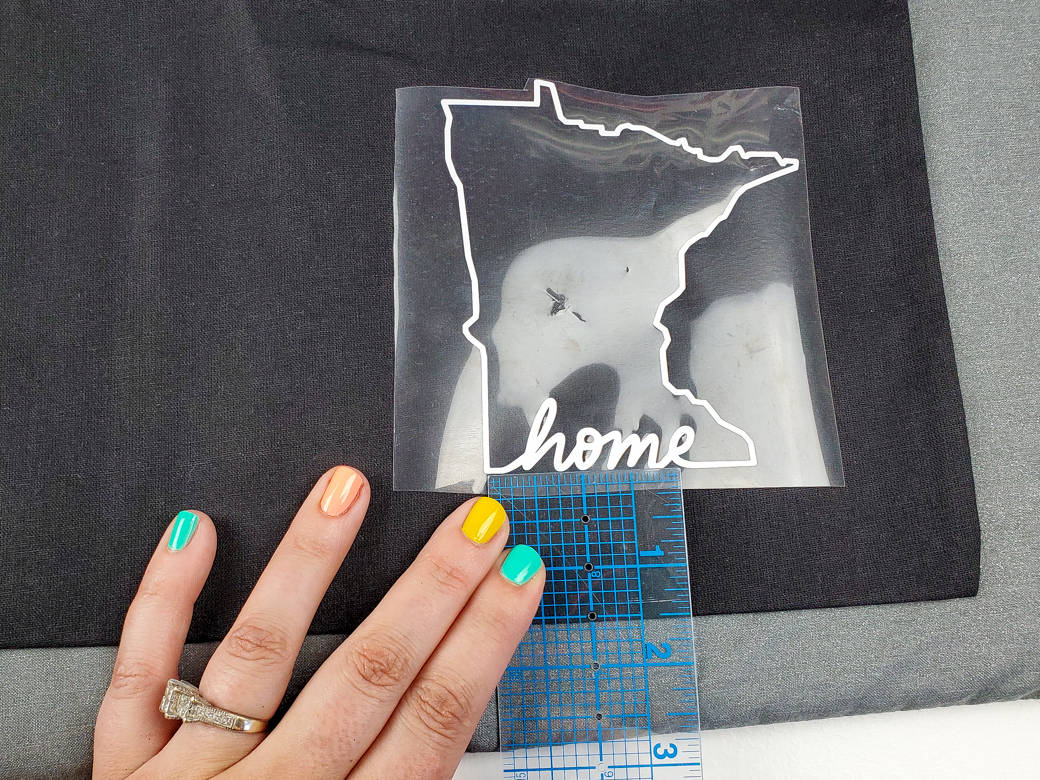
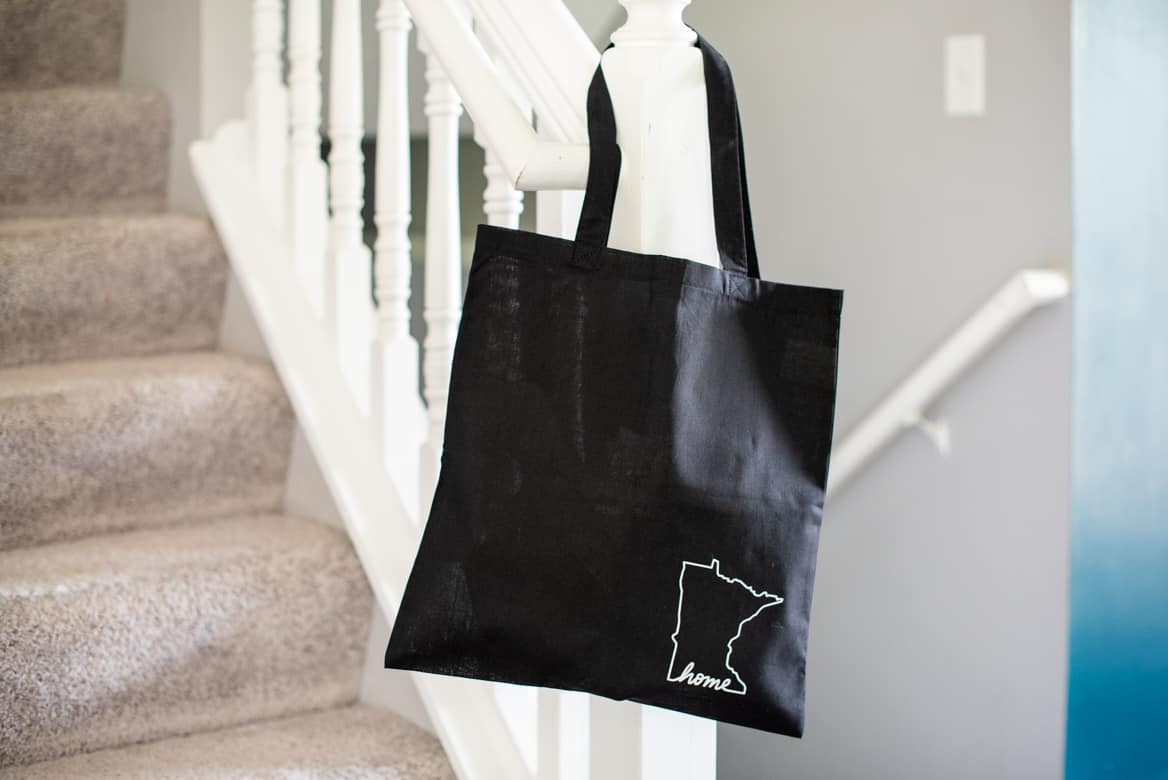
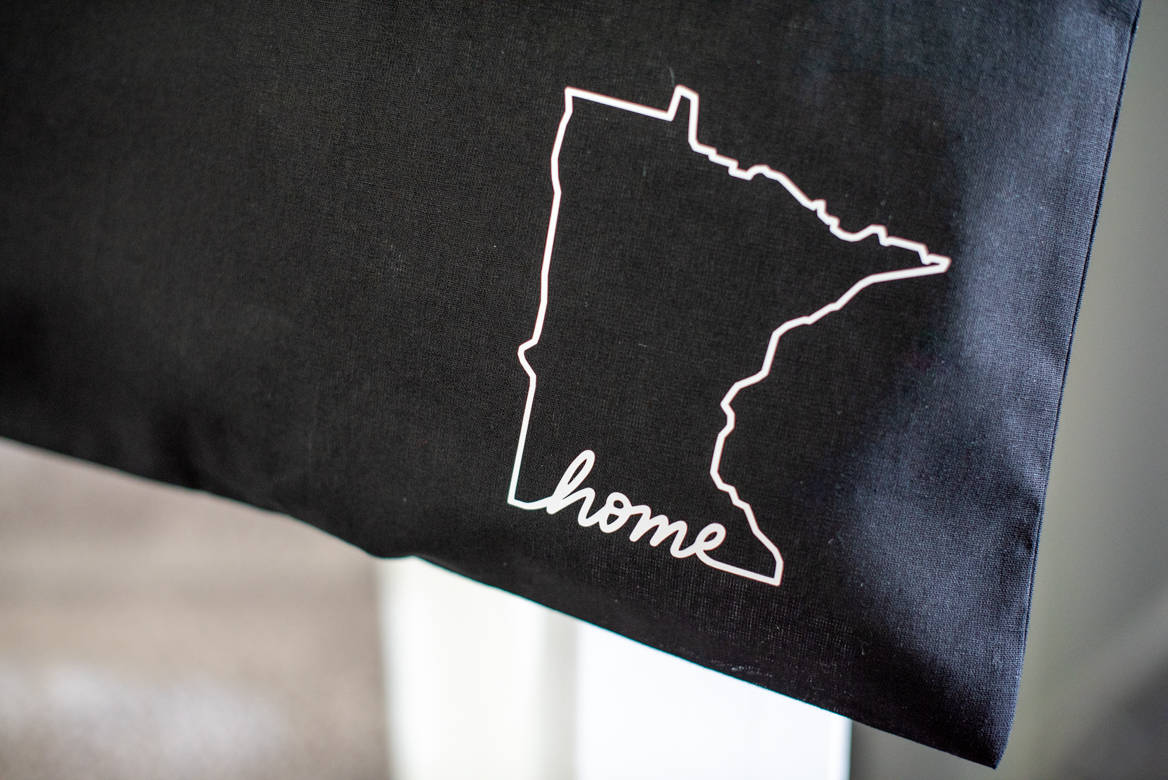
DIY Home State Tote with Iron-On Vinyl
Step 1: Create your design in Cricut Design Space
Again, I found the perfect design in Cricut Design Space with my Cricut Access membership. They have an option for every state, so you can make one for your grad, too!
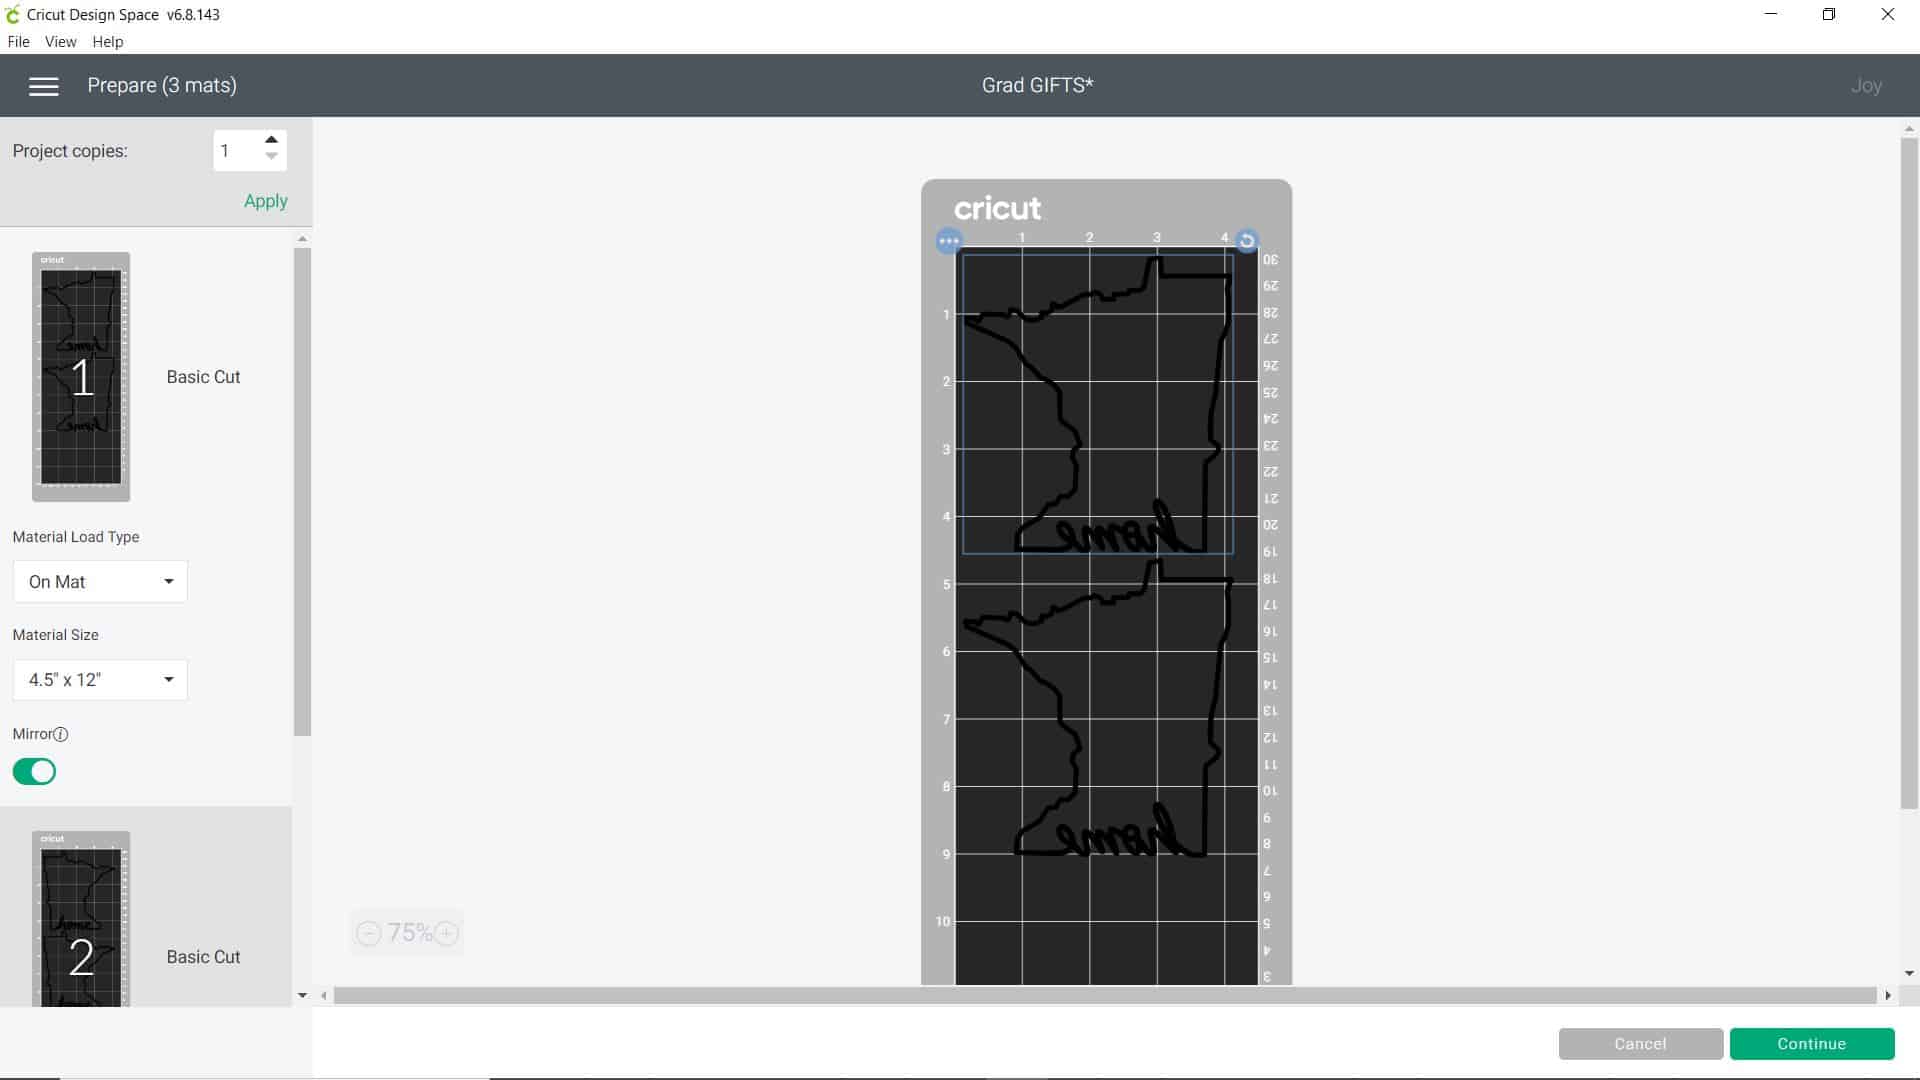
Step 2: Cut using your Cricut Joy
Apply your iron-on vinyl to your mat SHINY SIDE DOWN and insert it into the Cricut Joy.
Important tip:
If your project requires multiple cuts like mine did, make sure every one of your cuts is set to mirror!
Step 3: Weed and apply your design
Using your Cricut weeding tool, remove the excess vinyl from the design.
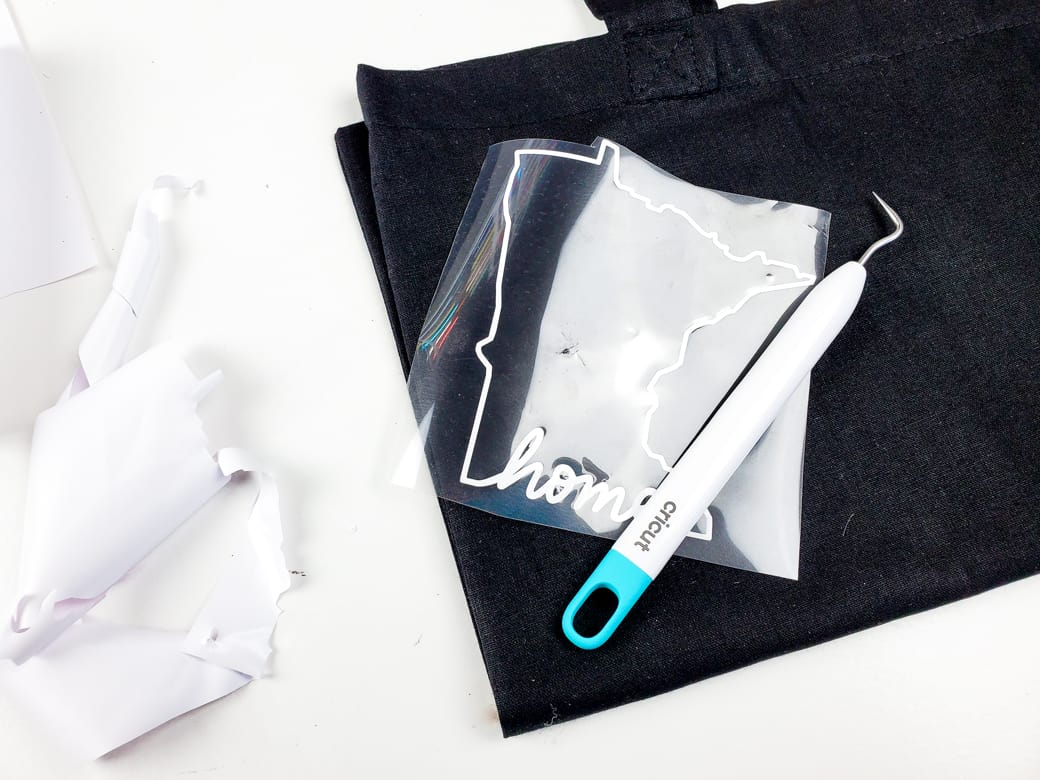
Use a ruler to line up your design on your tote bag where you would like. I decided to place these in the bottom right corner.
After referring to the handy Cricut Heat Guide, I learned that I needed to set my EasyPress 2 to 315 degrees and press for 30 seconds.
I wanted to make sure my tote was protected, so I placed a sheet of parchment paper over top. You don’t have to do this since the vinyl has a built in carrier sheet, but I like to for peace of mind.
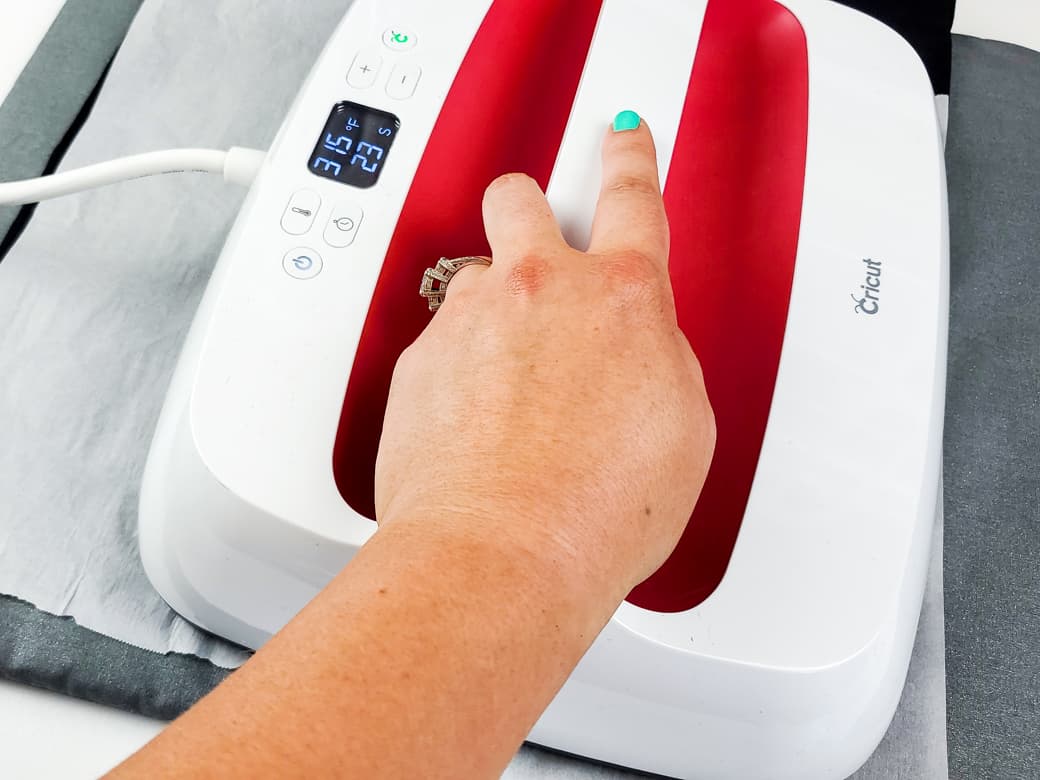
Once the vinyl cooled, I removed the carrier sheet, placed the parchment back over top, and pressed for another 15 seconds to make sure the design adhered well.
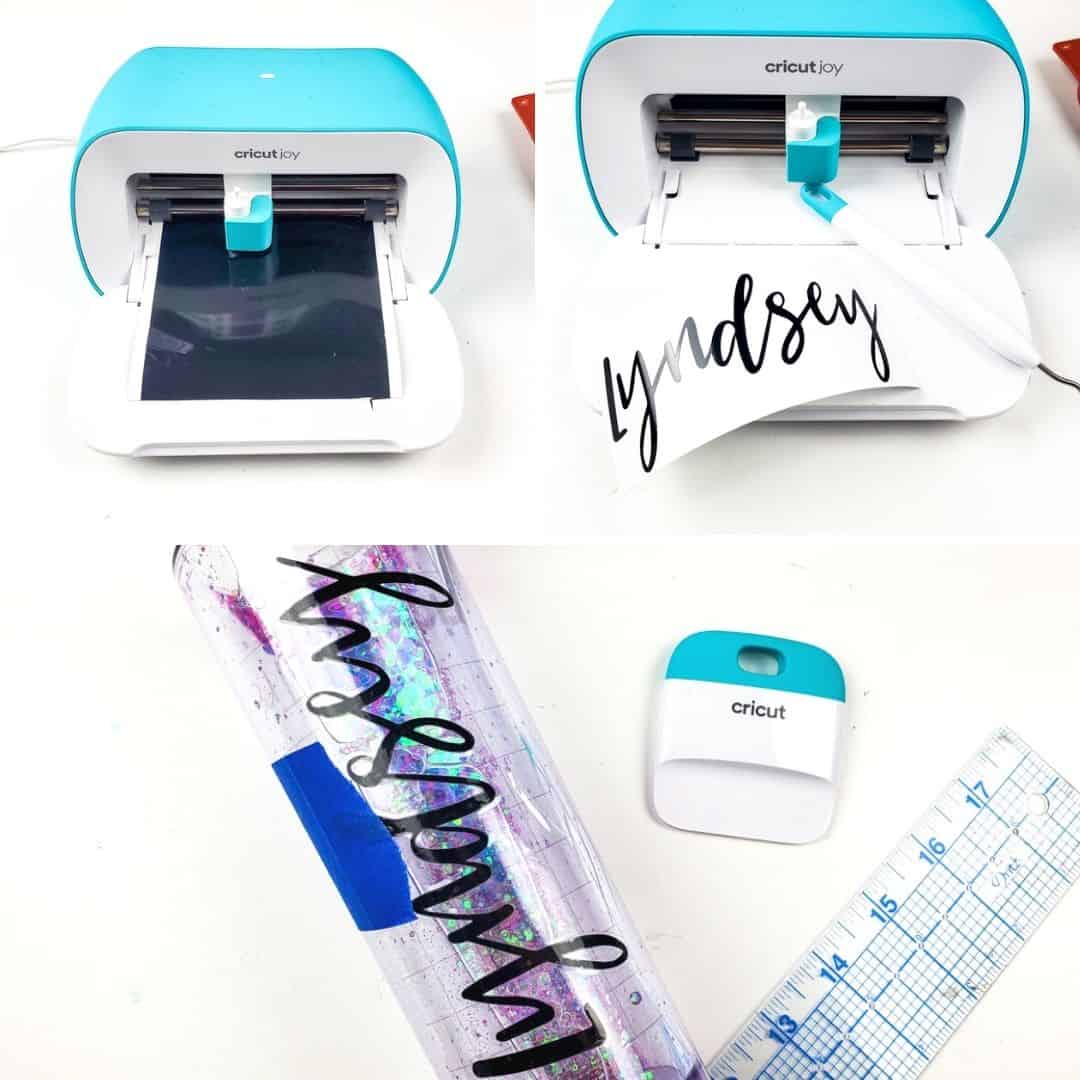
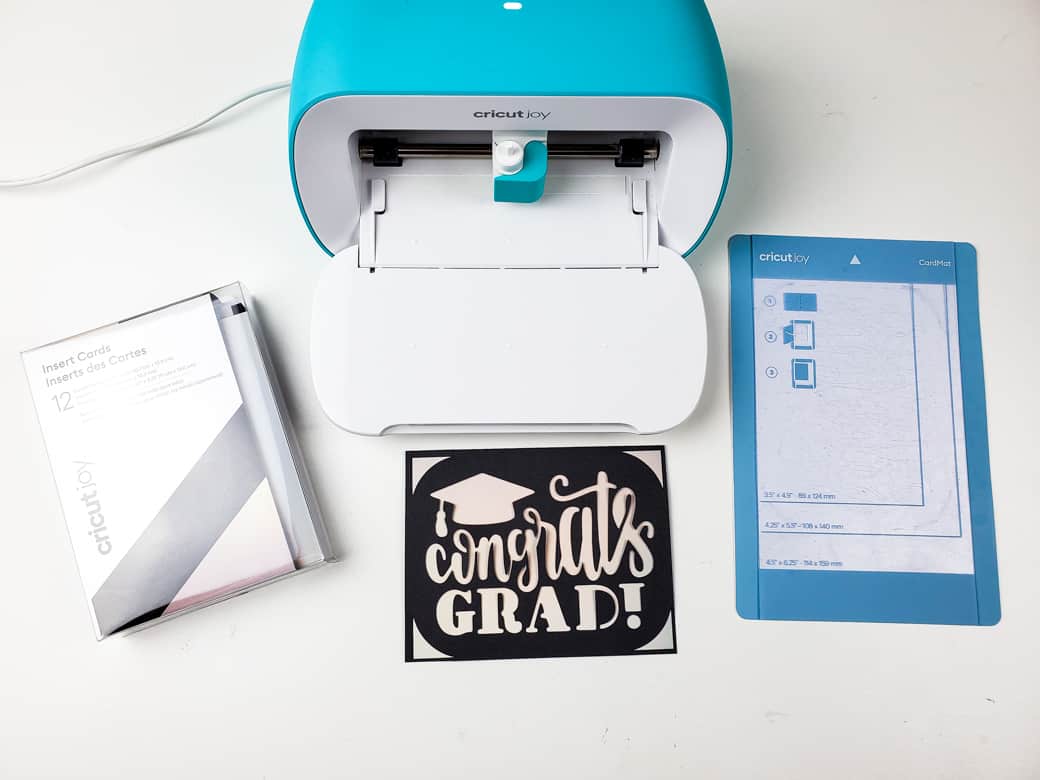
Finally, we’ll make some super easy grad cards for each basket using Cricut Joy Insert Cards and the special card mat made just for the Cricut Joy.
Quick and Easy DIY Graduation Cards with Cricut Joy
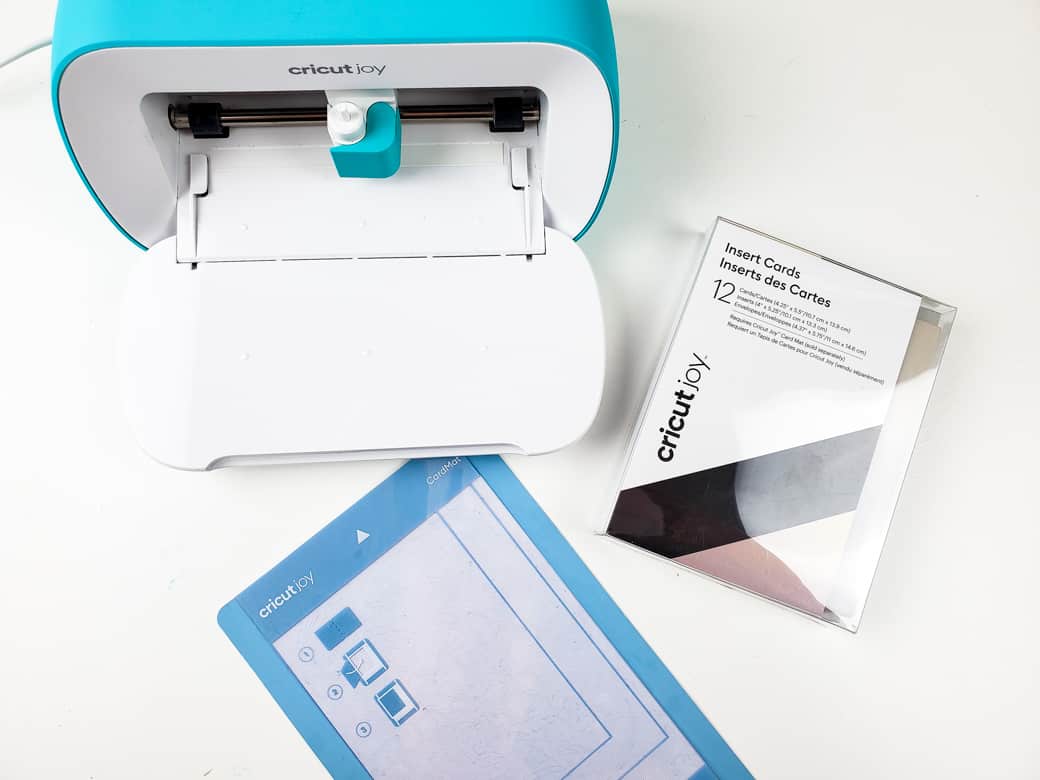
Step 1: Insert your card into the mat
Once you decide upon a design in Cricut Design Space, take a card and insert it into the mat so that the front of the card is on top of the sticky side and the inside slides underneath.
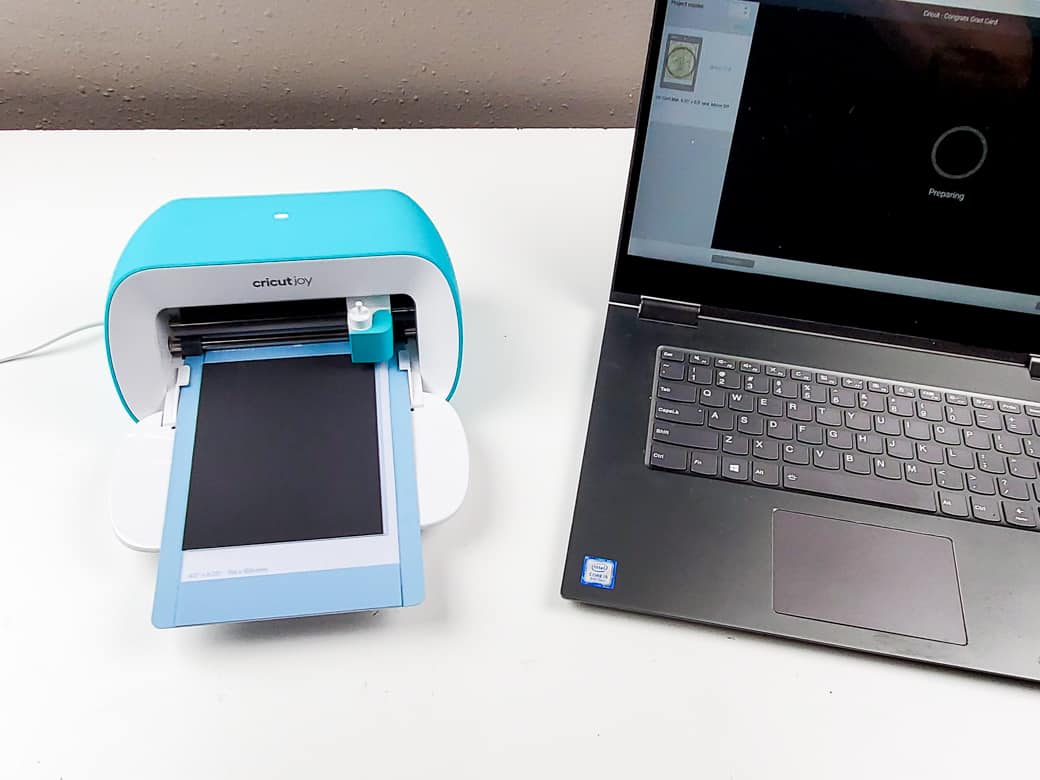
Step 2: Cut out your deisgn
Insert the mat into the Cricut Joy and cut your design. Use the spatula tool to gently separate the card from the mat and remove the excess cardstock left on the mat.
Pro tip:
You can sometimes reuse the designs cut from the card on another card!
Then, insert the accent paper into the inside of the card sliding the corners into the guides.

Once you’ve got your DIY grad gifts made you can package them in a dollar store basket, insert your super fancy card, and you’ve got yourself a senior gift basket every teenage girl would be excited to receive!